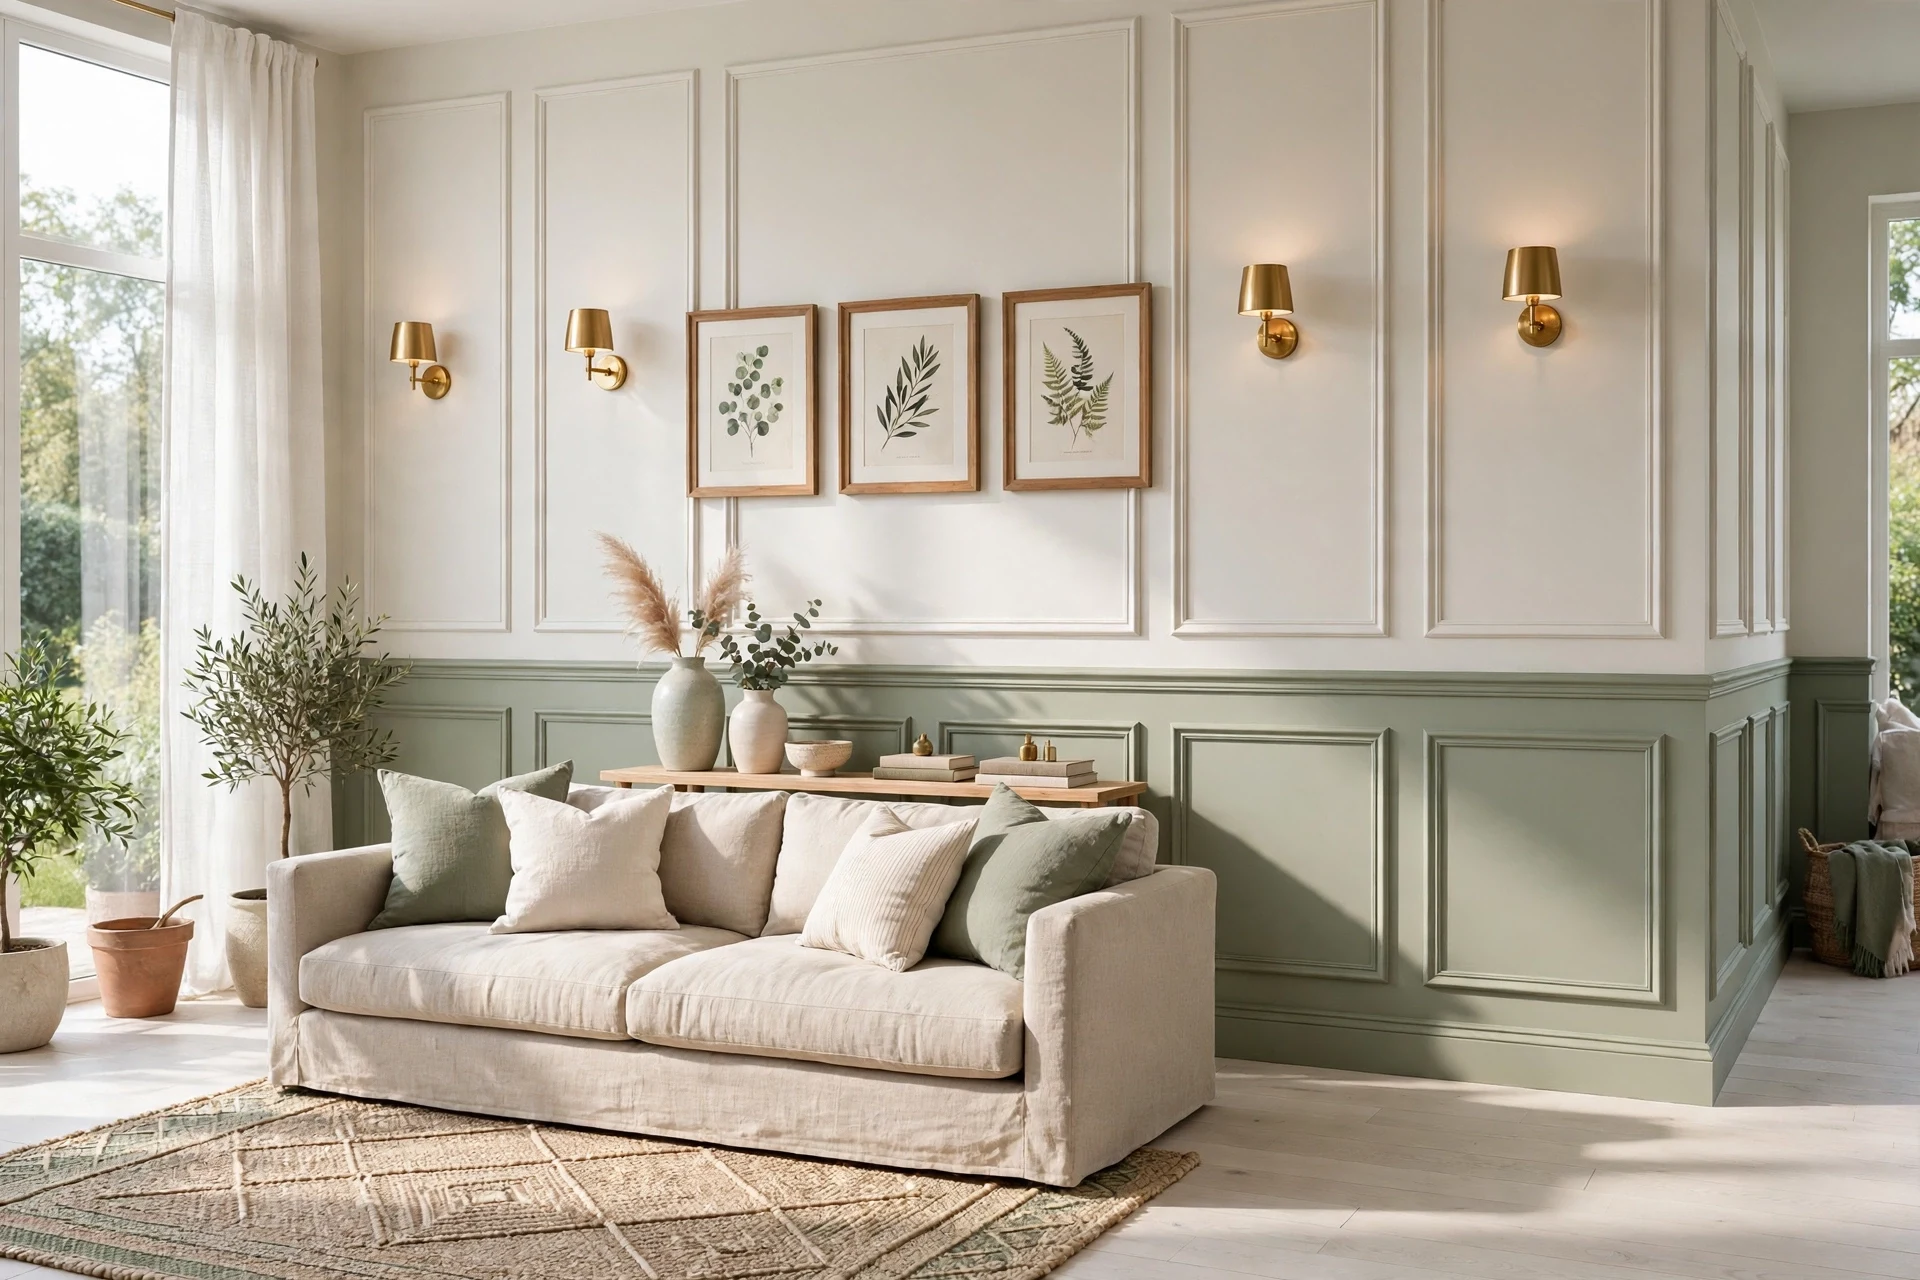
Picture frame wainscoting is flat wall molding arranged in rectangular frames, usually over painted drywall or thin MDF, that gives a plain wainscoting wall the shadow and proportion of traditional paneling. These picture frame wainscoting ideas deliver 30 room-by-room ways to use those frames, from sage entryways to black laundry rooms. Run your eye along a crisp mitered corner and the wall suddenly has rhythm. Low light grazes the raised trim, soft shadows pool inside each rectangle, and flat paint starts to feel tailored and calm. Here are 30 ideas worth saving — and stealing.
Why Picture Frame Wainscoting Works So Well
Picture frame wainscoting grew from Georgian and French paneled rooms, where raised timber panels covered full walls. The modern version keeps the geometry but skips the heavy inset panel, using applied molding on flat walls instead. That distinction matters: it delivers classical proportion and a clear datum line without rebuilding the wall itself.
Core materials are poplar, finger-jointed pine, and pre-primed MDF molding, plus a chair rail and baseboard in matching profiles. Favorite finishes include Benjamin Moore White Dove, Sherwin-Williams Evergreen Fog, Farrow & Ball Strong White, and deep Hague Blue. Accents are usually unlacquered brass, matte black iron, white oak, and undyed Belgian linen.
It is trending now because open-plan homes and plain new-build rooms need character that paint alone cannot supply, and this is a weekend-scale project. One framed wainscoting wall photographs with real depth, which is why these wainscoting ideas keep circulating on Pinterest.
Small spaces suit it especially well because the frames add architecture without stealing a single inch of floor area. Keep rectangles tall rather than wide, paint frames and wall one color, and prioritize the wall you see first on entering.
| Element | Classical Proportion | Painted Simplicity |
|---|---|---|
| Philosophy | Ordered, tailored geometry | Character without rebuilding walls |
| Materials | Poplar, pine, MDF molding | White oak, brass, linen |
| Color palette | White Dove, sage, navy | Greige, charcoal, terracotta |
30 Picture Frame Wainscoting Ideas
1. Sage-Green Picture Frame Wainscoting Ideas for an Entryway
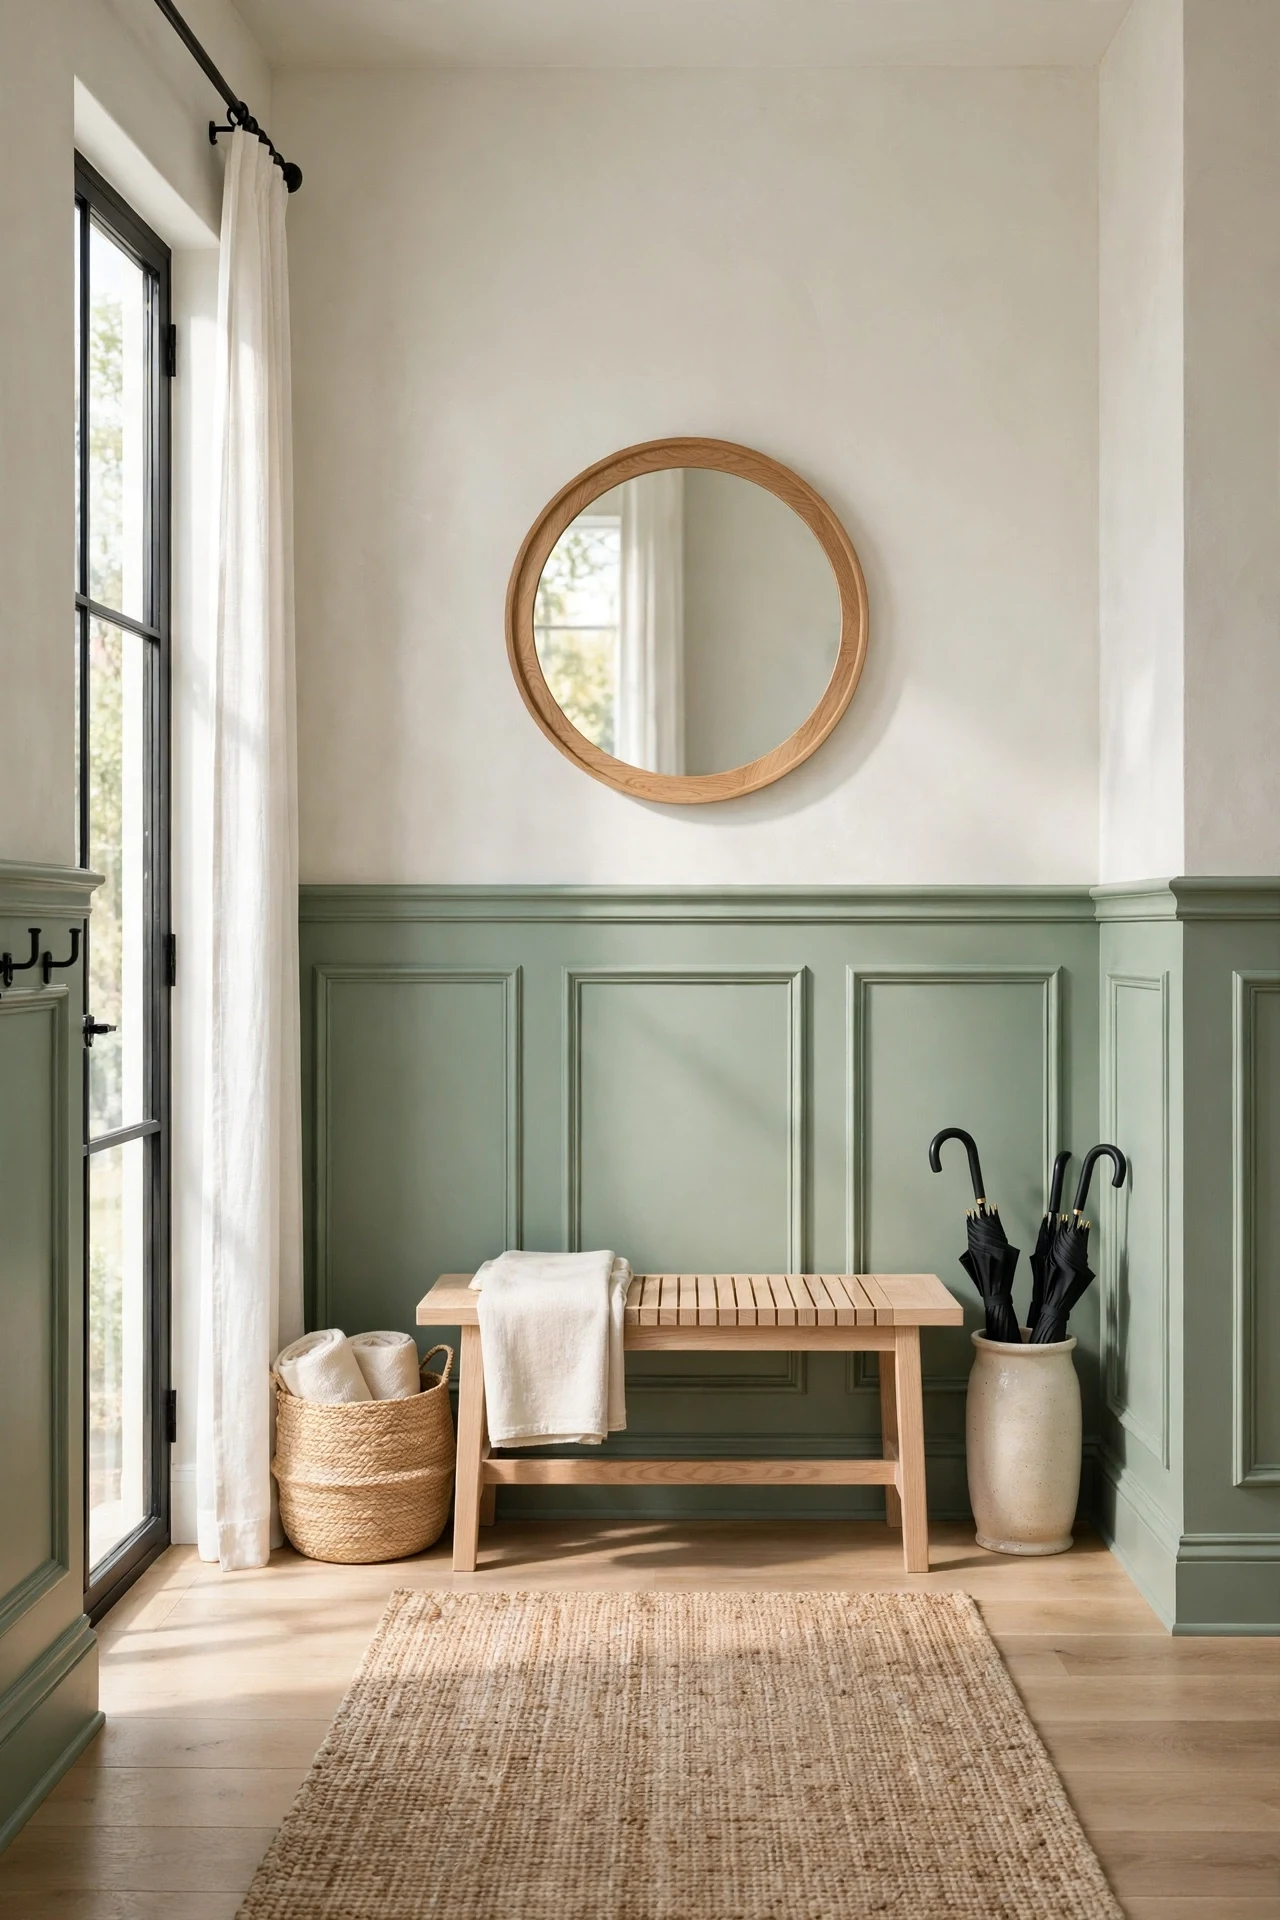
The entry feels sun-warmed, orderly, and quietly tailored from the doorway.
Tall rectangles create vertical rhythm, so a narrow hall reads higher than it measures. Sage over smooth drywall gives tonal contrast without a hard color break, and the white oak bench repeats the warm undertone in the paint. Proportion does the work here, not decoration.
Build the frames from pre-primed poplar molding, spacing them four inches from corners and rail for balanced margins. Paint everything, frames included, in Sherwin-Williams Evergreen Fog satin so shadows, not seams, define each rectangle.
💡 Quick Win: Tape the frame layout in painter's tape first tonight.
2. White Oak Picture Frame Panels in a Dining Room
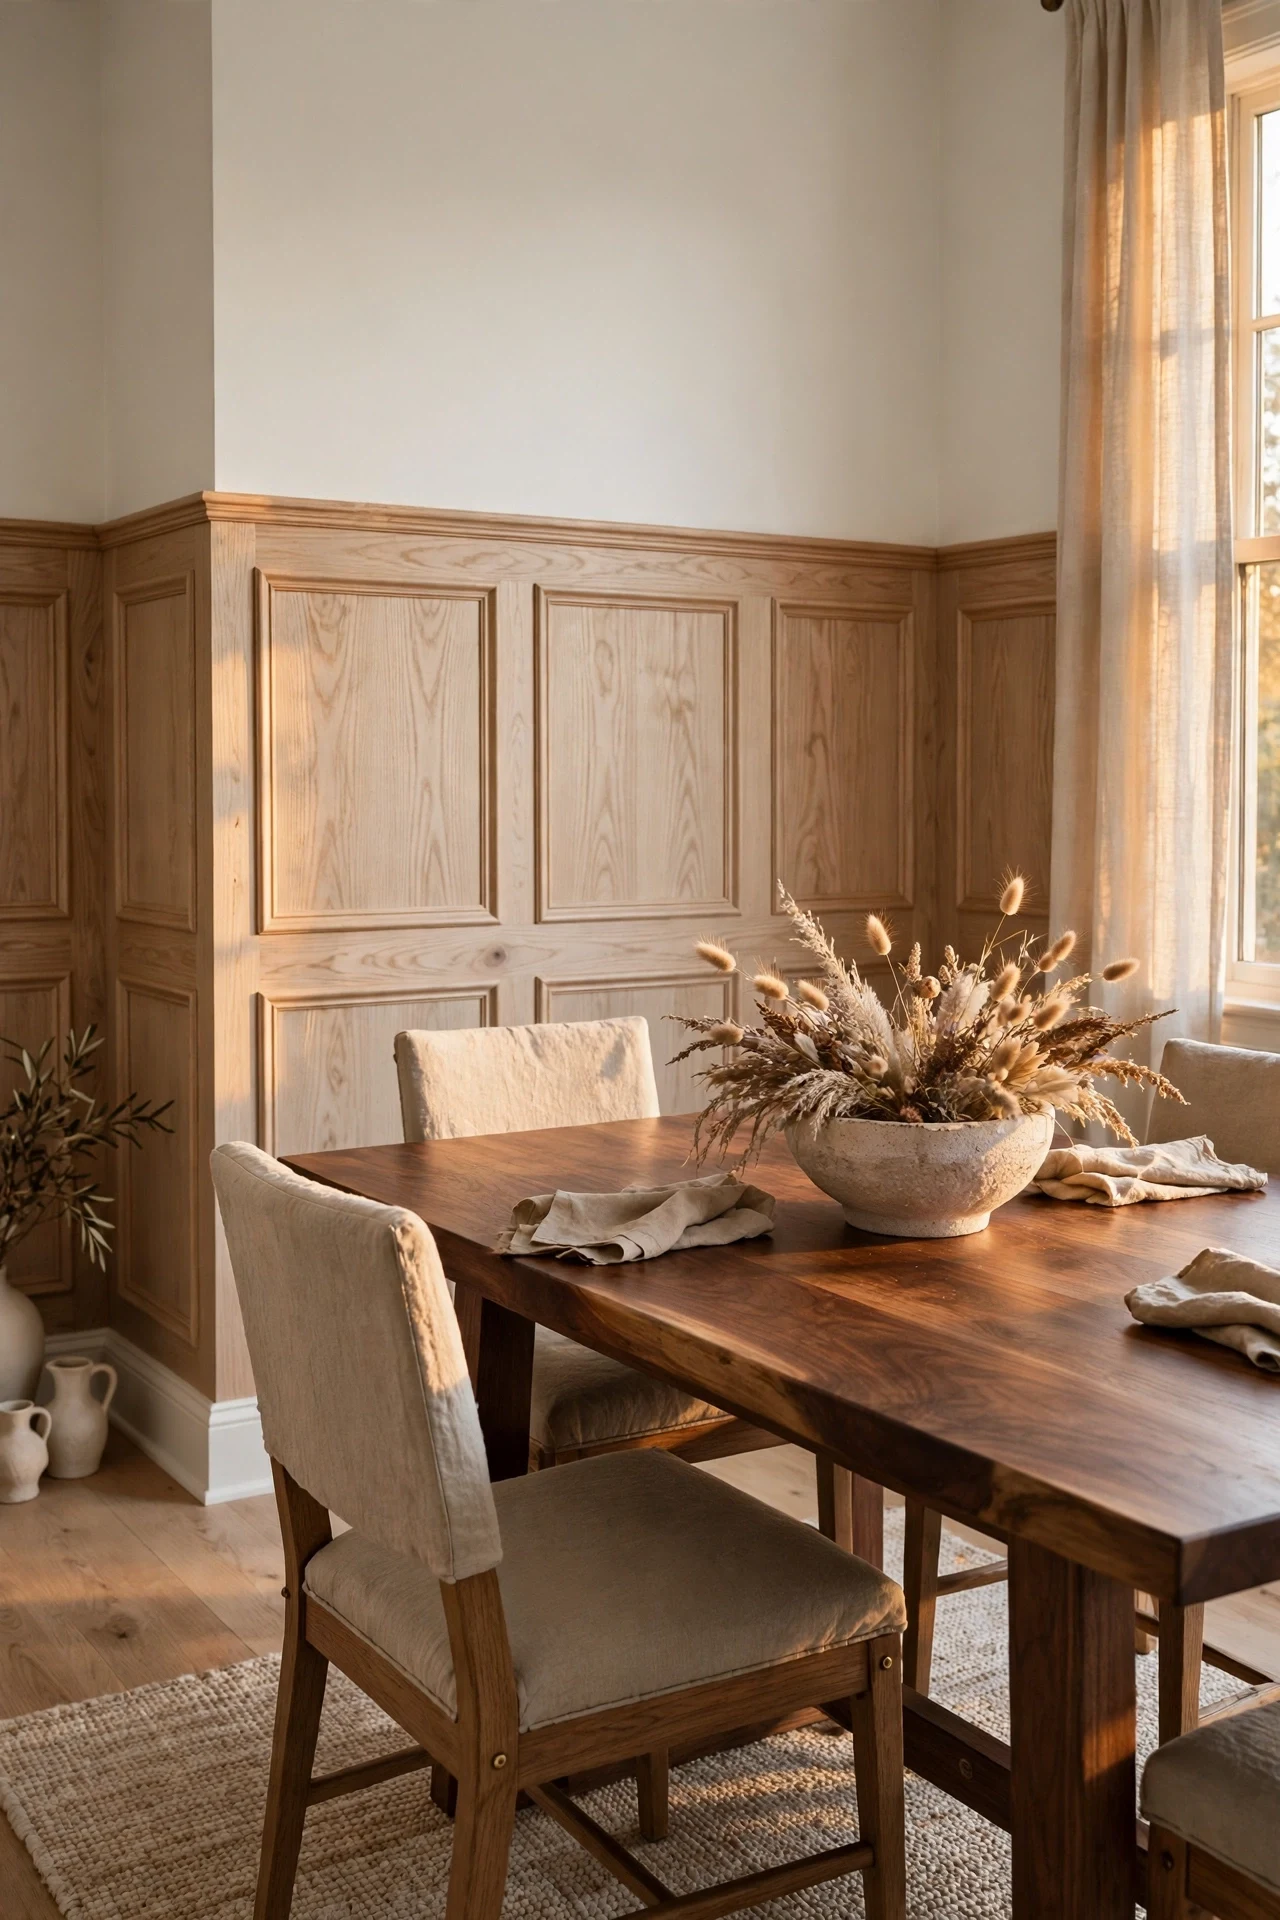
The dining room feels grounded, resinous, and warm against the skin.
Real wood changes the principle from shadow play to material contrast, because grain moves inside each otherwise flat rectangle. White oak frames against warm white plaster keep the wall light while still reading crafted. The repeated rectangles also echo the table's long horizontal line.
Mill the frames from plain-sawn white oak picture molding and finish them with Rubio Monocoat Oil Plus in Pure before mounting. Pre-finishing keeps oil off the painted wall and makes every miter read clean and deliberate.
3. Sconce-Lit Picture Frame Panels in a Hallway
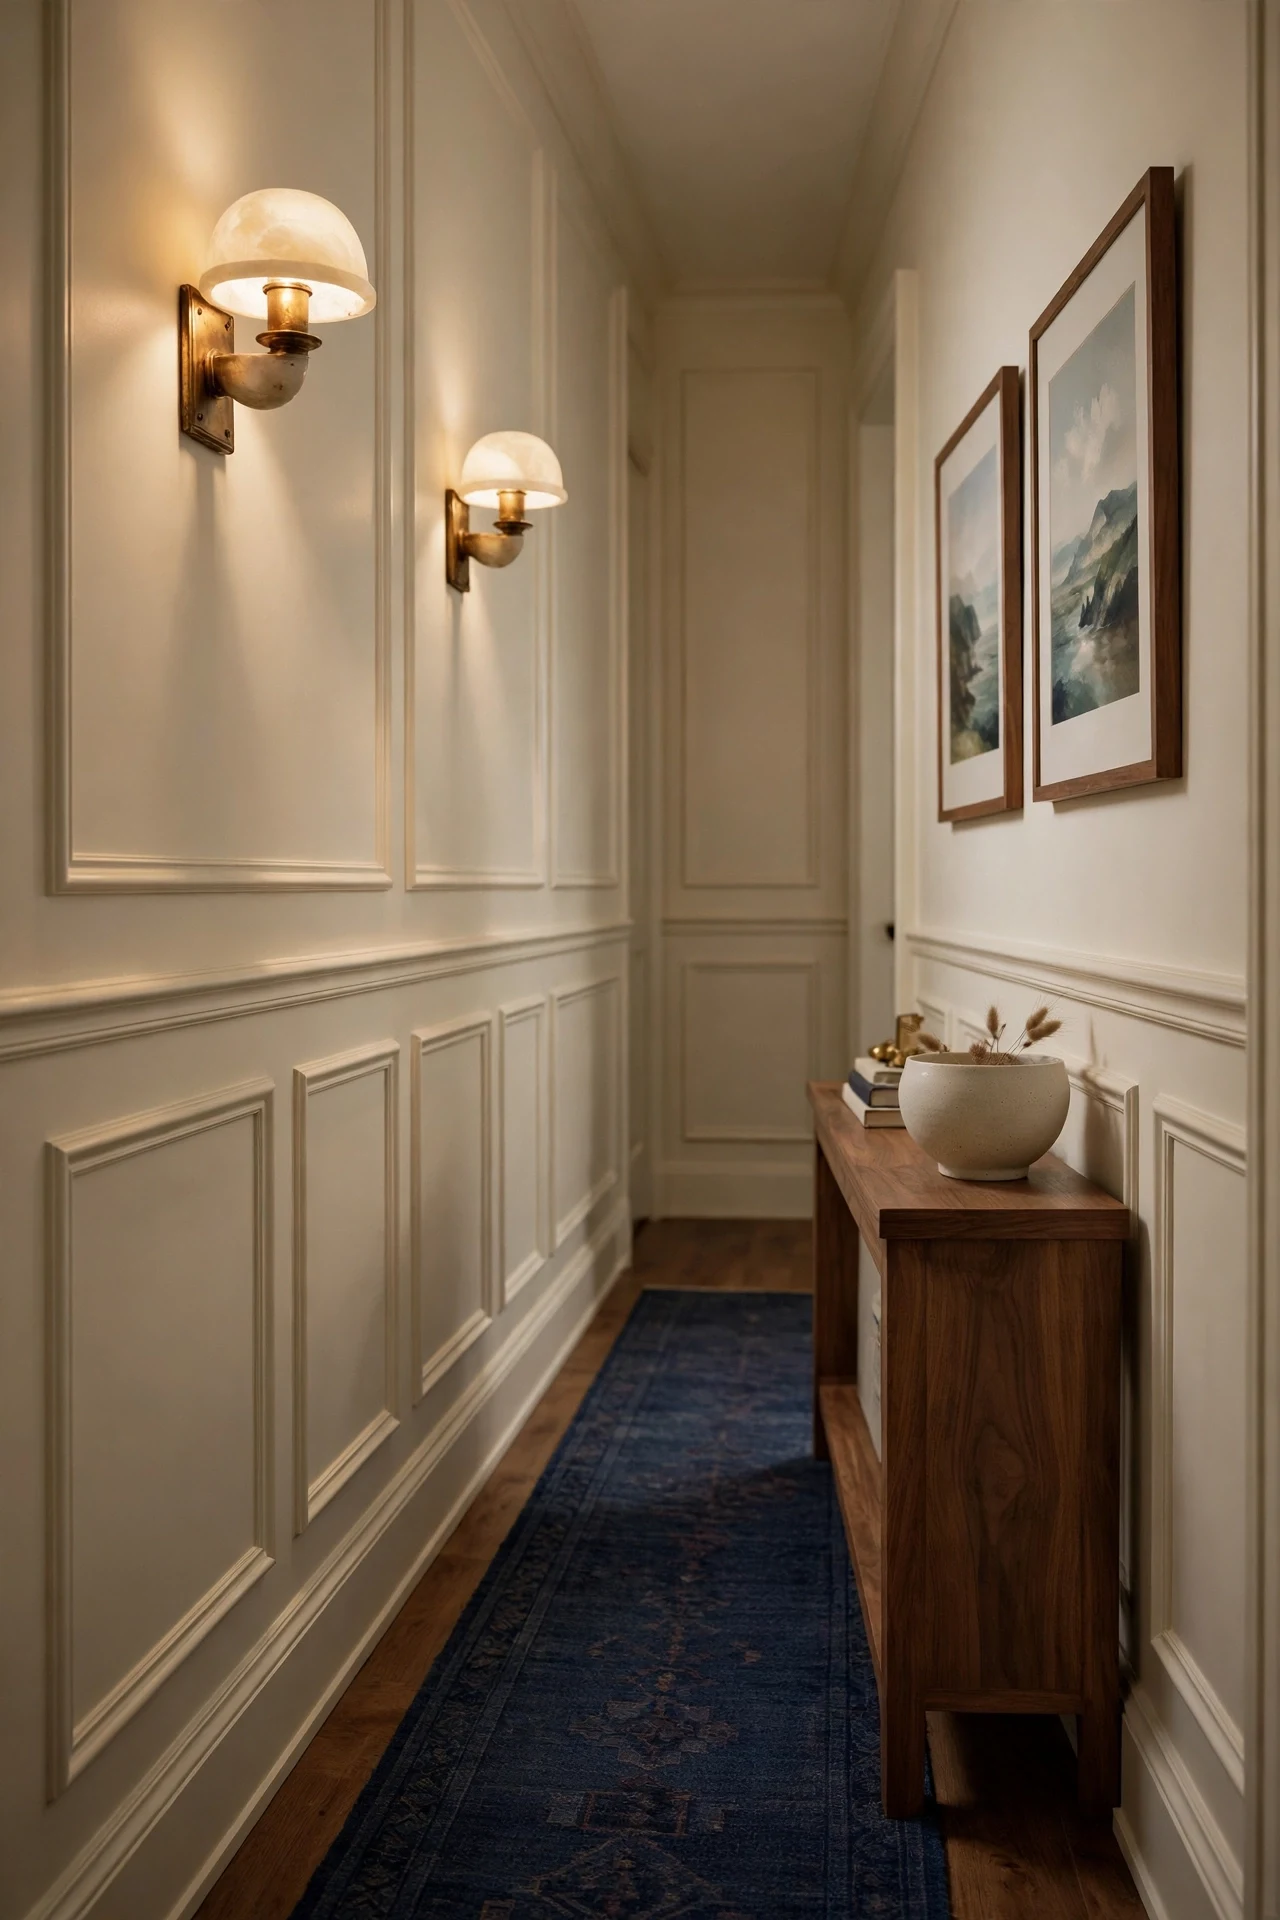
The hallway feels hushed, lamplit, and far longer than it is.
Raking light is the design principle here: sconces set above the rail graze downward, so each frame throws a thin shadow and gains depth. Repeating the light at panel intervals turns circulation space into a measured rhythm. Cream paint keeps that shadow soft rather than stark.
Mount Schoolhouse Alabaster sconces sixty-six inches high, centered over alternating frames, and wire them to a dimmer. Use 2700K bulbs so the cream molding warms instead of turning yellow under the glow.
💡 Quick Win: Swap hallway bulbs to 2700K tonight.
4. Picture Frame Panels Behind a Low Linen Sofa
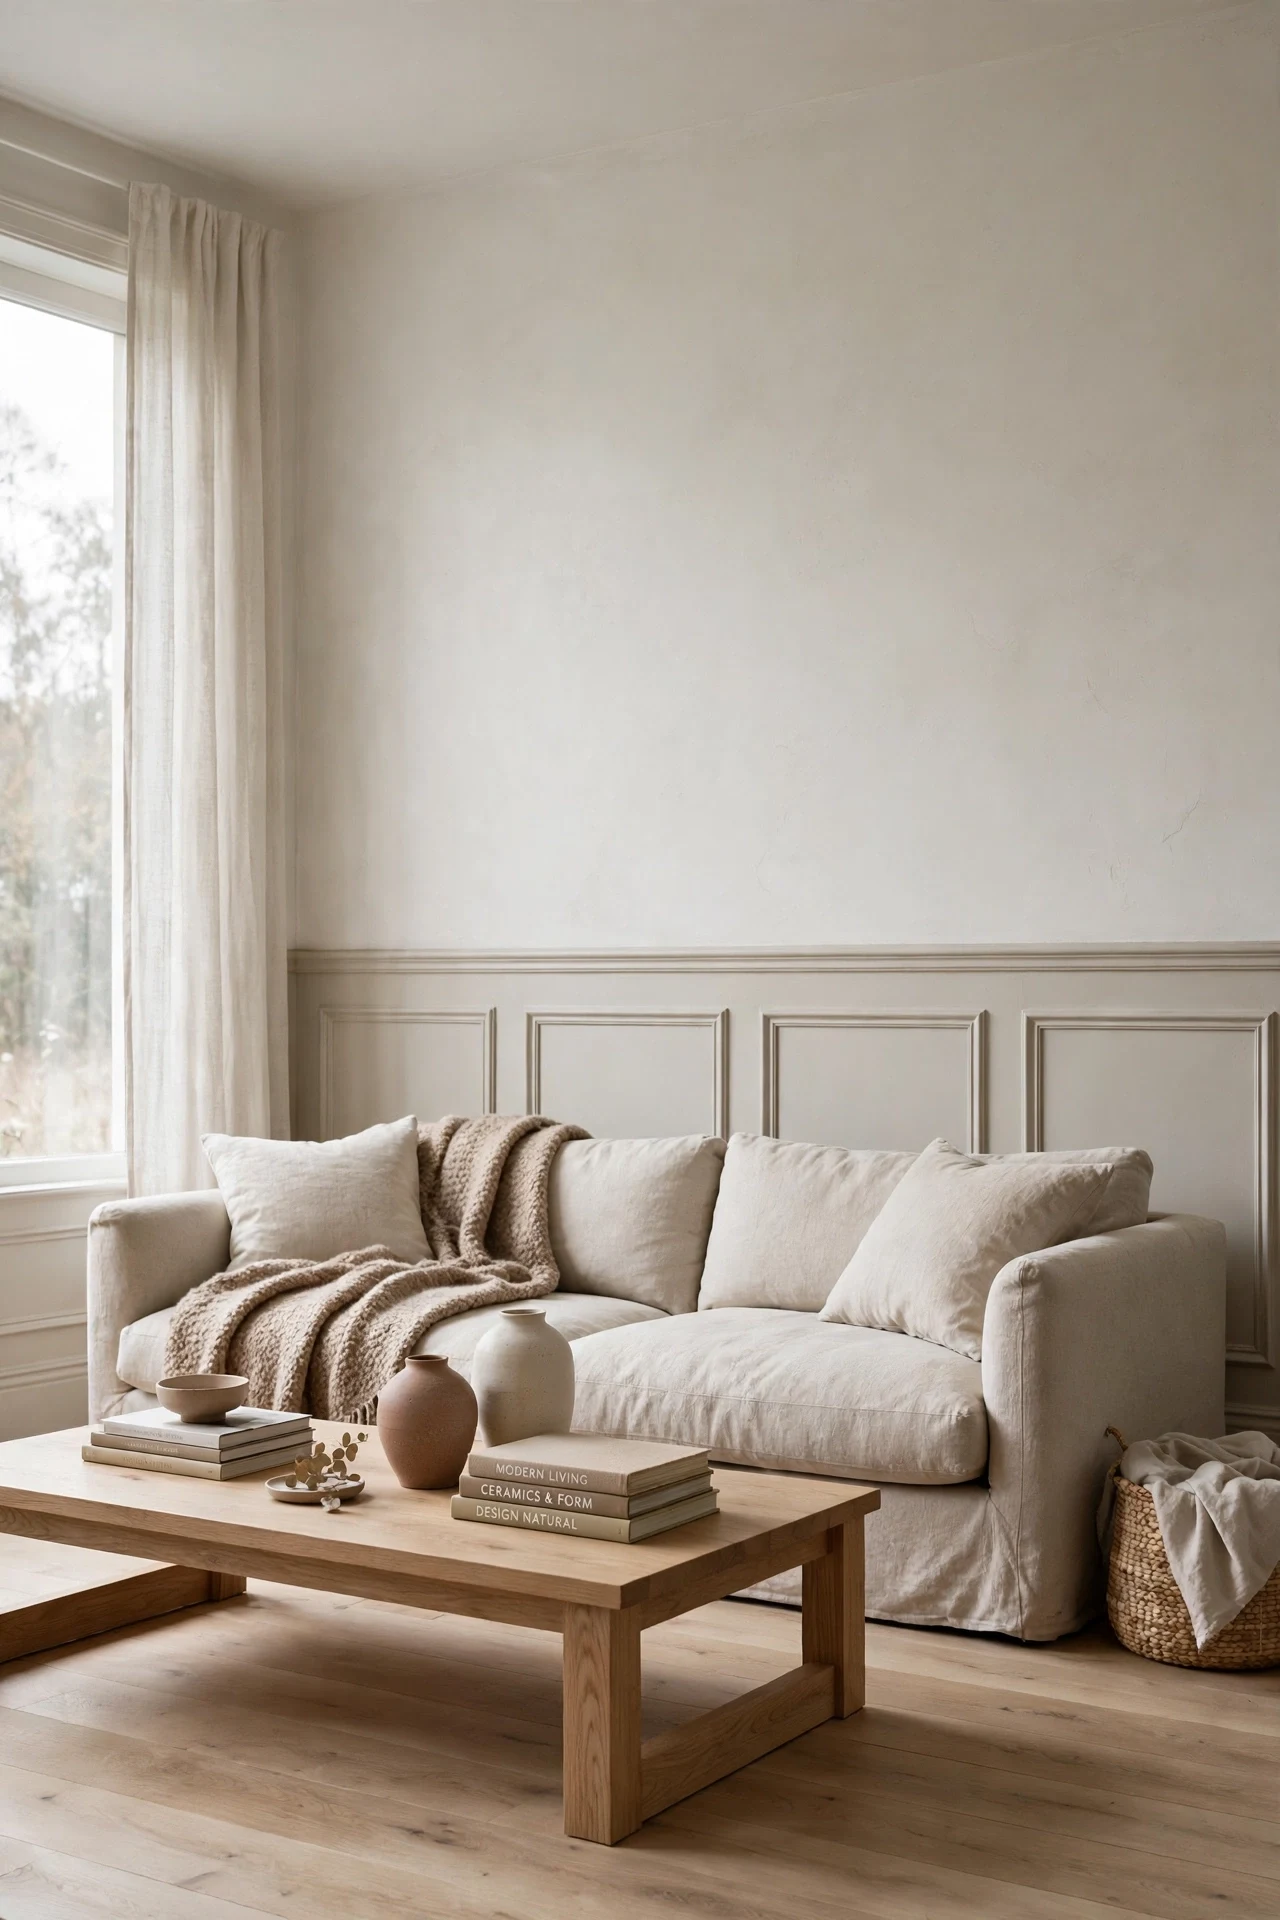
The room feels still, layered, and settled around the sofa.
Scale is the principle: frames sized to the sofa's width anchor the furniture instead of floating it against blank drywall. Negative space inside each rectangle keeps the low, deep seating from feeling heavy. Greige molding and linen share an undertone, so the wall and furniture read as one composition.
Size the center frame exactly to the sofa back, then mirror narrower frames on each side using a cardboard template. Keep the rail four inches above the sofa back so cushions never hide the geometry.
5. Botanical Prints Inside Picture Frame Panels in a Bedroom
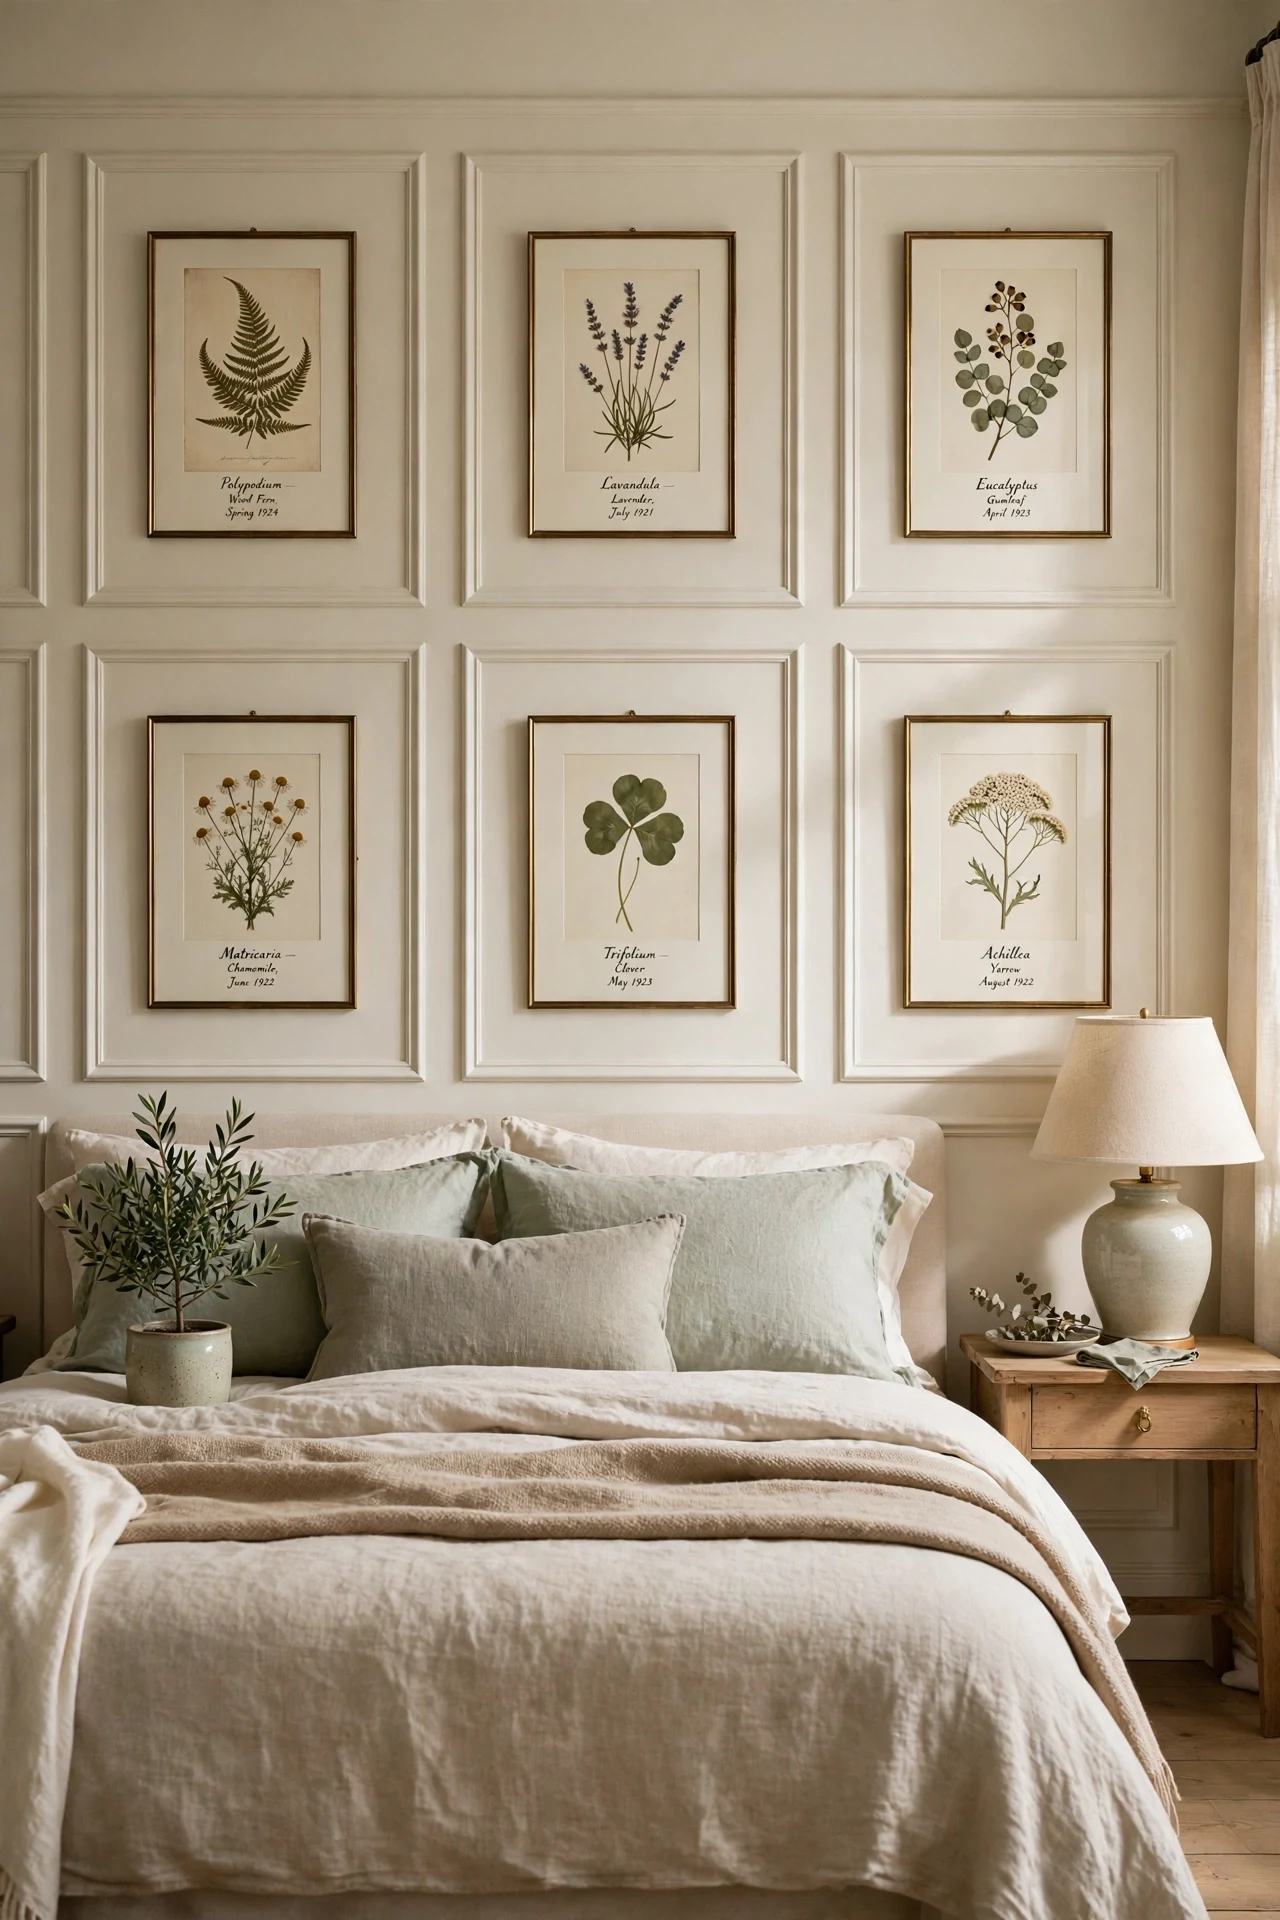
The bedroom feels hushed, leafy, and calm in morning light.
Framing art inside molding creates a frame-within-a-frame, which doubles the sense of intention without adding furniture. Botanical prints supply the only pattern, so their green tones carry the whole wall. Equal margins around each print keep the repetition restful rather than busy.
Hang each print on a brass picture hook centered inside its panel, measuring six inches of clear space on every side. Print vintage herbarium plates at a local copy shop on matte stock to avoid glass glare.
💡 Quick Win: Print three botanical plates this weekend.
6. Picture Frame Wainscoting That Zones an Open-Plan Living Room
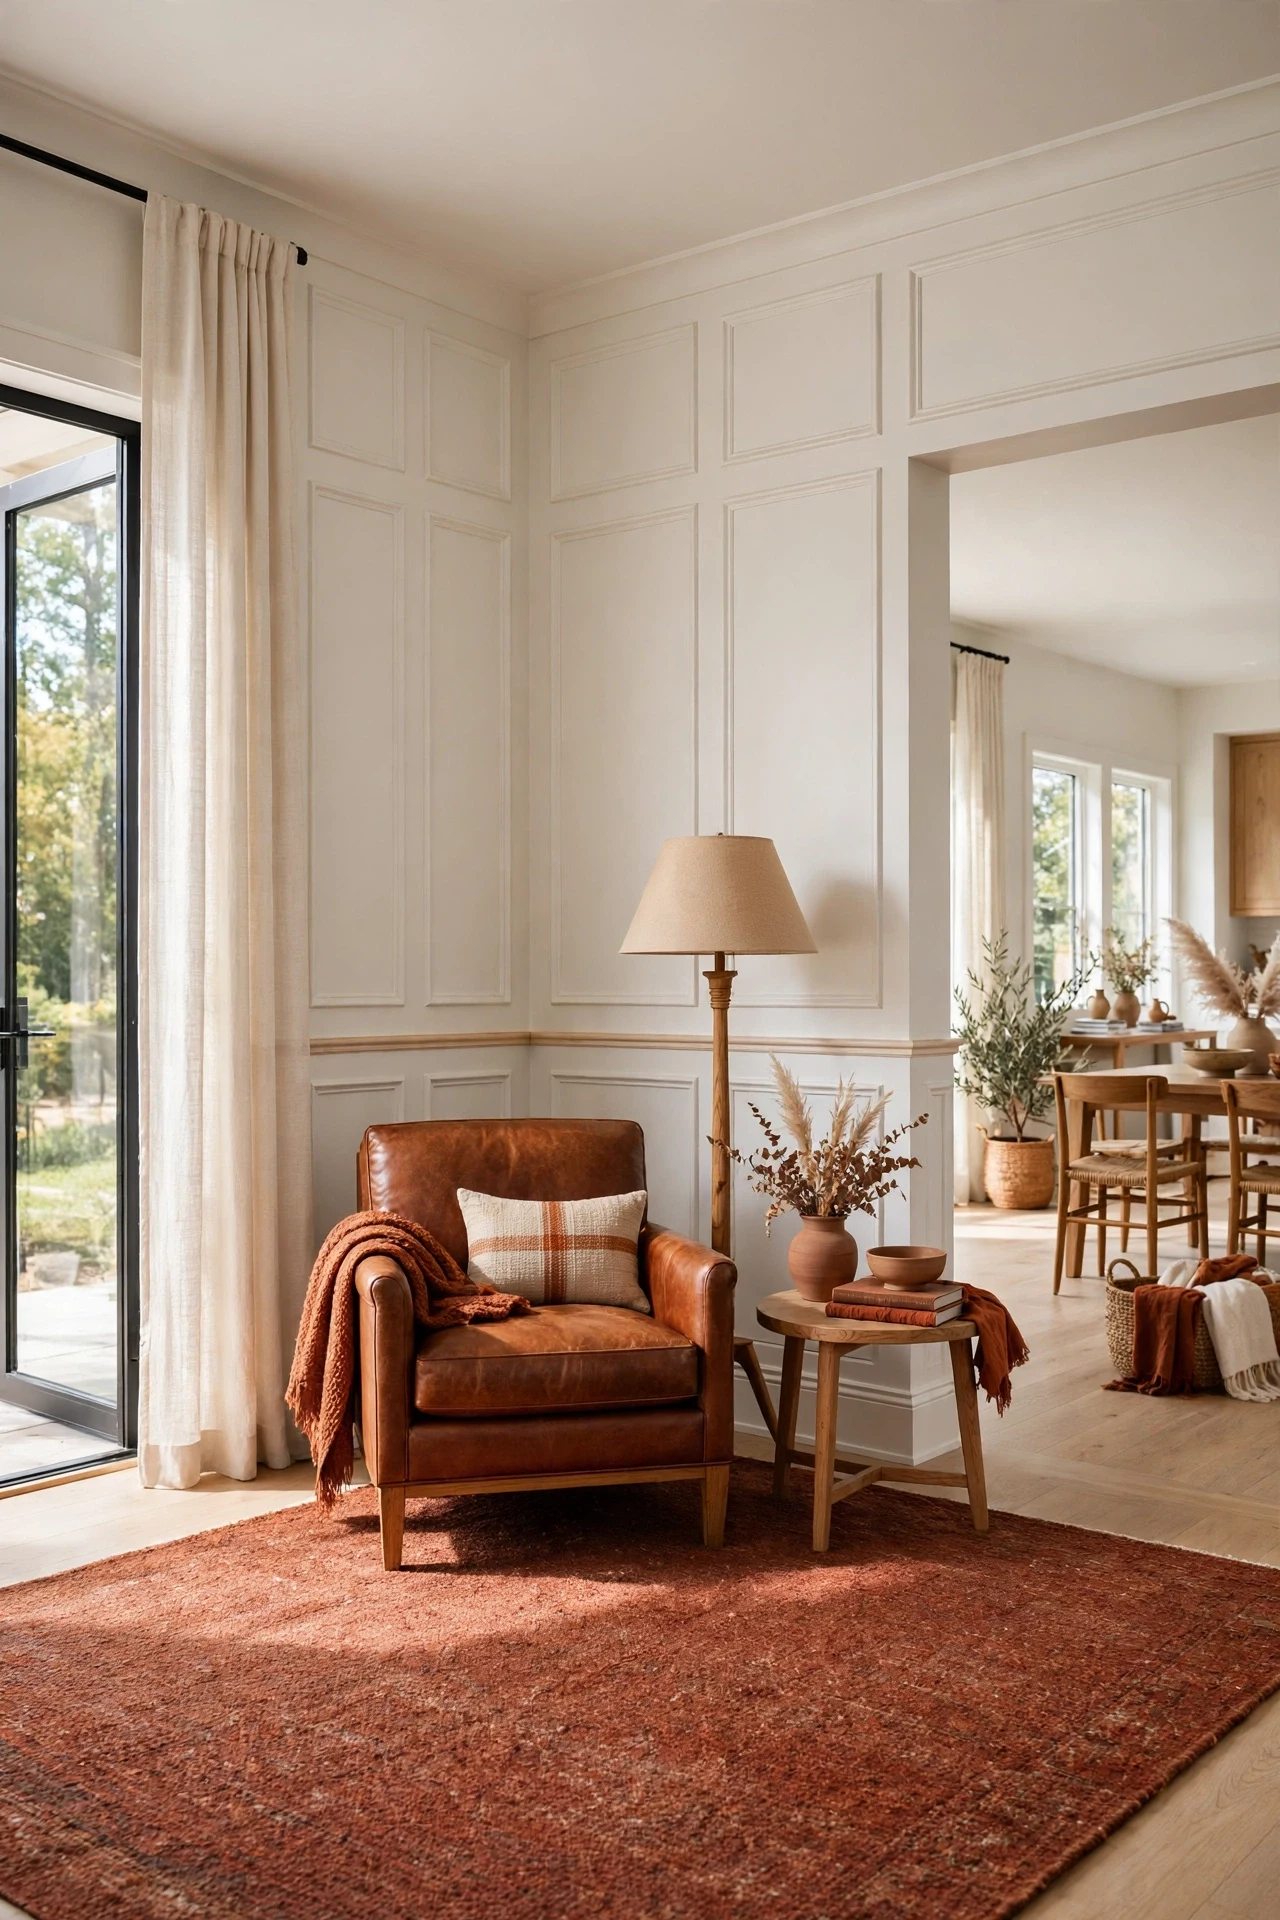
The open space feels anchored, warm, and clearly meant for sitting.
Zoning is the principle: one continuous rail line wraps the seating area, so the eye reads a room within a room without any partition. Panels stop where the rug stops, aligning architecture with furniture layout. Warm white paint keeps the boundary visual, never physical.
Run the chair rail continuously around the seating zone only, ending it with a returned miter at the rug's edge. Paint panels below the rail two shades deeper than above to strengthen the zone.
7. Navy Picture Frame Wainscoting Ideas in a Study
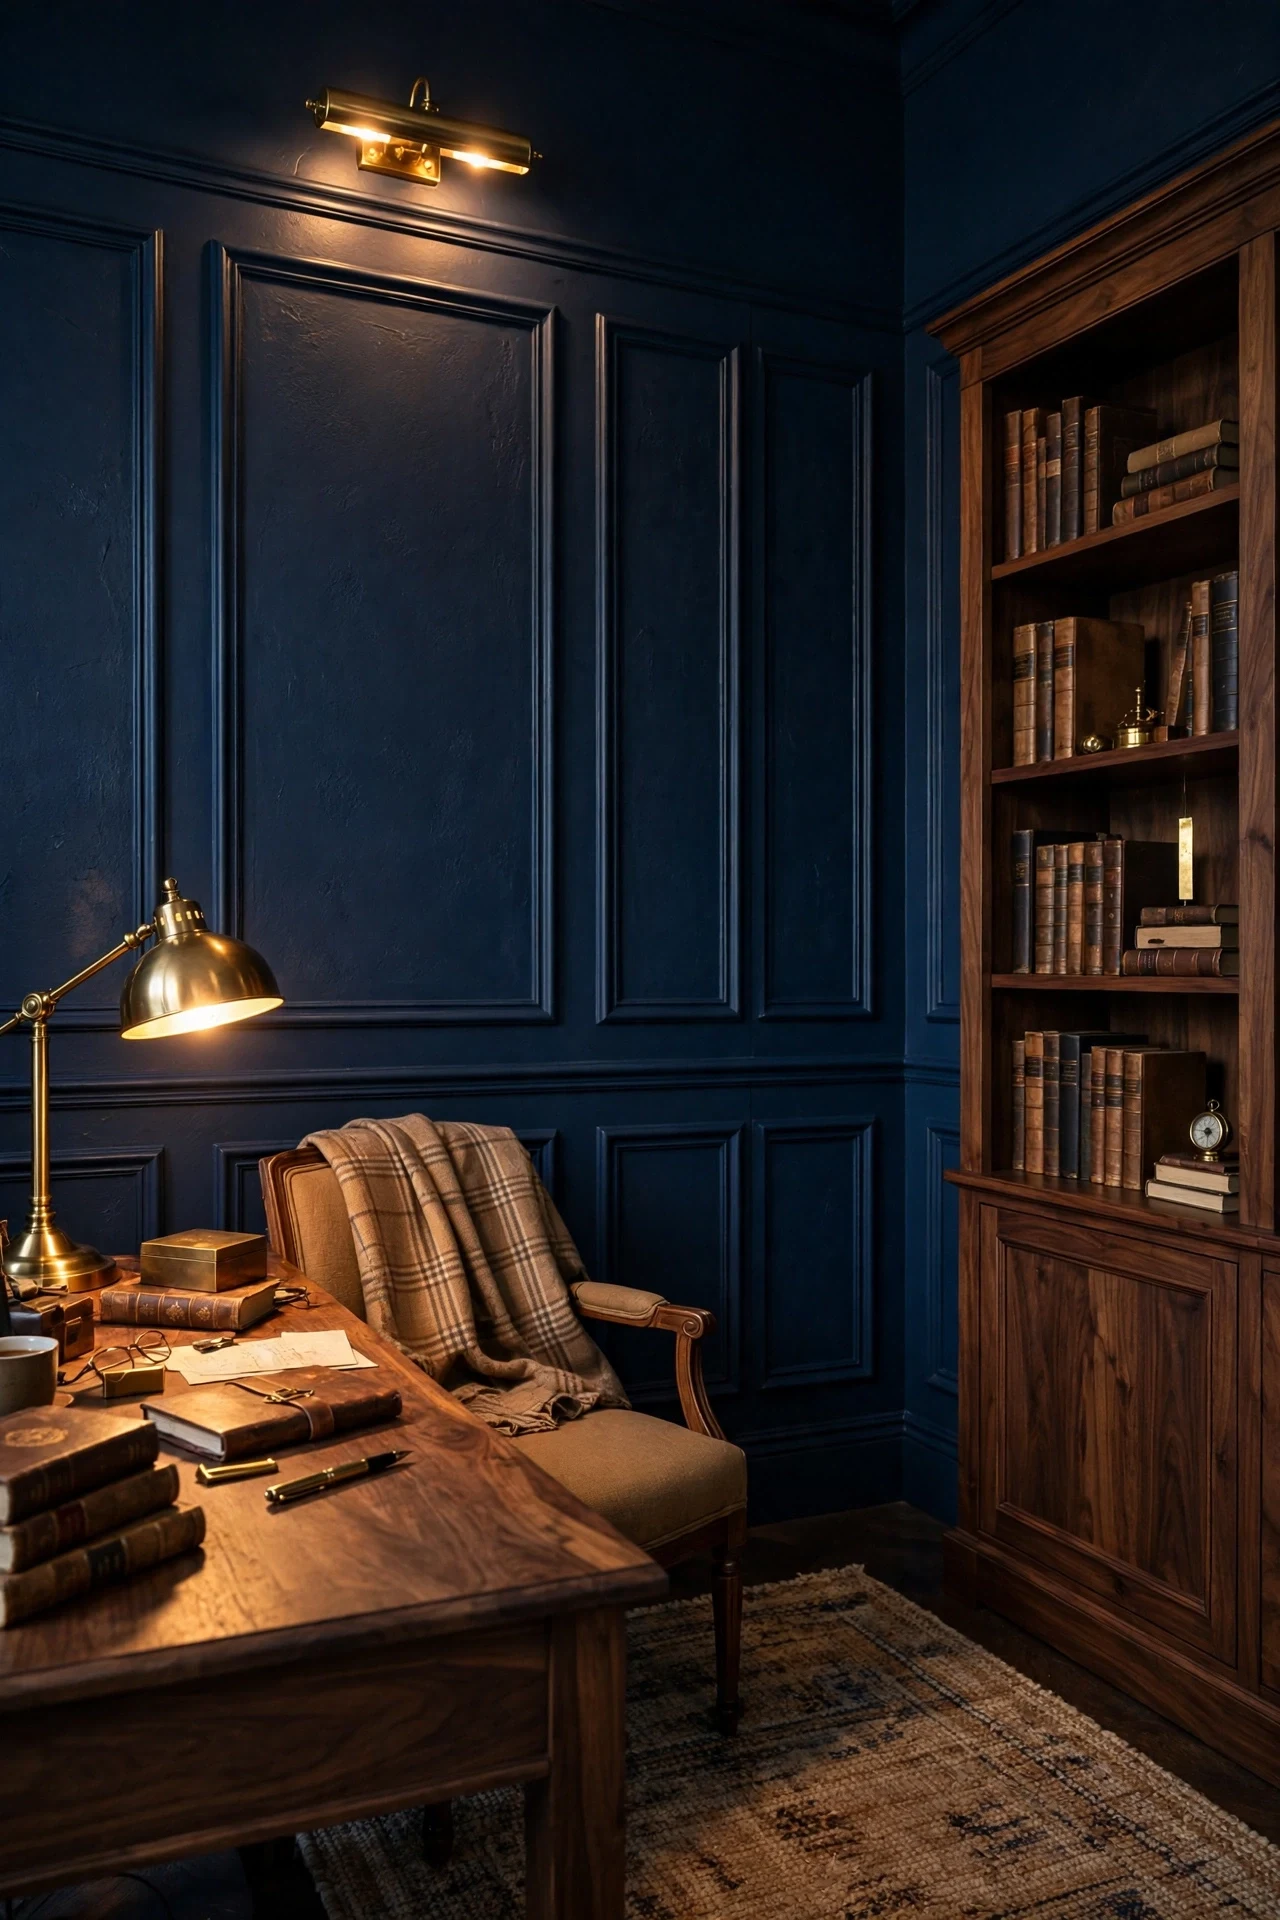
The study feels cocooned, ink-dark, and focused late into evening.
Color drenching is the principle: painting frames, rail, and wall one navy removes every visual seam, so shadow alone models the rectangles. Dark saturation concentrates visual weight low and around the desk, which suits concentration. Walnut and brass warm the blue so it never reads cold.
Spray Farrow & Ball Hague Blue in dead flat over primed MDF frames for a brush-mark-free drench. Test a full panel first, because navy darkens noticeably once the whole wall is committed.
💡 Quick Win: Paint one navy sample panel behind the desk.
8. Limewashed Pine Frames in a Coastal Living Room
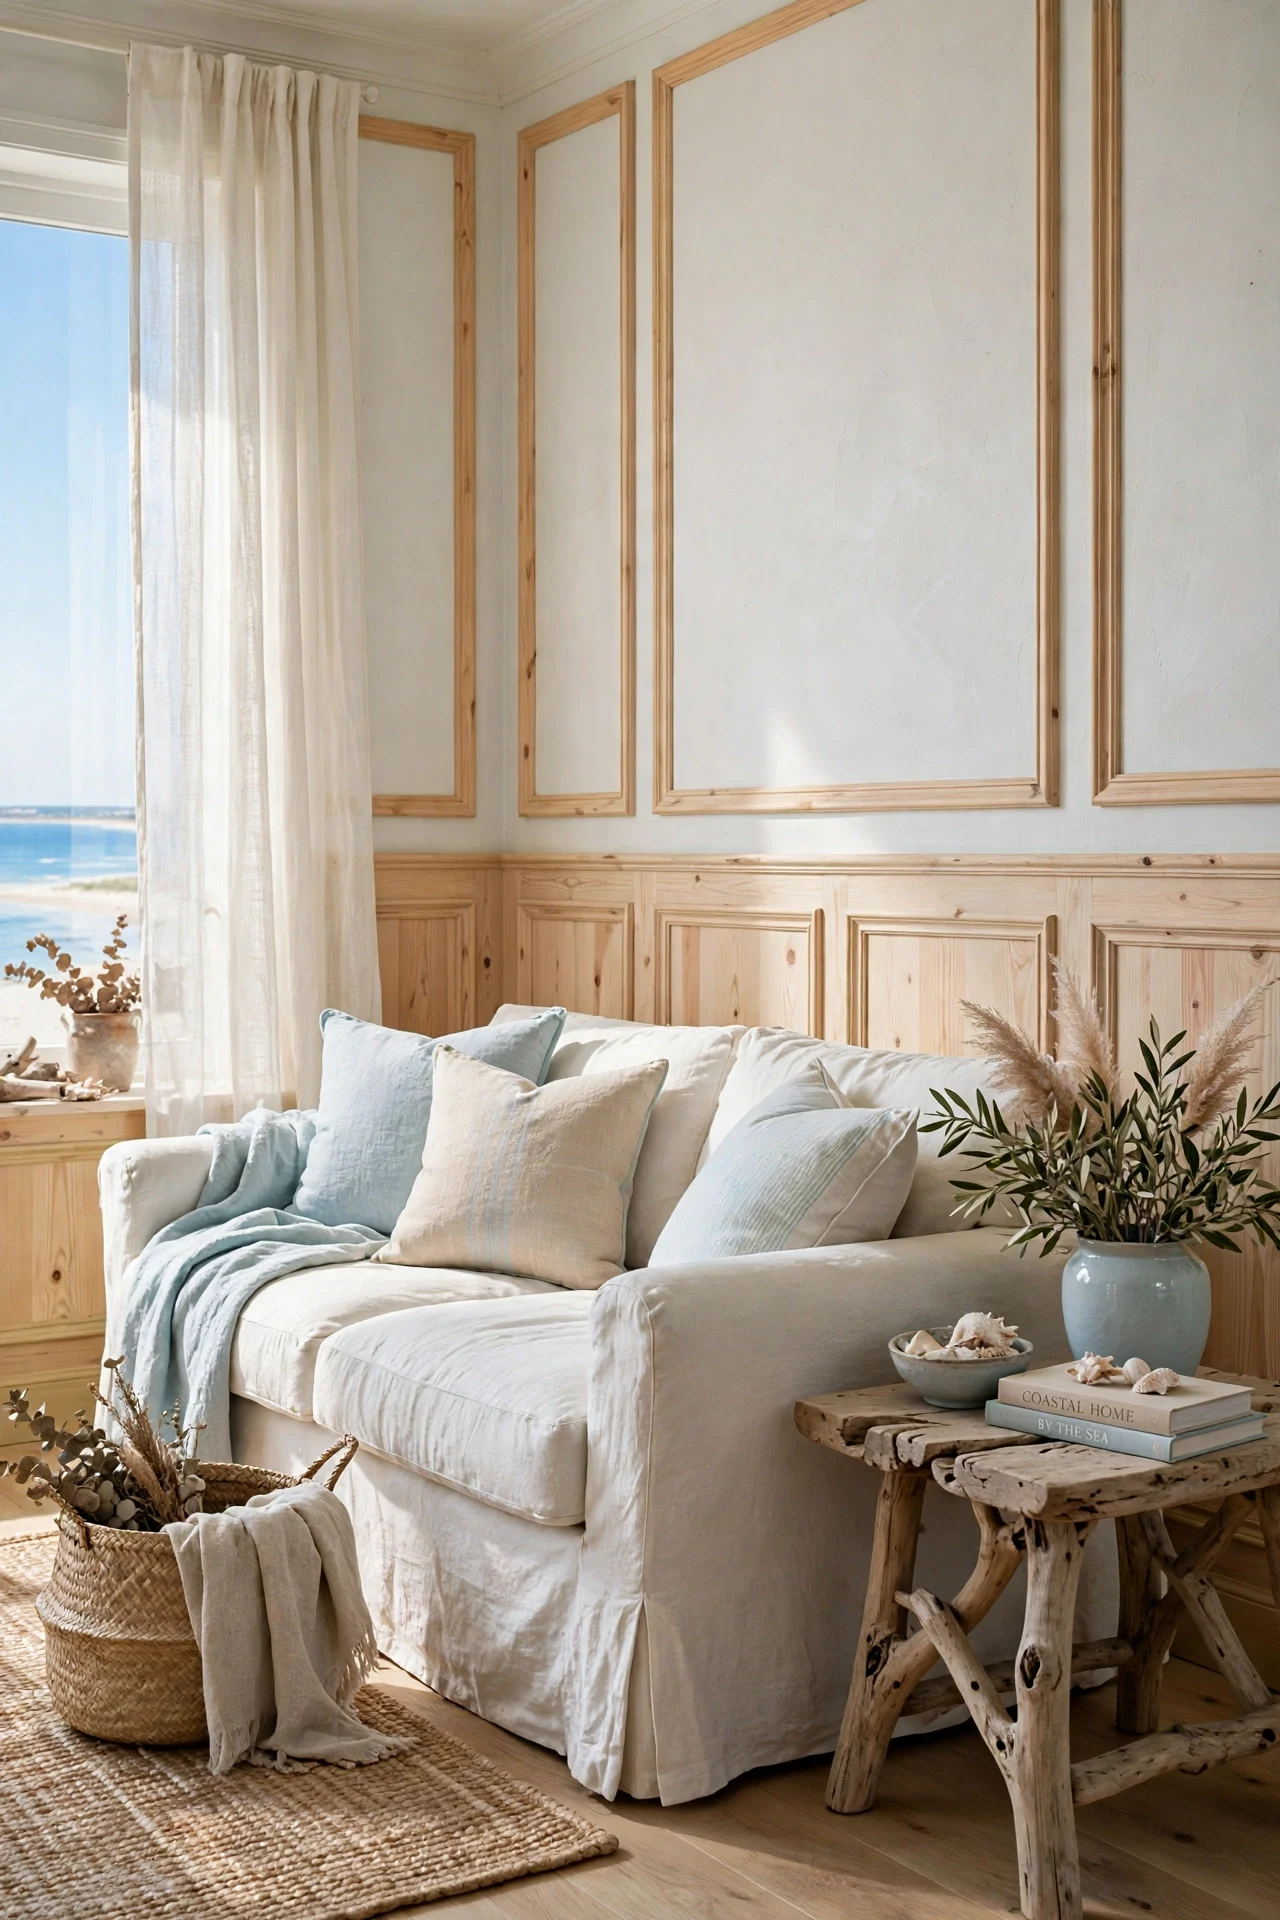
The room feels breezy, salt-soft, and light on bare feet.
Texture layering drives this look, because limewash lets pine grain ghost through a chalky veil instead of hiding it under opaque paint. The frames stay pale, so coastal light bounces rather than glares. That softness separates it from crisp painted traditional paneling.
Brush Portola Limewash in a pale driftwood tone onto raw pine molding with a block brush, working in loose crosses. Wipe back high spots within ten minutes so grain stays visible through the finish.
9. Built-In Bench Framed by Picture Frame Panels in a Mudroom
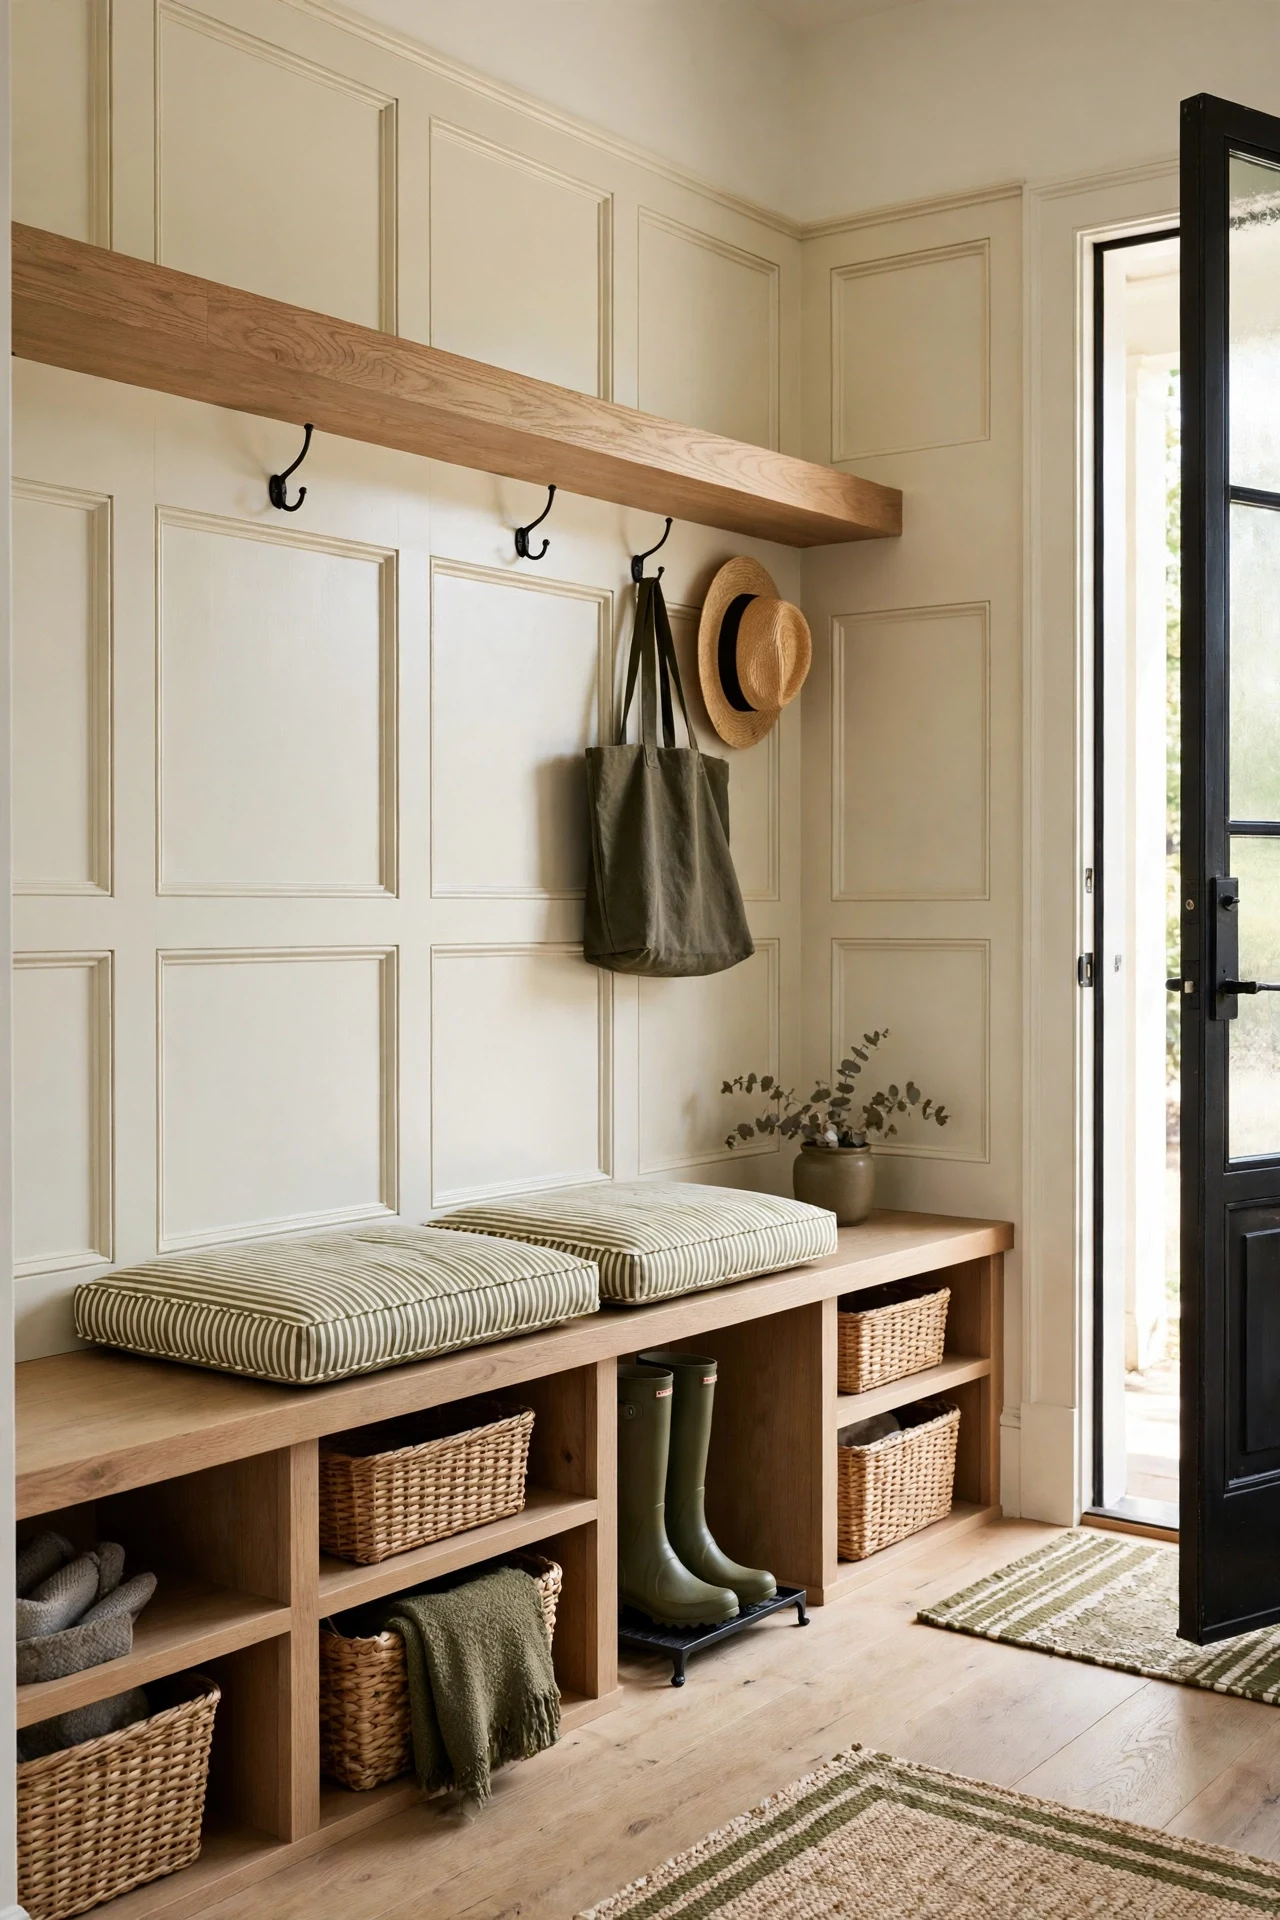
The mudroom feels sturdy, sunlit, and ready for wet boots.
Function sets the proportion here: panel height matches bench height, so the furniture and the wainscoting wall read as one built-in unit. Frames behind the bench protect flat paint from bags and shoulders. A deep rail doubles as a ledge, giving the carpentry a practical top edge.
Build the bench from white oak plywood on wall cleats, leaving fifteen-inch cubbies below for boots. Align each vertical molding stile with a cubby divider so the two grids never fight each other.
💡 Quick Win: Add two iron hooks to the rail today.
10. Picture Lights Above Picture Frame Panels in a Library Corner
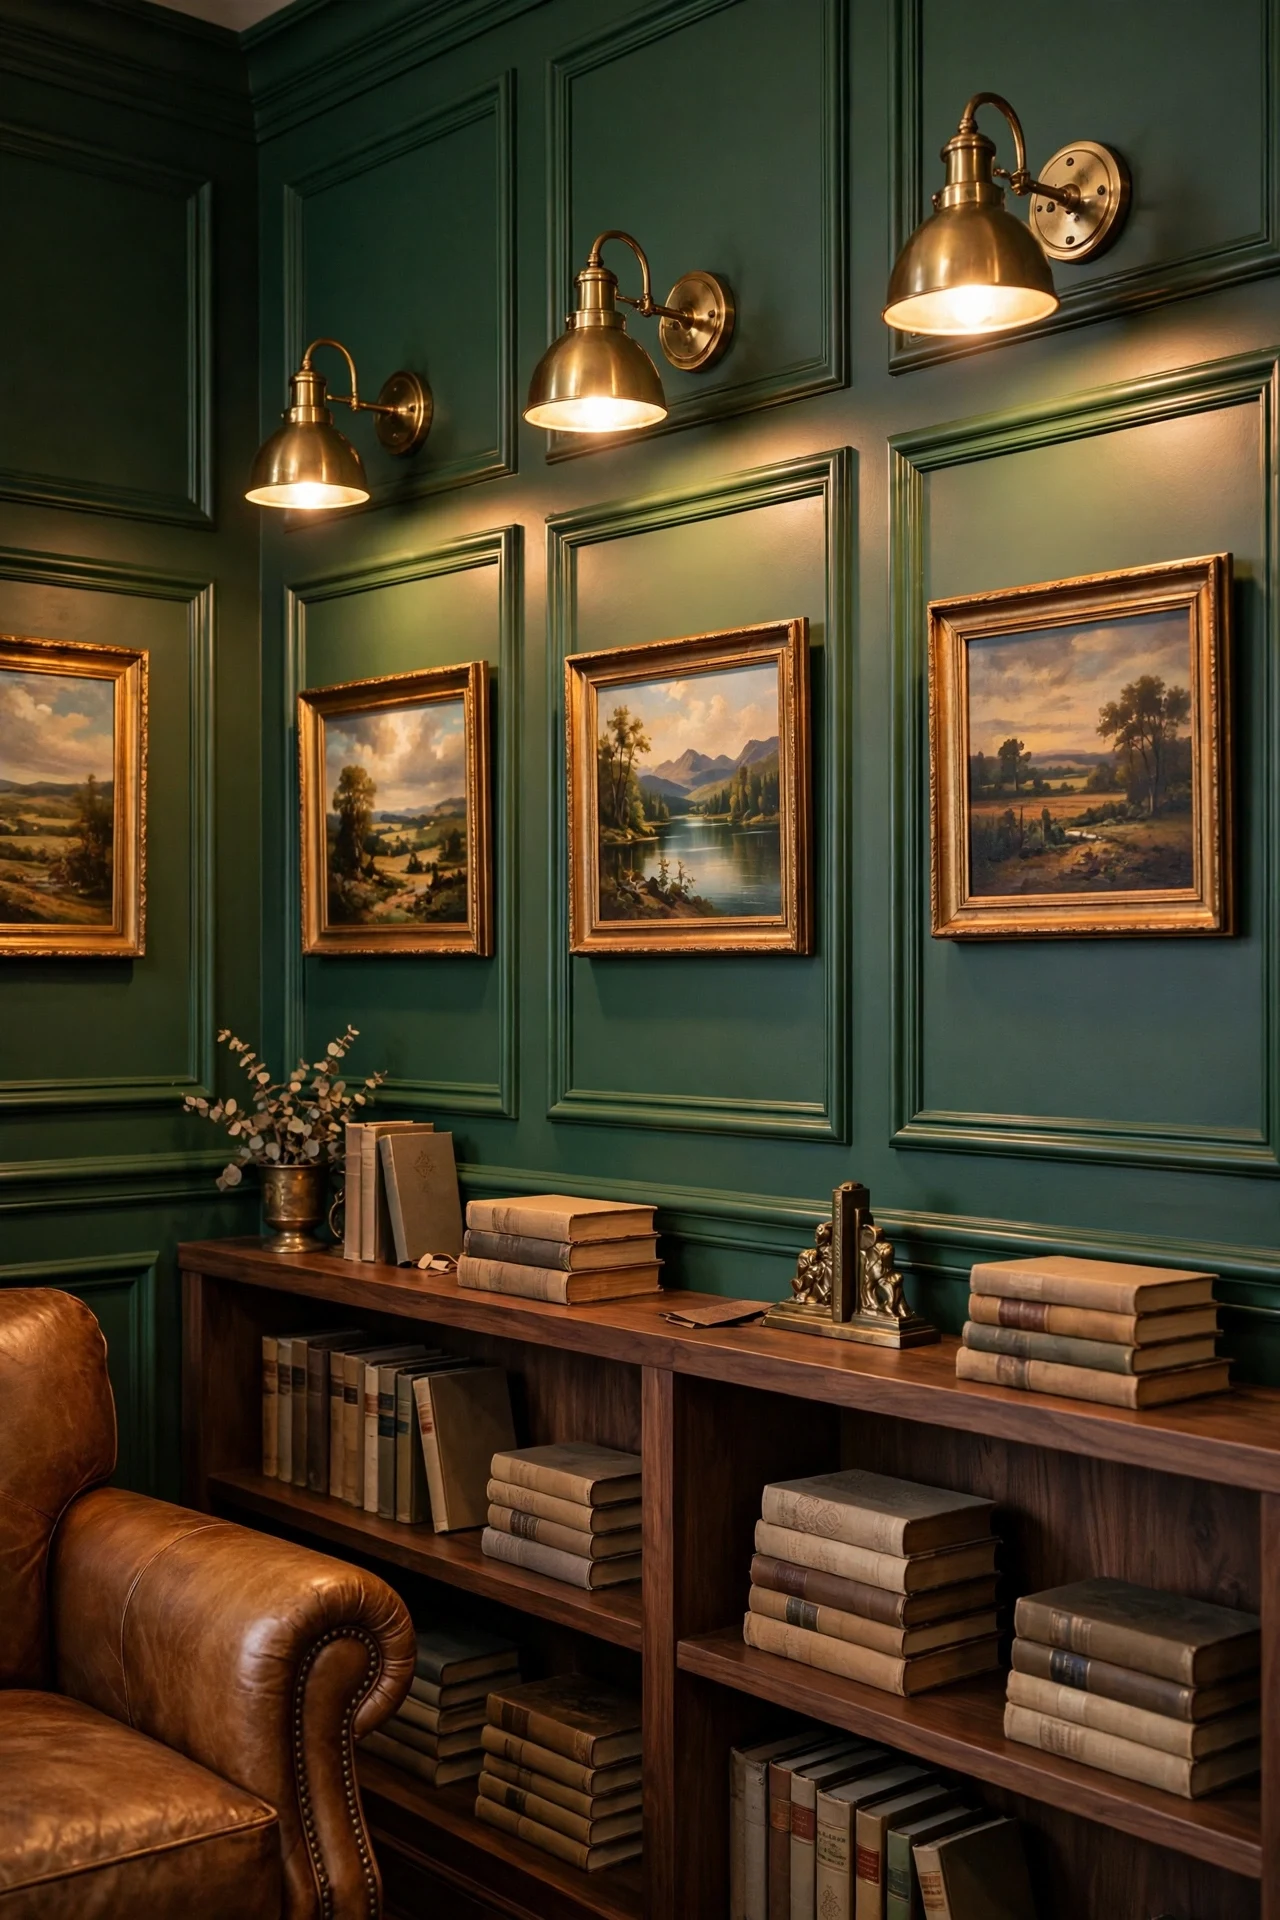
The corner feels storied, lamplit, and quiet as turned pages.
Repetition of light is the principle: one picture light per panel sets a gallery rhythm that the rectangles below answer. Focused pools of light also create contrast against deep green molding, making art glow without overhead glare. The corner becomes a destination, not leftover space.
Choose battery-operated brass LED picture lights so no electrician is needed, and center one over each frame. Space the lights evenly even where art hangs lower, keeping the rhythm architectural rather than decorative.
11. Ironstone Plates Above a Picture Frame Wainscoting Wall in a Kitchen
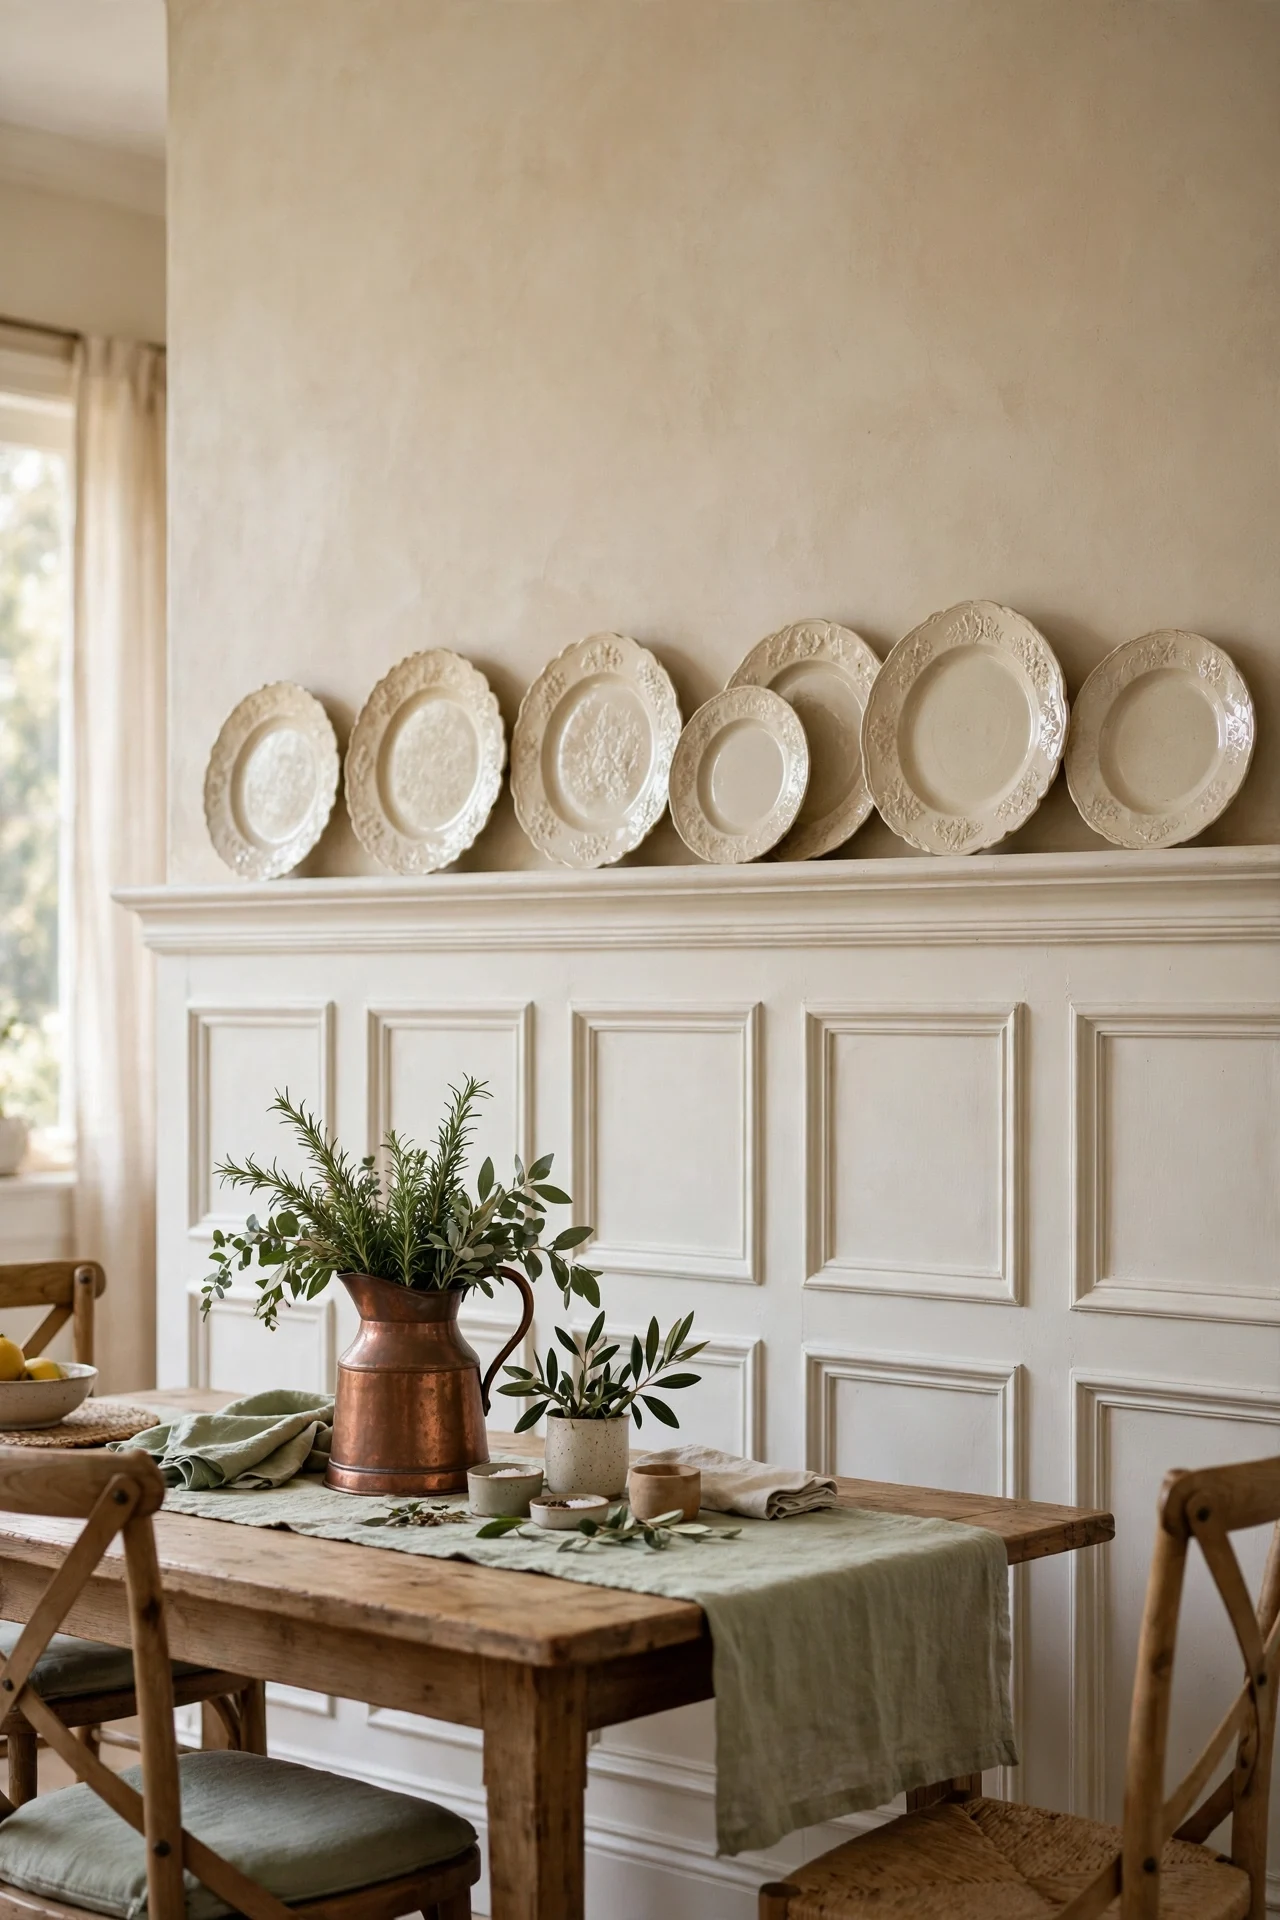
The kitchen corner feels collected, milky, and calm at breakfast.
Visual weight is balanced vertically here: plain framed panels below, a dense row of round ironstone above, each offsetting the other. Circles against rectangles supply the contrast, so no color is needed. White-on-cream tonal layering keeps the display from overwhelming a working kitchen.
Fit a grooved plate rail from poplar stock above the frames, screwing through into studs every sixteen inches. Lean plates in the groove and secure the largest with a discreet museum putty dot behind each rim.
💡 Quick Win: Lean three ironstone plates up this morning.
12. Tall Picture Frame Panels in a Tiny Powder Room
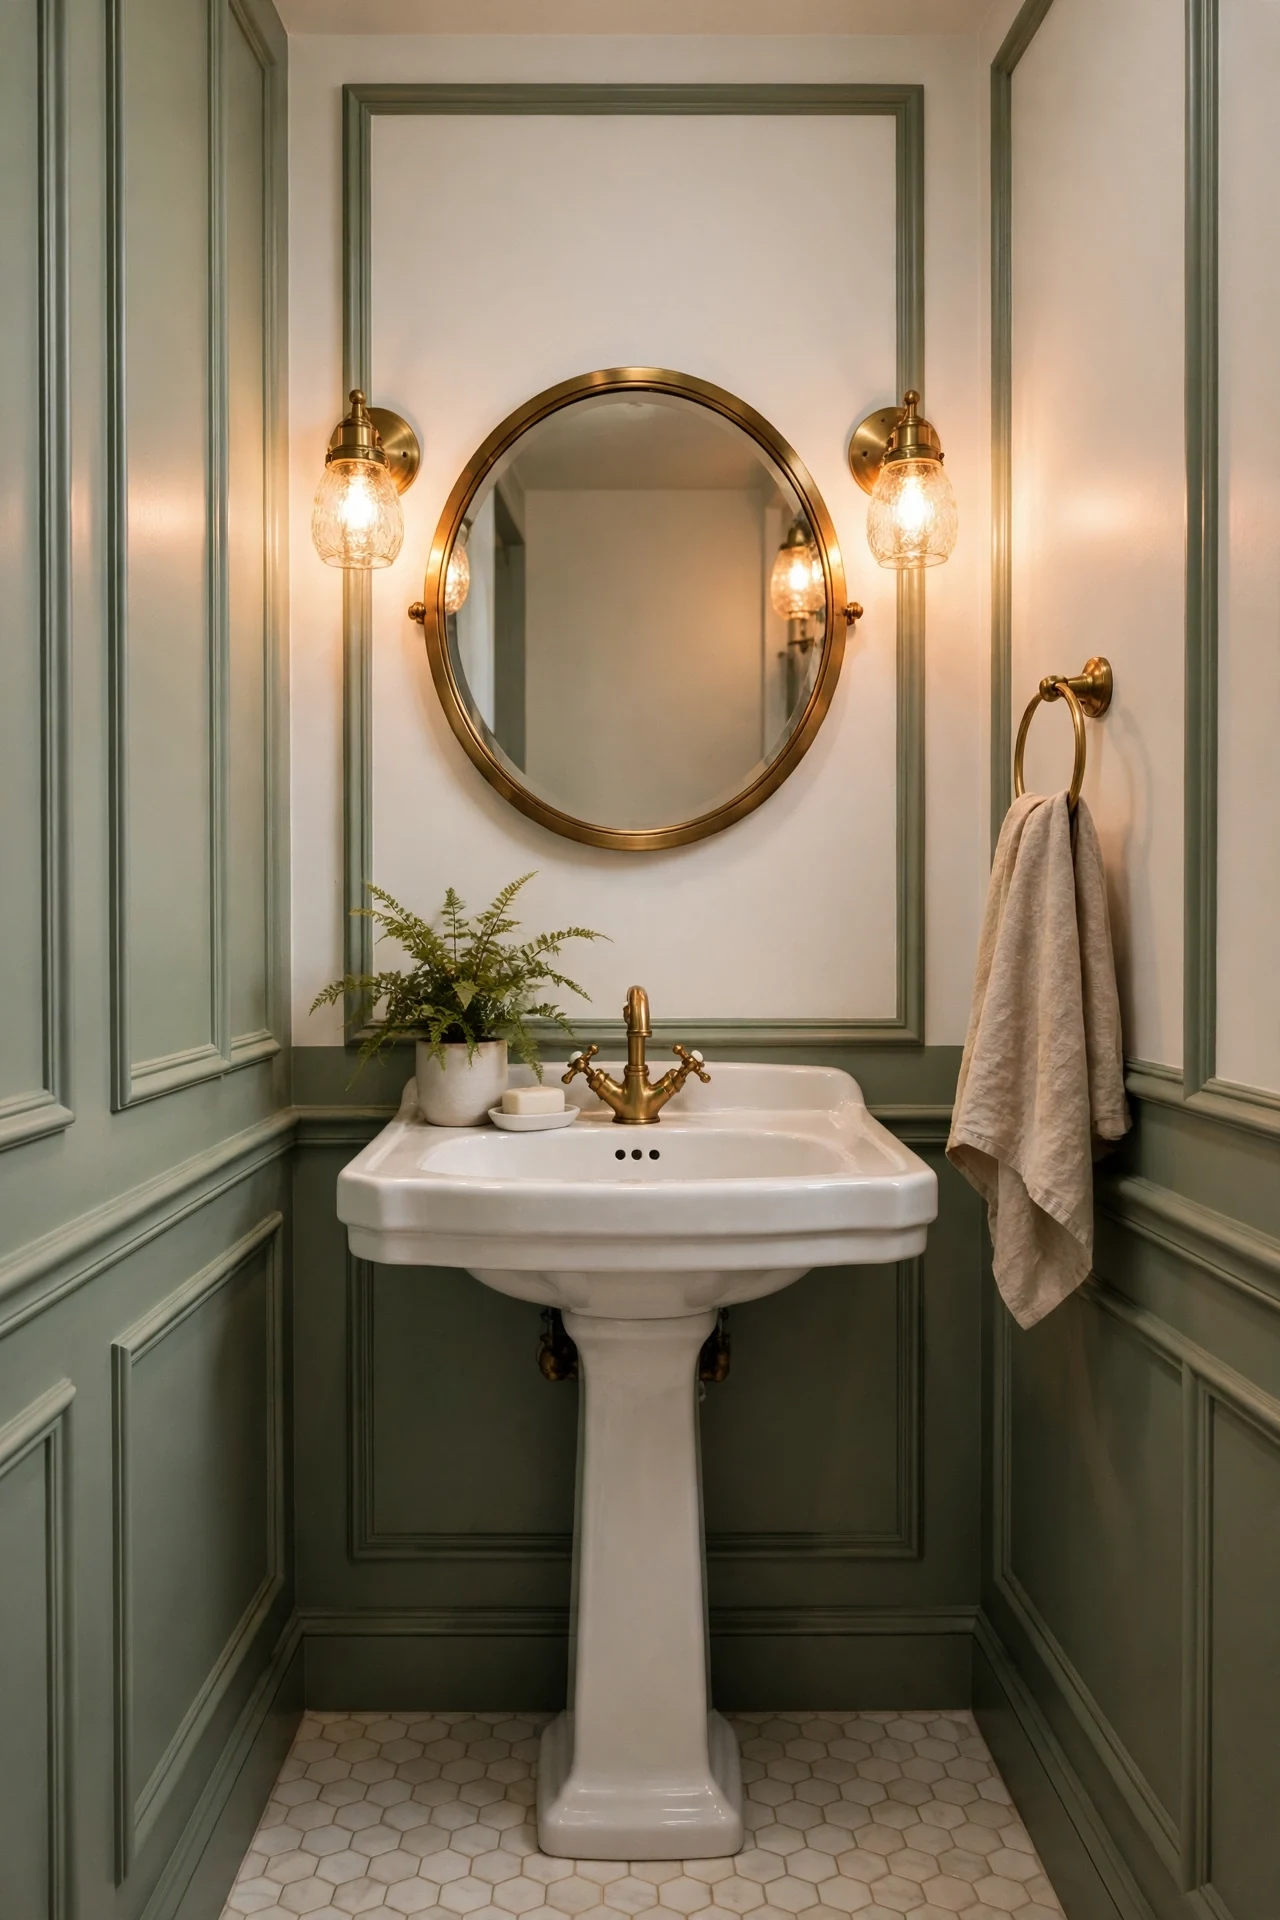
The powder room feels cocooned, compact, and taller than expected.
Vertical proportion is the illusion at work: raising frames to sixty inches pulls the eye upward, so a tiny footprint borrows height. Narrow rectangles suit narrow walls, keeping margins honest instead of cramped. Sage concentrates color low while the mirror returns light at face level.
Build these frames from moisture-resistant MDF molding and seal every cut end with primer before painting. In wet-adjacent rooms, unsealed MDF edges swell first, so that extra priming step protects the miters longest.
13. Two-Tone Cream and Greige Picture Frame Wainscoting
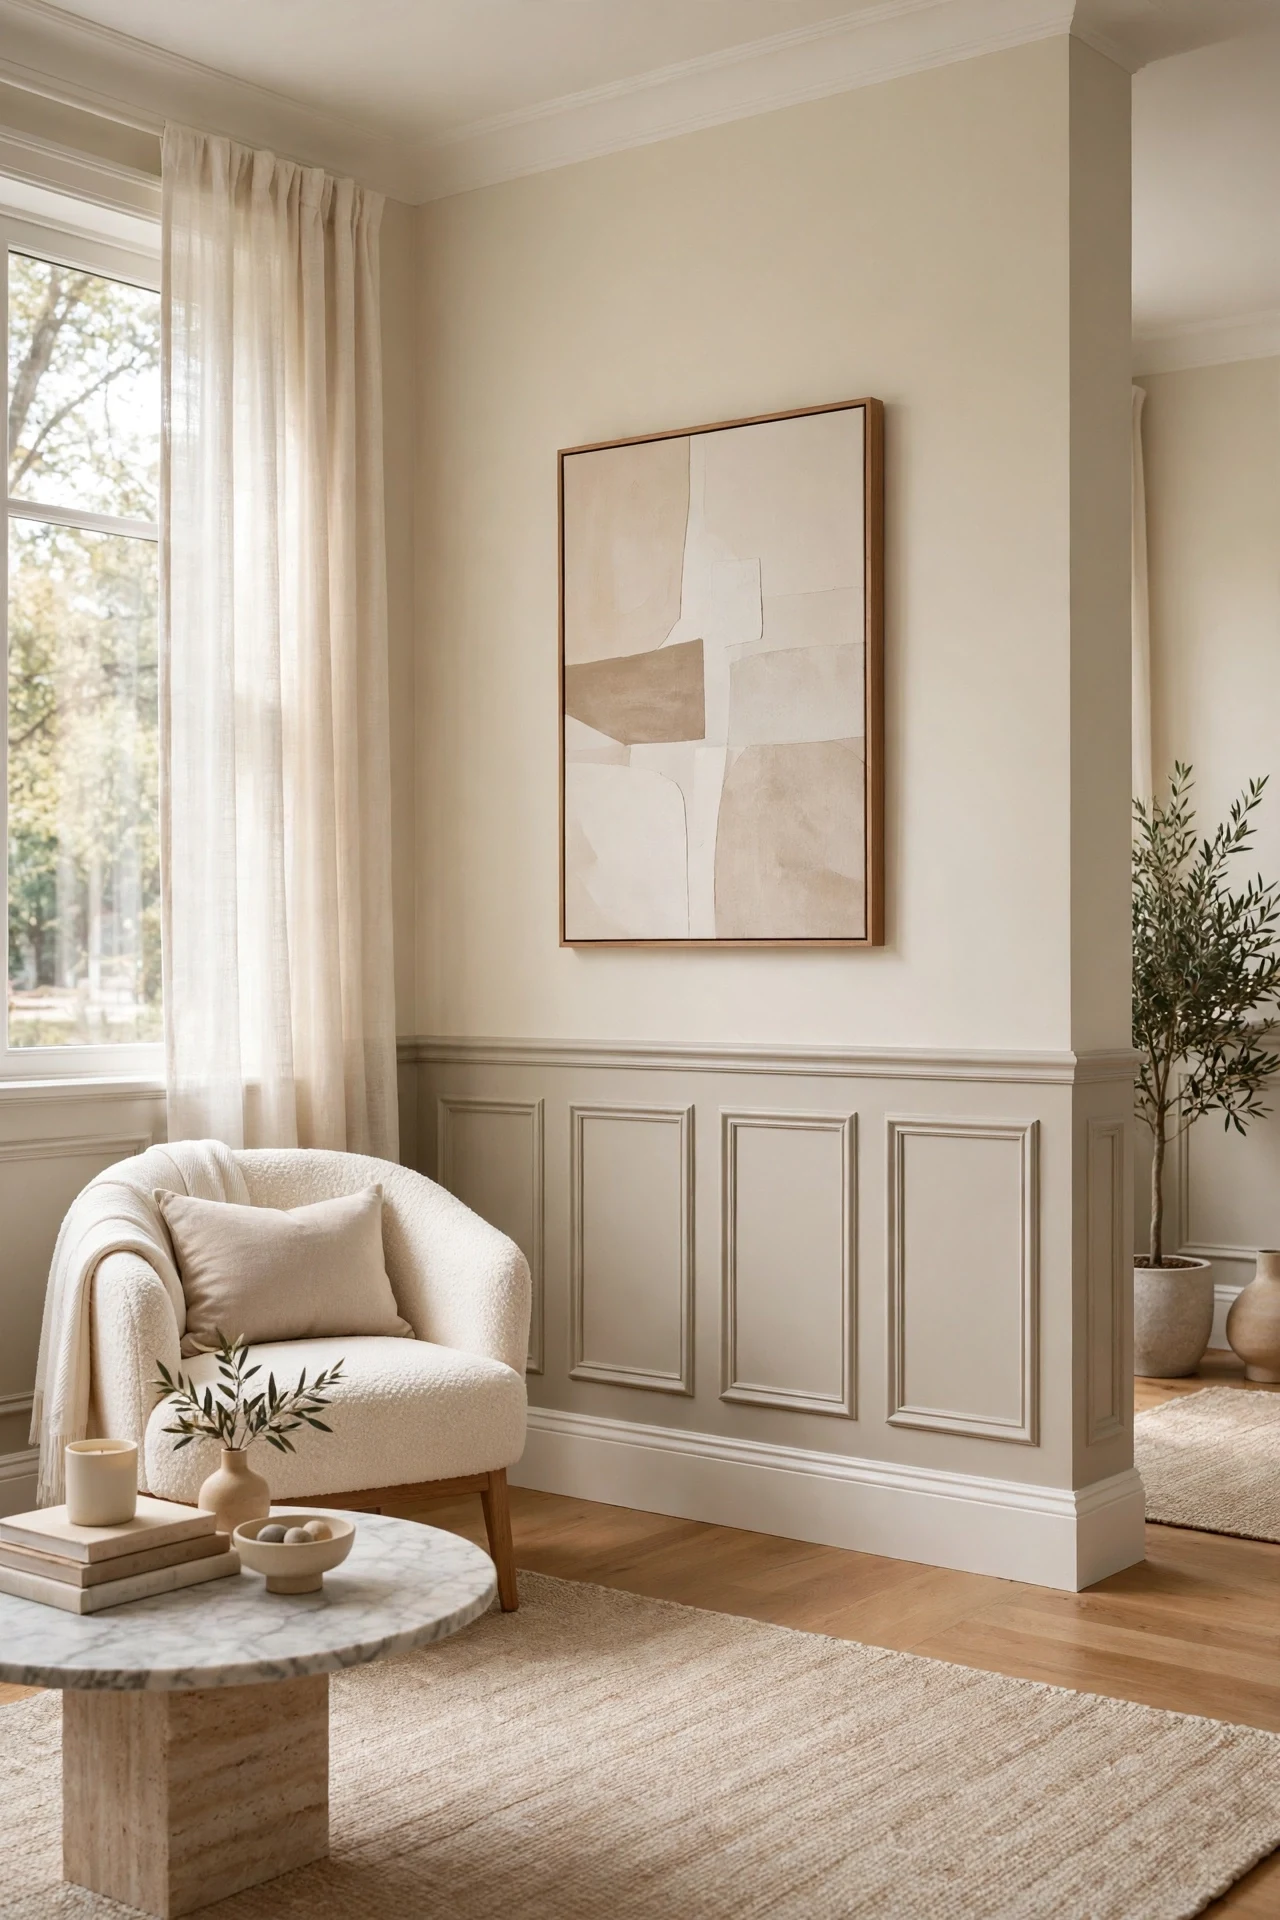
The room feels layered, quiet, and soft around the edges.
Color blocking at the rail is the principle: greige below grounds the room, cream above lifts it, and the rail becomes a deliberate horizon line. Using two finishes, satin below and matte above, sharpens the split without adding a third color. The frames keep the lower tone from reading as a flat band.
Tape the rail line with FrogTape Delicate Surface and paint the lower frames first in Benjamin Moore Revere Pewter satin. Peel the tape while the second coat is still tacky for the crispest two-tone edge.
💡 Quick Win: Test the split with two large swatches today.
14. Marble Chair Rail Over Picture Frame Panels in a Bathroom
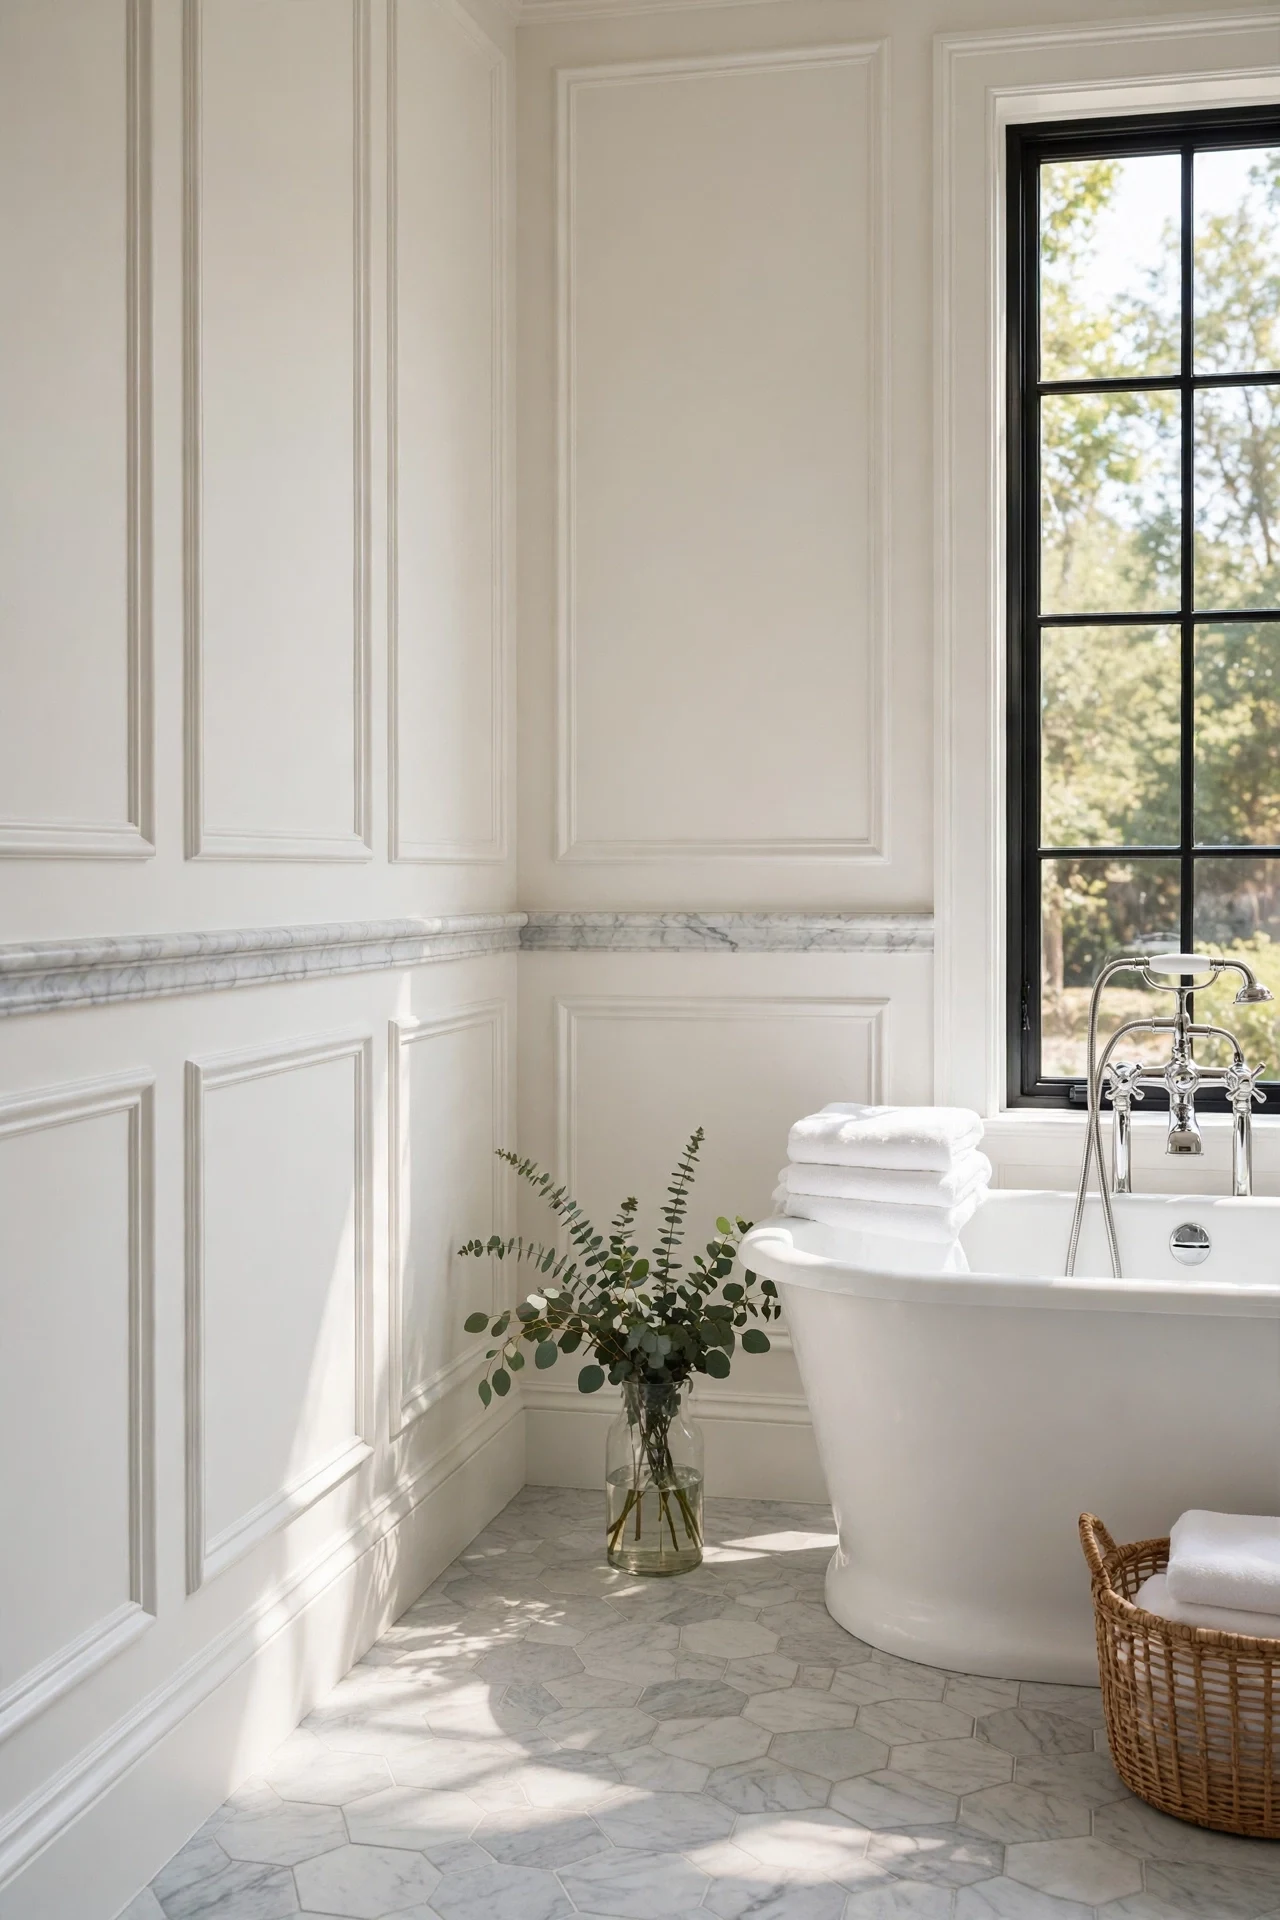
The bathroom feels cool, smooth, and quiet as stone.
Material contrast carries this room: a honed marble rail introduces real stone weight above lightweight painted molding, so the wall feels permanent. Grey veining in the Carrara echoes in the floor, linking the framed panels to harder surfaces. Everything else stays white to let that one upgrade speak.
Order a pre-cut honed Carrara threshold strip as the rail and set it on a level ledger board with white thinset. Seal the marble twice before grouting so moisture and toothpaste never stain the edge.
15. Picture Frame Panels That Wrap a Corner Reading Nook
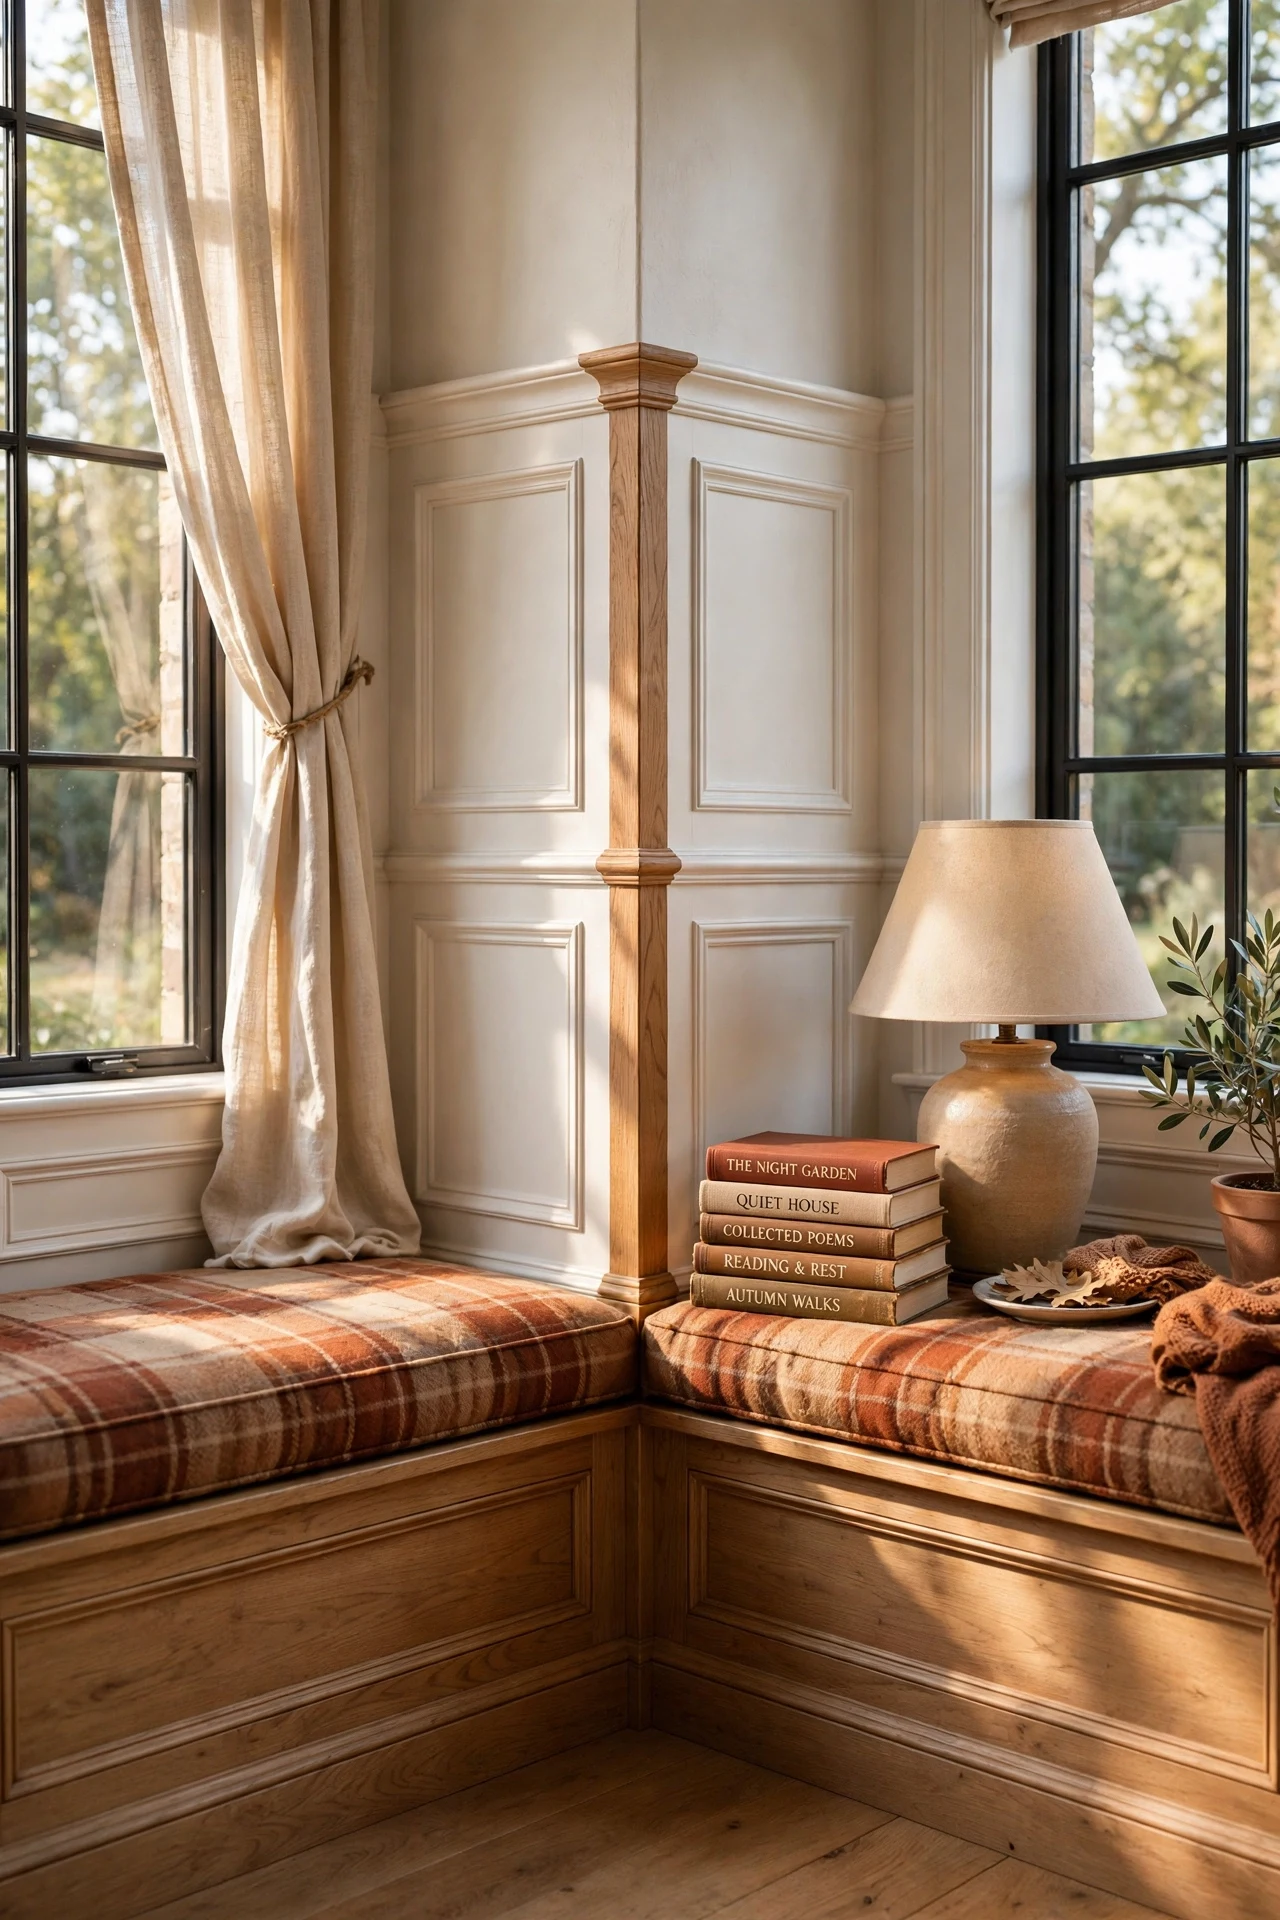
The nook feels tucked, sun-warmed, and made for long chapters.
Wrapping frames around a corner uses continuity as the principle: the same rectangle rhythm turns ninety degrees, so two small walls become one intentional place. A shared corner stile prevents the awkward half-panel most DIY corners produce. Low panels keep the seat, not the wall, as the hero.
Plan the layout from the corner outward, using one square corner stile that both walls share. Dry-fit both sides with a laser level before gluing, because a wrapped corner magnifies any height mismatch instantly.
💡 Quick Win: Mark the corner stile line in tape first.
16. Headboard Wall of Picture Frame Panels in a Primary Bedroom
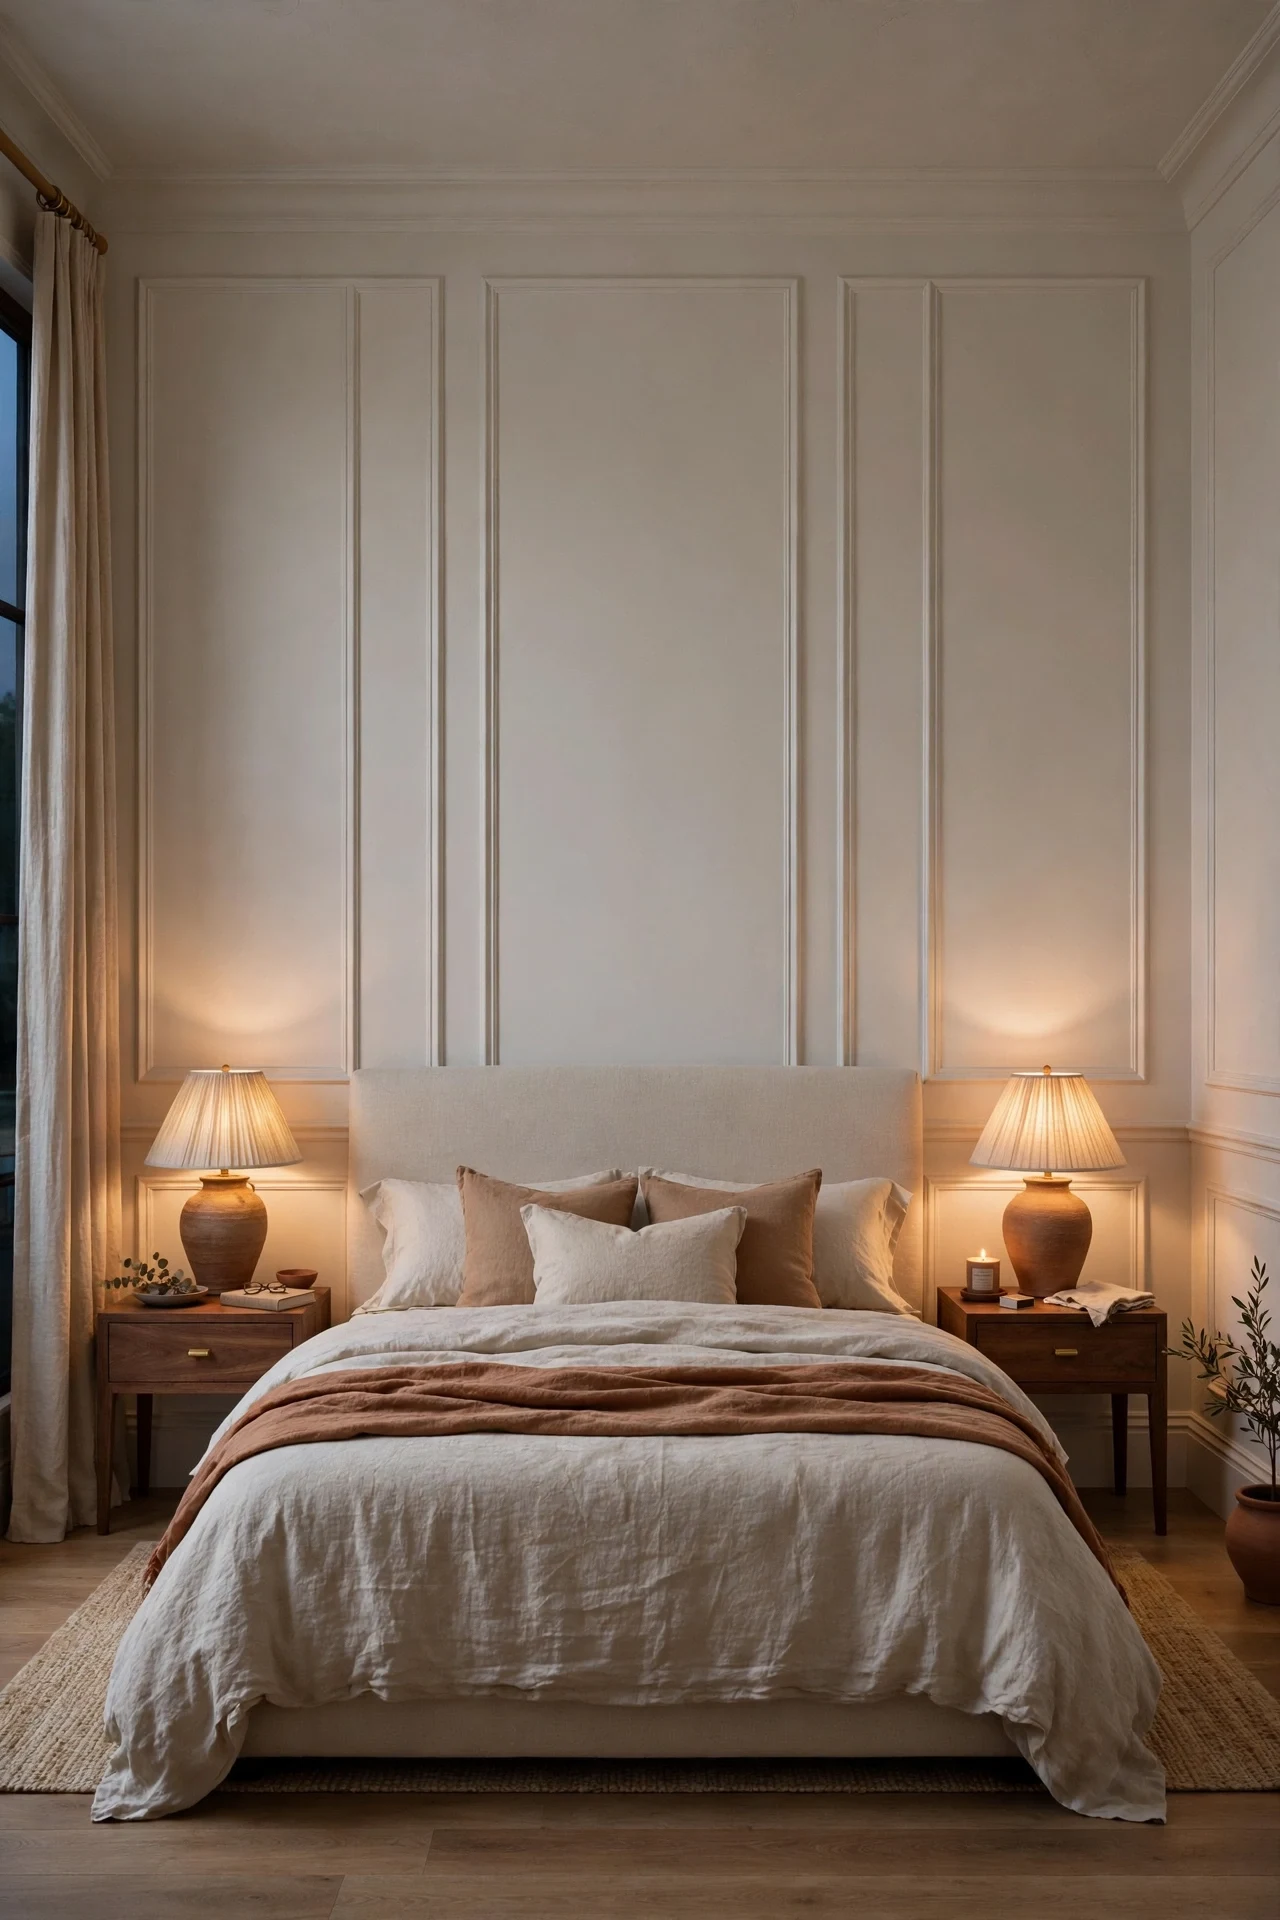
The bedroom feels hushed, tailored, and settled for sleep.
Symmetry is the principle behind the headboard wall: three tall frames, the center one matched to the bed, create a focal point without artwork or an expensive headboard panel. Extending frames above the headboard keeps the proportions generous. Matte warm white prevents the grid from feeling formal at night.
Extend the molding to eight inches below the ceiling and align the center frame exactly with the bed's centerline. Use a plumb laser line, because a frame even half an inch off the bed reads as a mistake.
17. Dimmable Pendants Over Picture Frame Panels in a Dining Room
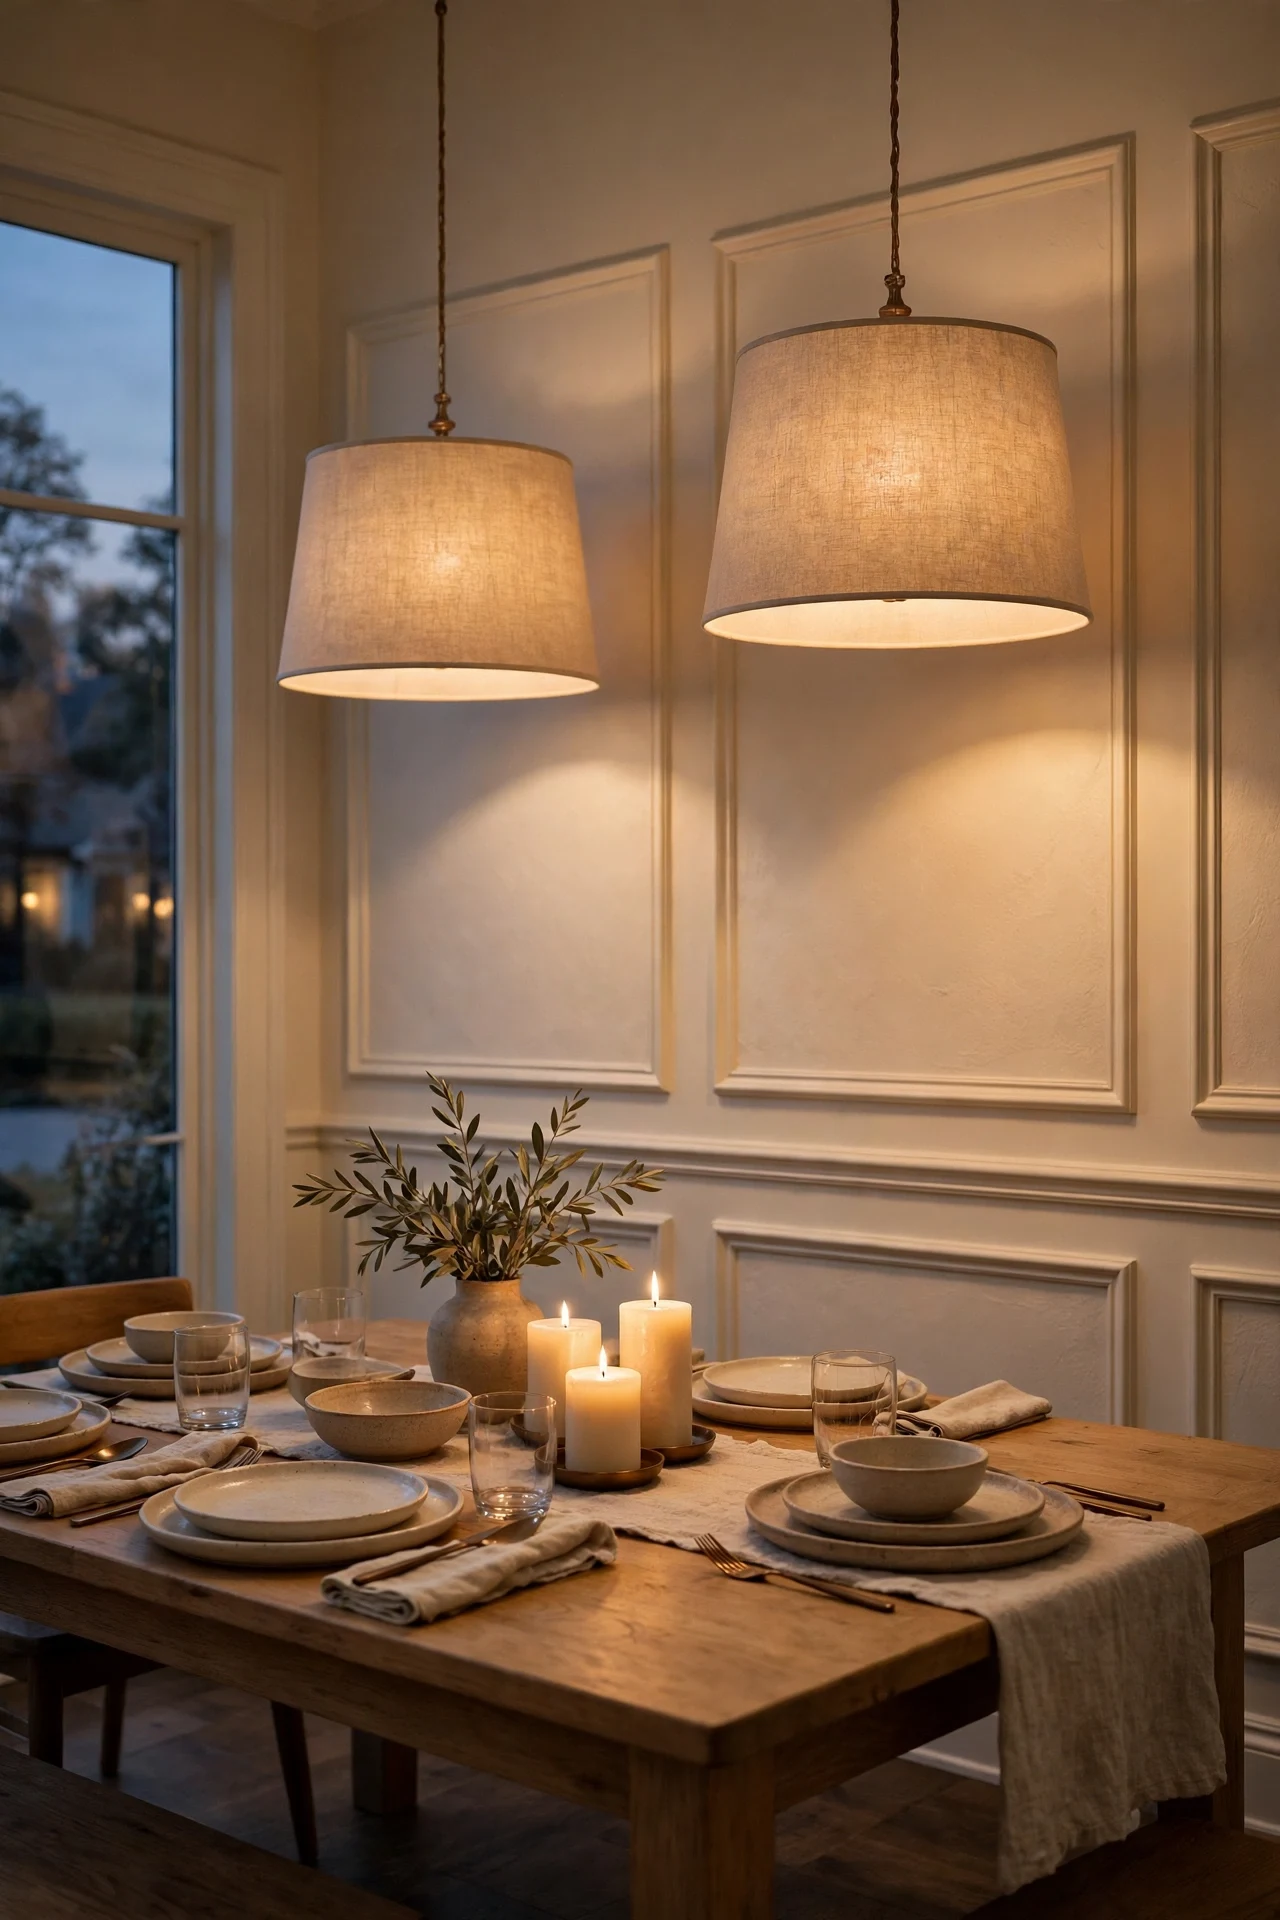
The dining room feels golden, intimate, and low-lit at dusk.
Light behavior shapes this room: pendants hung low wash the upper wall and let the framed lower wall fall into soft shadow, reversing daytime contrast. Twin fixtures reinforce the table's axis, which the panel rhythm repeats below. Dimming lets one room serve bright lunches and slow dinners.
Hang two linen drum pendants thirty inches above the tabletop on a shared dimmer circuit. Choose 2200K dim-to-warm bulbs so lowering the light deepens the cream molding instead of greying it.
💡 Quick Win: Fit dim-to-warm bulbs before dinner tonight.
18. Woven Baskets and Hooks Between Entry Picture Frame Panels
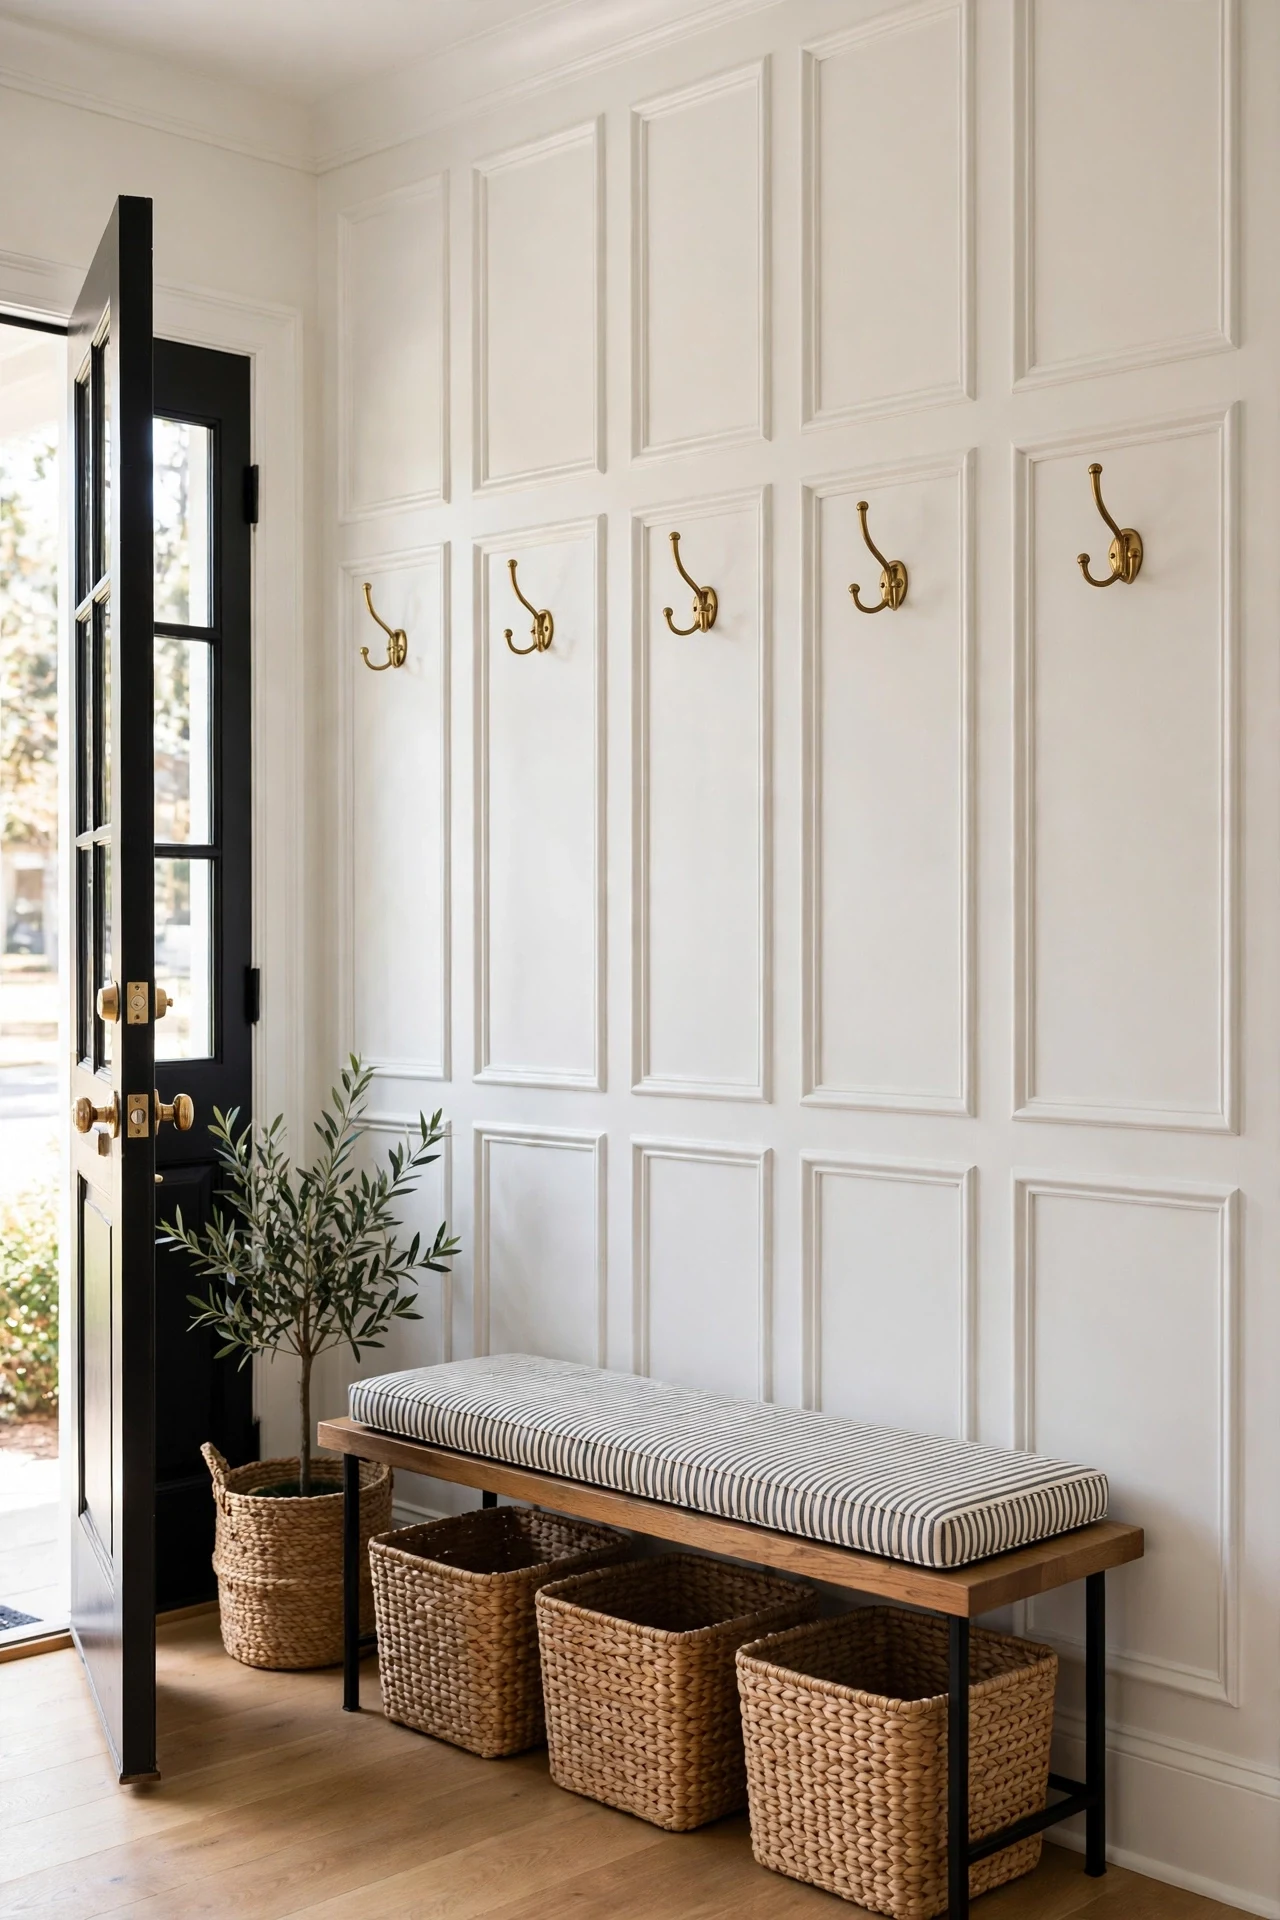
The entry feels orderly, busy, and easy to live with.
Accessories work hardest when their spacing follows architecture, so hooks land on panel stiles and baskets fill the gaps below in the same grid. That alignment is the principle: storage looks designed, not added. Brass against white molding adds warmth without another paint color.
Screw brass double hooks through the molding stiles into a hidden poplar ledger behind the drywall. Anchoring into the ledger, not drywall anchors alone, keeps loaded hooks from pulling the trim loose over time.
19. Charcoal Picture Frame Wainscoting Ideas for a Media Room
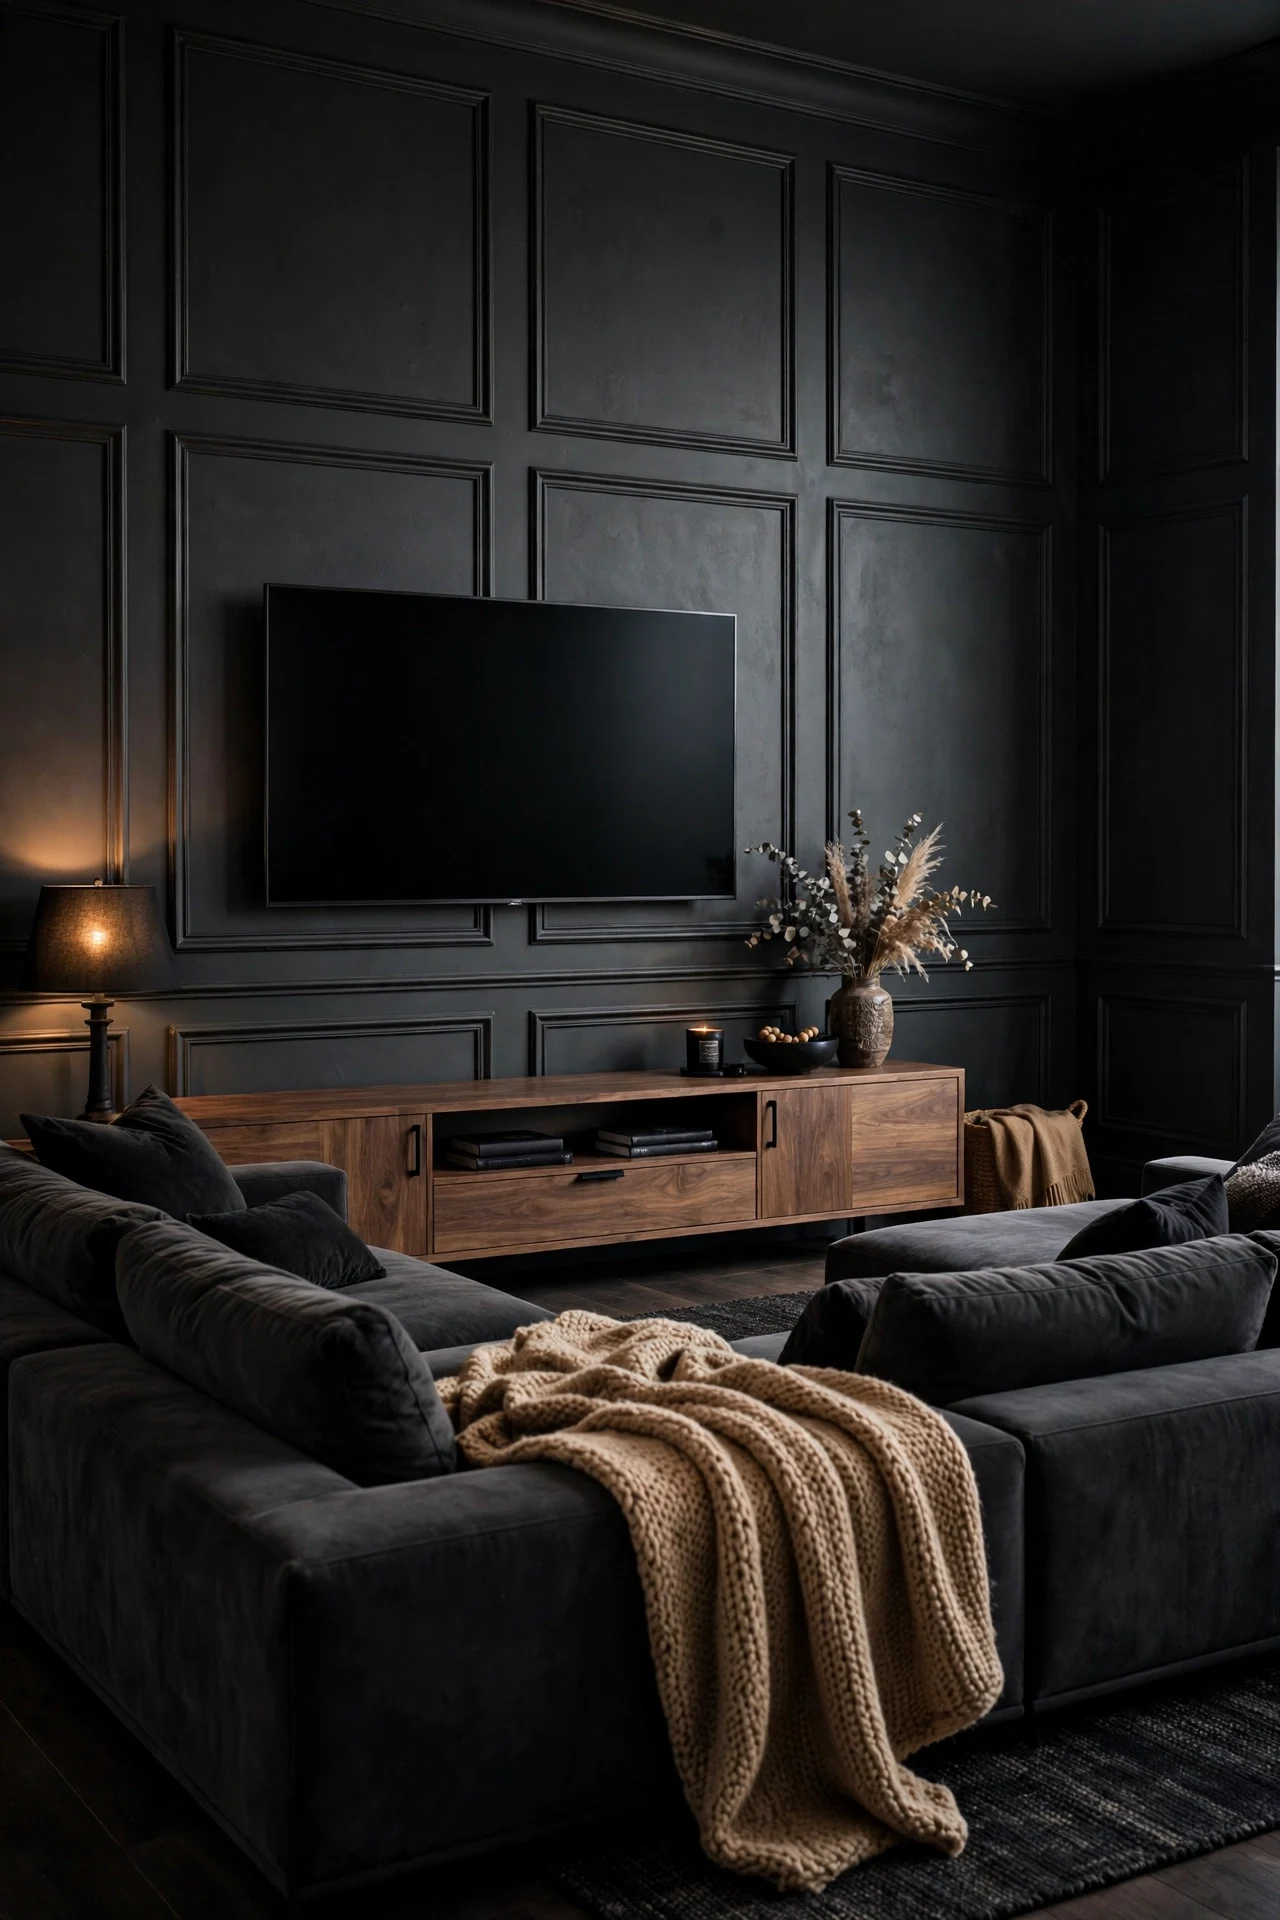
The media room feels dark, hushed, and built for film nights.
Light absorption is the principle: charcoal frames and wall share one matte finish, so screen glare has nowhere bright to bounce. Shadow still models each rectangle under lamplight, keeping the wall architectural rather than flat black. Camel and walnut accents stop the darkness from feeling cold.
Paint frames and wall in Sherwin-Williams Iron Ore using a matte cabinet enamel for durability. Roll the final coat vertically in one direction, because matte charcoal shows every lap mark under side light.
💡 Quick Win: Paint the screen wall charcoal first.
20. Reclaimed Walnut Trim Frames in a Living Room
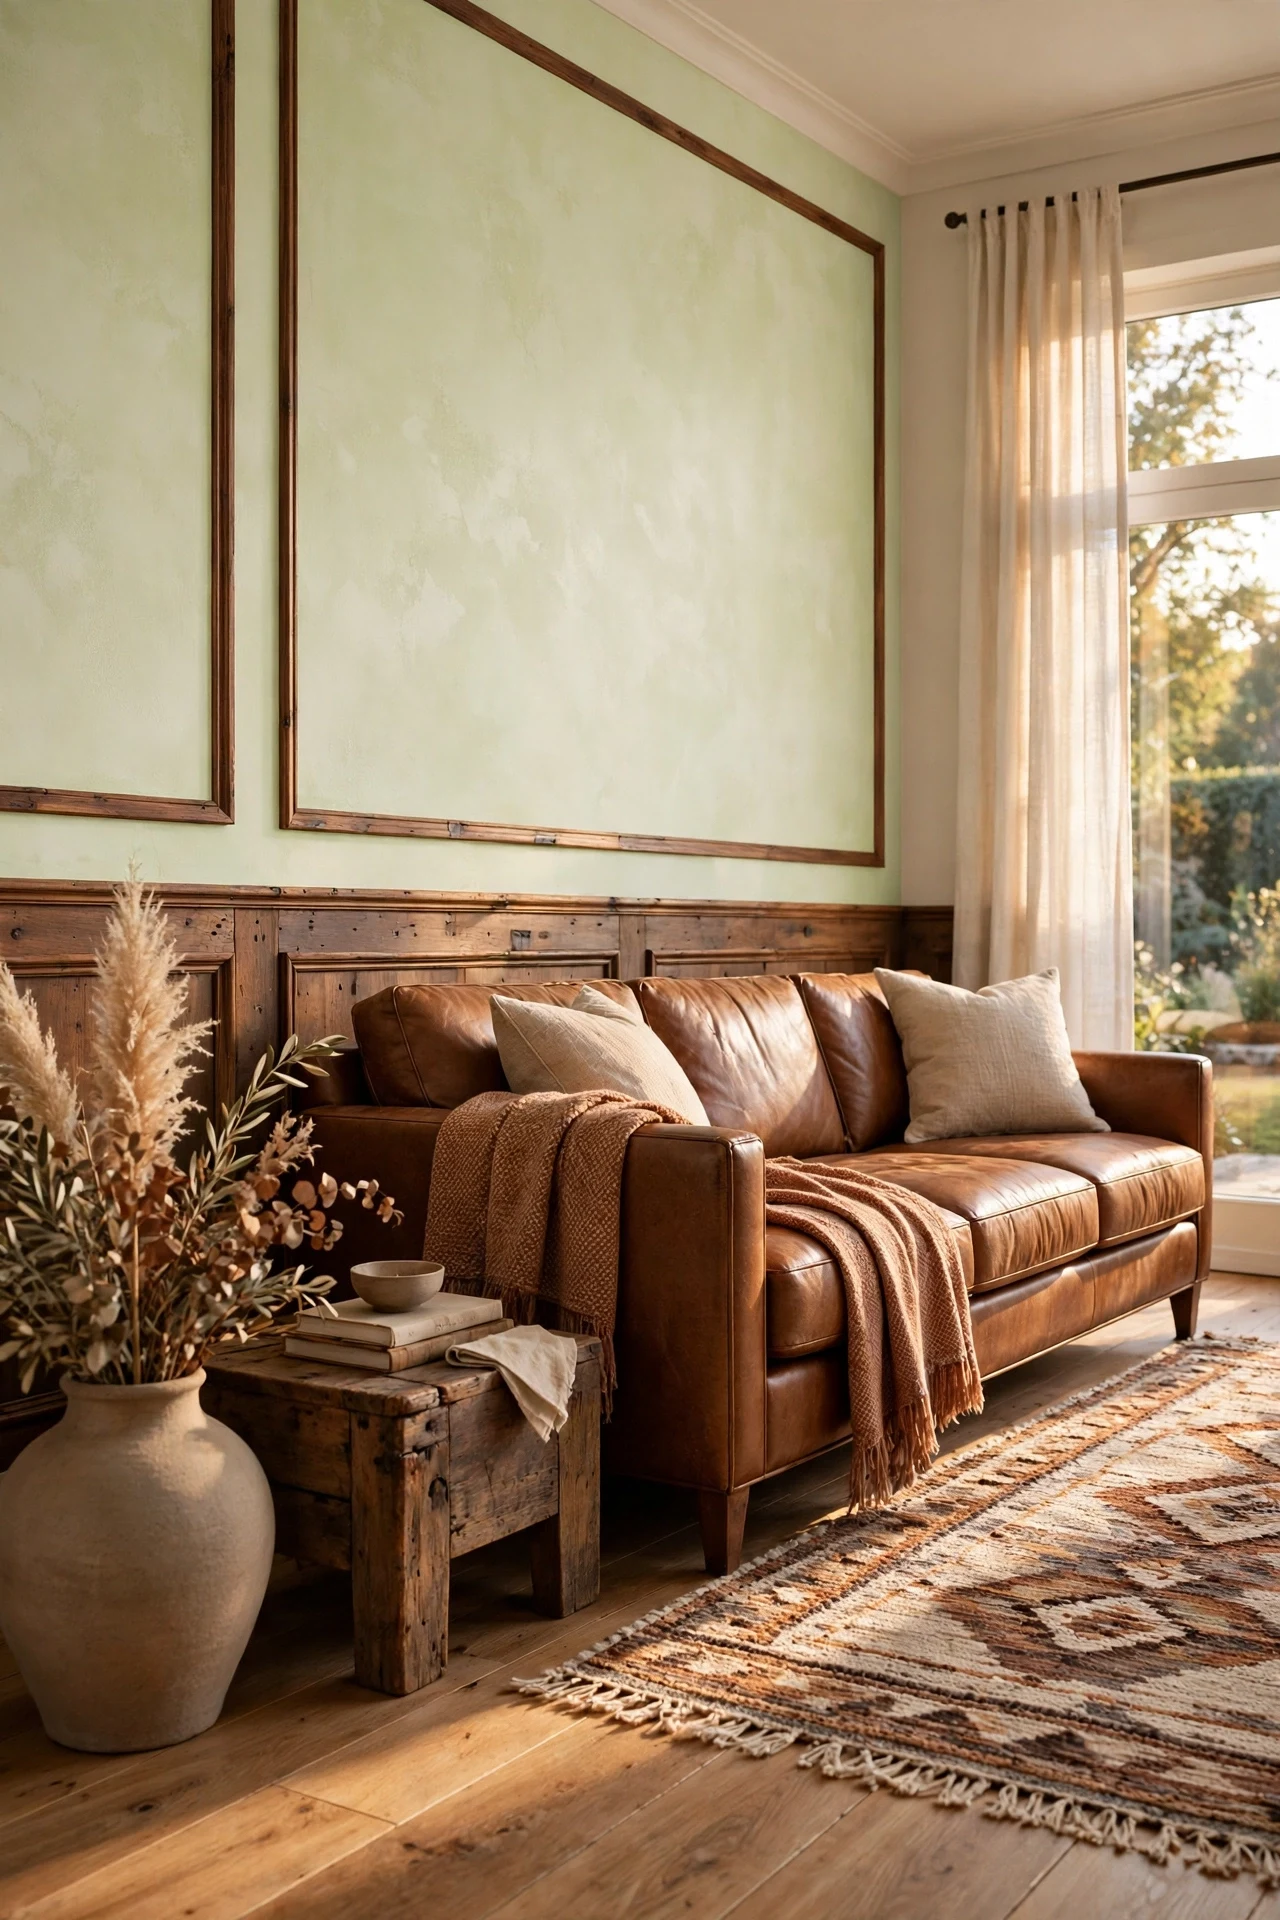
The living room feels storied, warm, and touched by hands.
Patina is the material principle: salvaged walnut carries nail marks, tonal variation, and softened edges that new molding cannot imitate. Against flat limewash, that irregular grain becomes the room's only pattern. Slim profiles keep reclaimed timber from reading heavy or rustic-cliché.
Source salvaged walnut trim from an architectural salvage yard, then de-nail and sand it lightly with 220-grit before mounting. Seal with clear matte hardwax oil so old marks stay visible under protection.
21. Narrow Picture Frame Panels on a Compact Hallway Landing

The landing feels efficient, calm, and larger than its footprint.
Scale adaptation is the principle on a landing: narrowing frames to eighteen inches keeps margins equal on a short wall, where standard widths would crowd. Tall, slim rectangles also echo the stair's vertical rise. One color throughout stops the small wall from fragmenting into pieces.
Cut these frames from slim three-quarter-inch MDF molding rather than standard wider stock, which would overwhelm the wall. Use a narrow-frame layout taped out first and live with it for a full day before cutting.
💡 Quick Win: Tape slim frames up and check tomorrow.
22. Banquette Backed by Picture Frame Panels in a Breakfast Nook
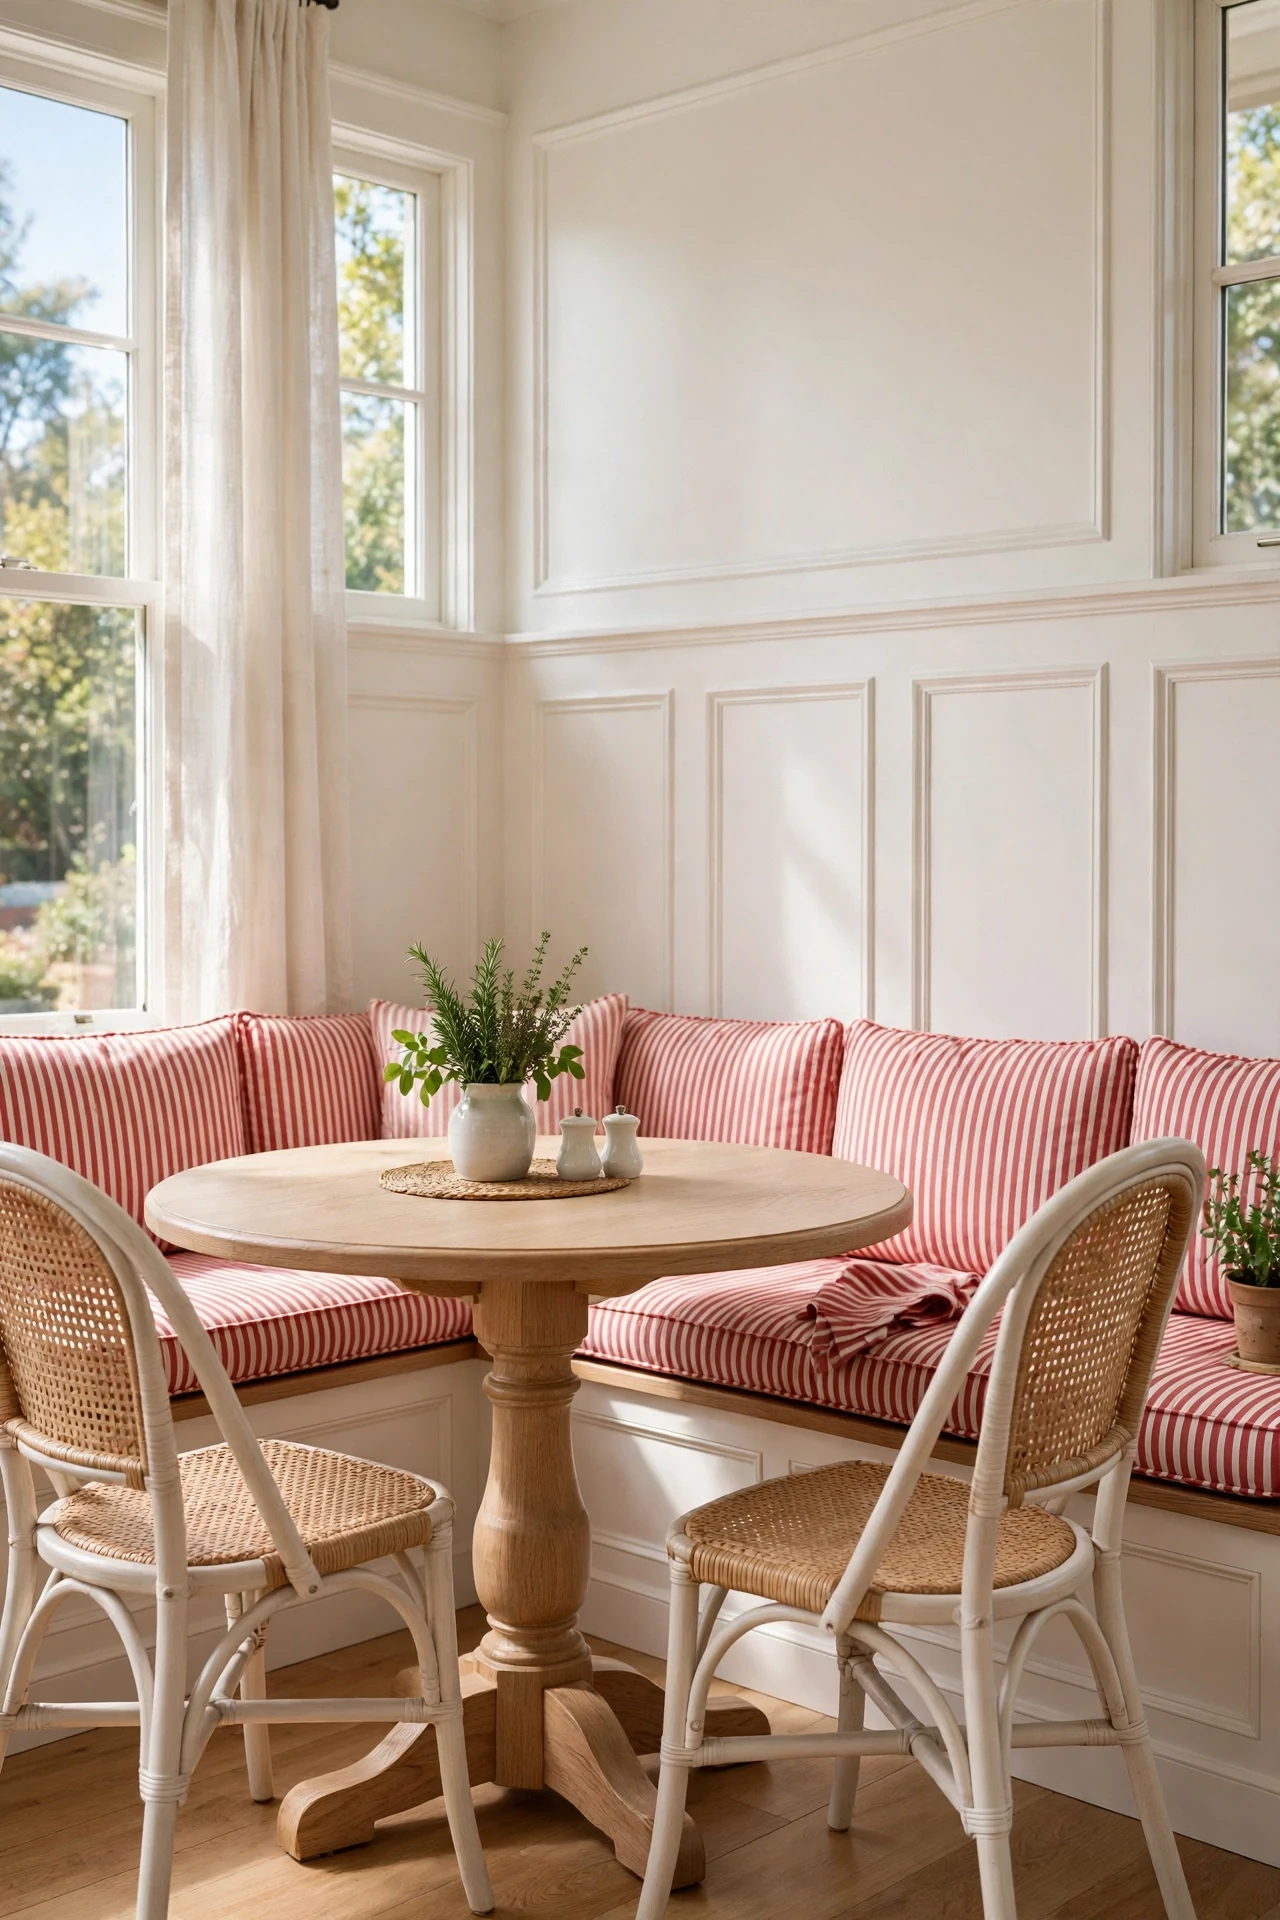
The nook feels cheerful, compact, and ready for coffee.
Continuity makes built-in seating read custom: carrying the same frames behind the banquette ties furniture and wall into one carpentry story. Panel tops align just above cushion height, protecting paint where shoulders rest. A round table softens all those rectangles with one clear curve.
Build banquette backs eighteen inches above the seat and cap the frames with a wide poplar ledge for mugs. Finish panels in scrubbable satin enamel, because breakfast nooks collect jam, coffee, and crayon marks weekly.
23. Leaning Mirrors Above Picture Frame Panels in a Dressing Area
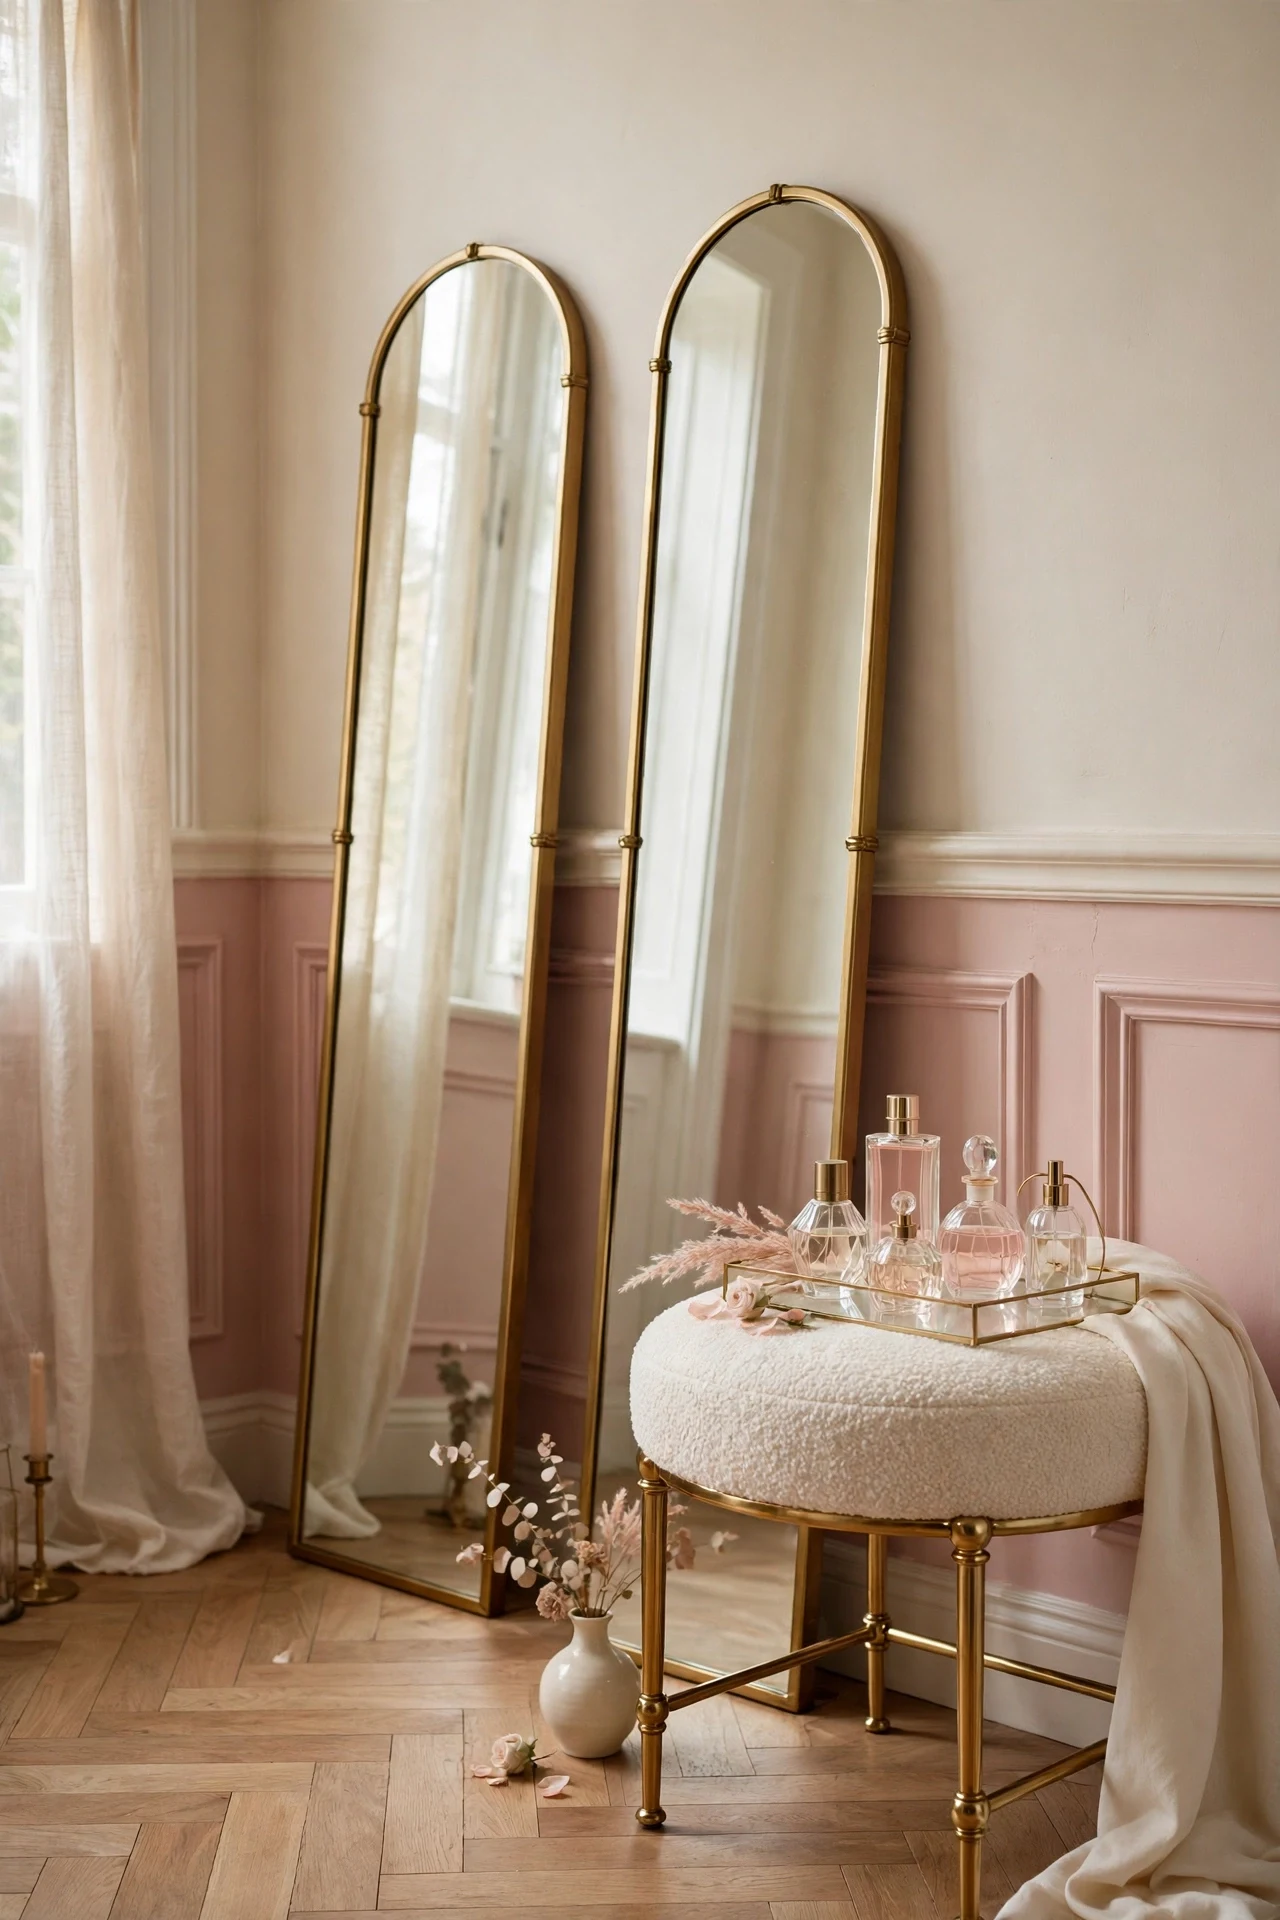
The dressing area feels soft, reflective, and unhurried in mornings.
Reflection multiplies the architecture here: mirrors leaned above the rail bounce the framed panels back into the room, doubling their effect without more molding. Arched tops contrast the rectangles below, adding one graceful curve. Blush paint keeps the doubled geometry feeling gentle, not formal.
Lean tall arched mirrors on the rail and secure each with a brass safety strap screwed into a stud. Never rely on weight alone, because a leaning mirror above seating must be anchored against slipping.
💡 Quick Win: Lean one arched mirror up today.
24. Backlit Mirror Glow Over Bathroom Picture Frame Panels
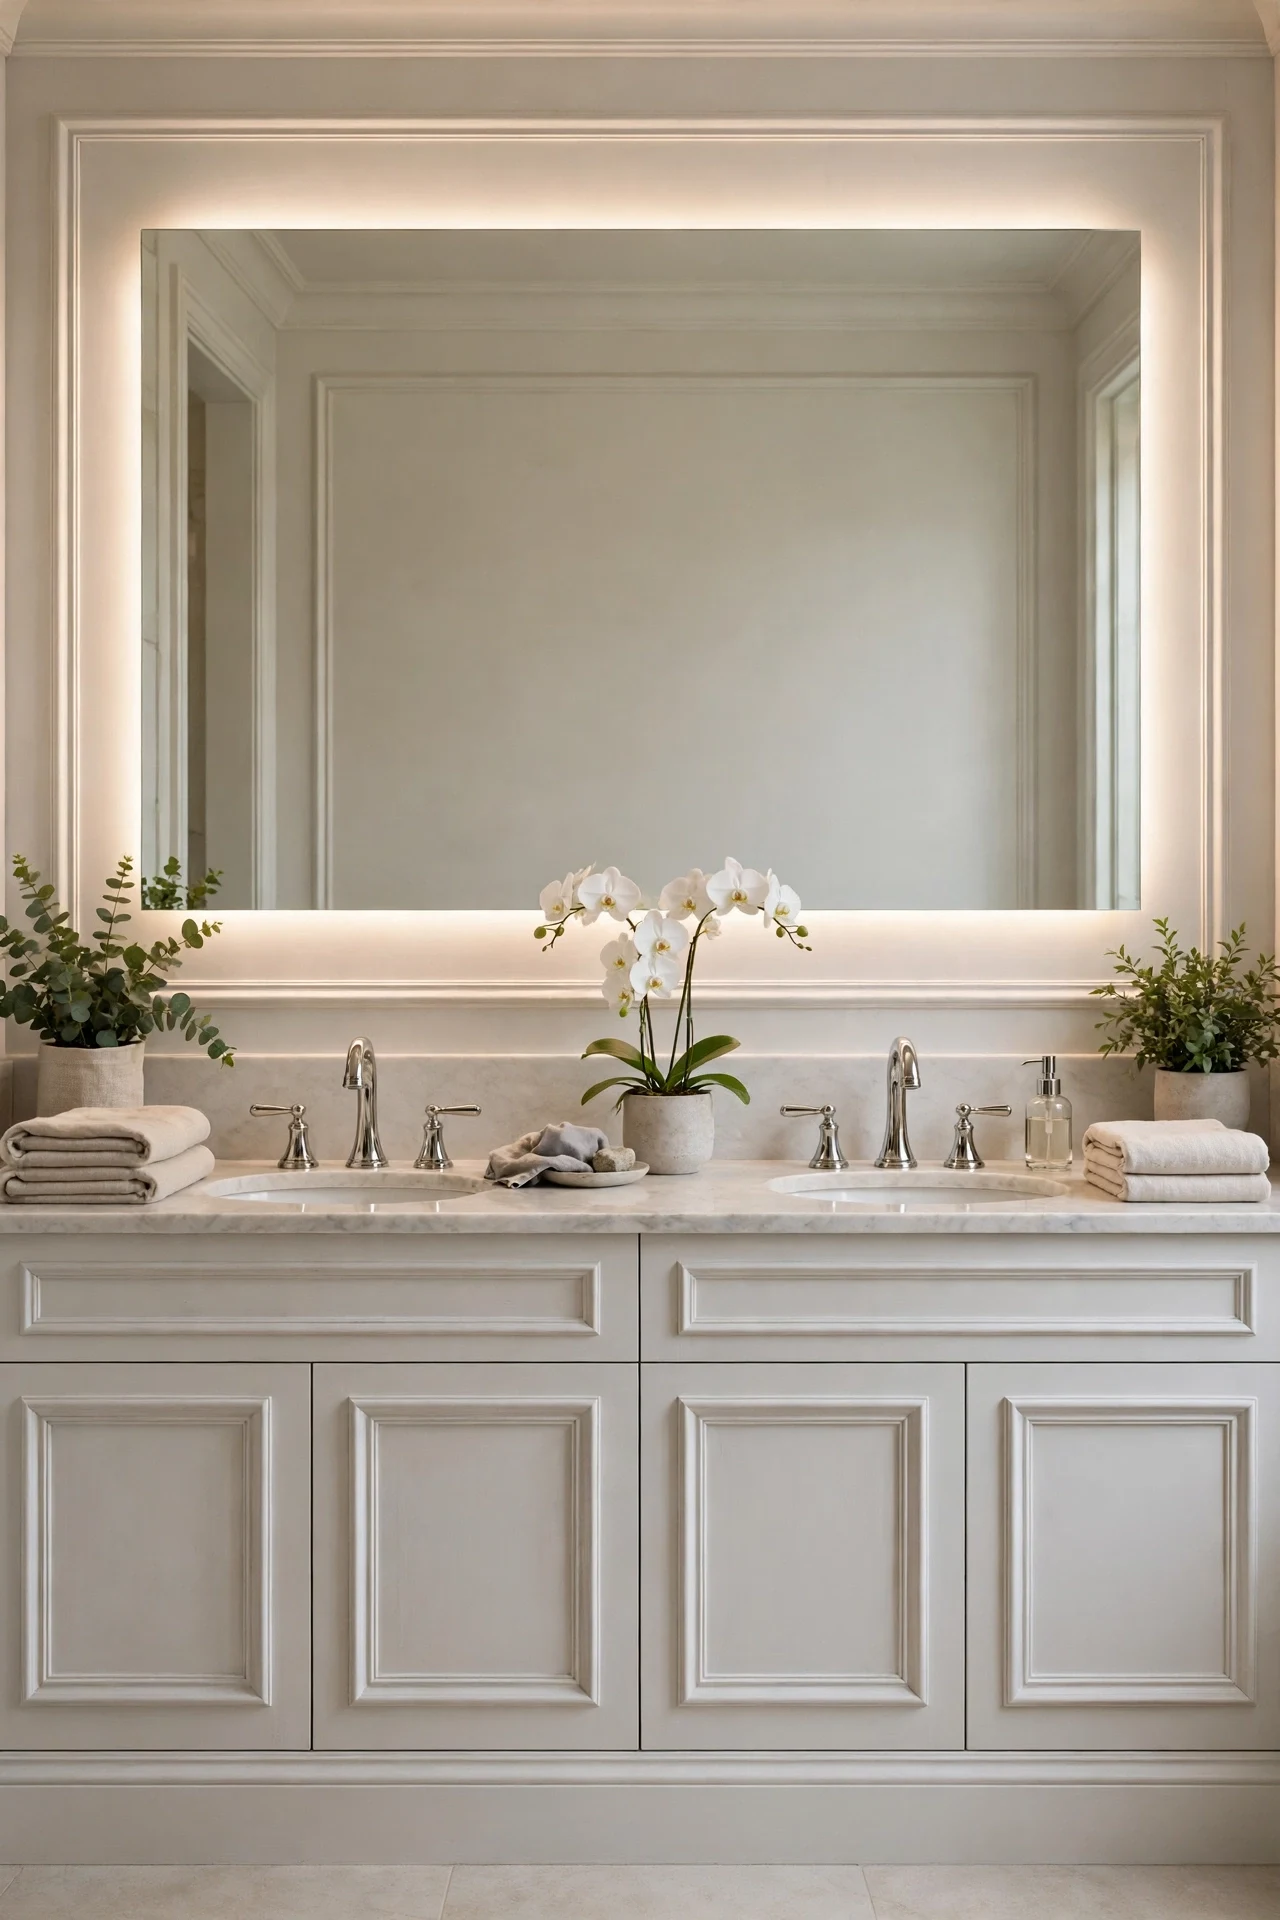
The bathroom feels luminous, steamy, and calm before mirrors clear.
Even, shadowless light changes how molding reads: a backlit mirror washes the panels uniformly, so their shape, not their shadow, provides the detail. That suits a bathroom, where task light matters more than drama. Stone-white paint keeps the glow neutral against skin tones.
Choose a 3000K LED mirror with a built-in defogger and center it across two frames, not one. Centering across a stile line looks accidental, so measure the mirror width against the panel layout before ordering.
25. Terracotta Picture Frame Panels in a Sunroom
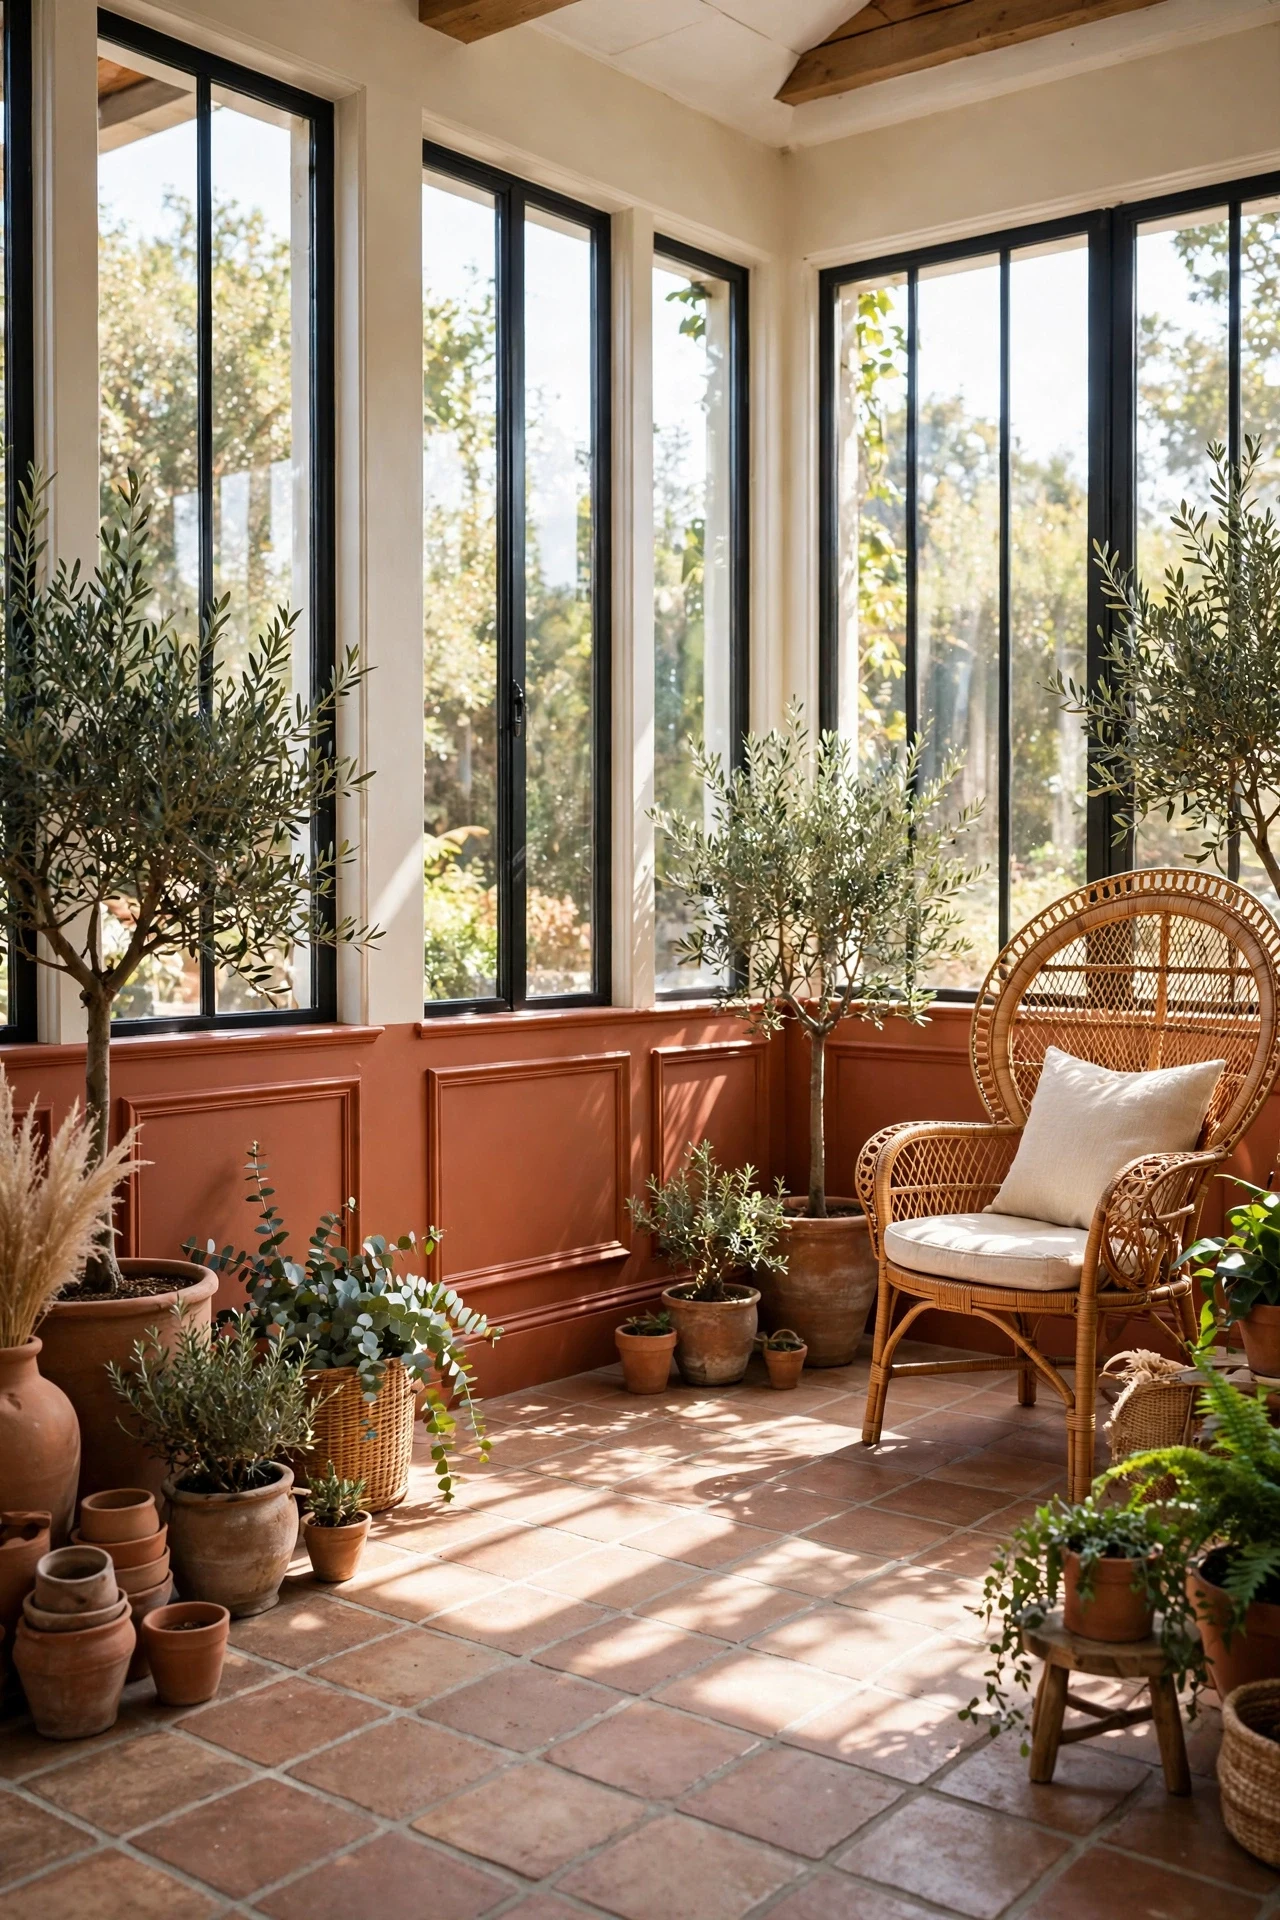
The sunroom feels earthy, sun-baked, and warm through glass.
Saturated color needs structure, and the frames supply it: terracotta spread flat would overwhelm, but divided into rectangles it reads as a series of warm panels. The geometry also grounds a glass-heavy room full of plants. Satin sheen reflects enough sun to keep the hue lively all day.
Paint the frames in Behr Terracotta Clay using exterior-grade satin enamel, even indoors. Sunrooms fade and bake interior paint quickly, so the tougher resin protects the color through summer heat cycles.
💡 Quick Win: Start with one terracotta panel behind plants.
26. Fluted Insert Inside Picture Frame Panels in a Dining Room
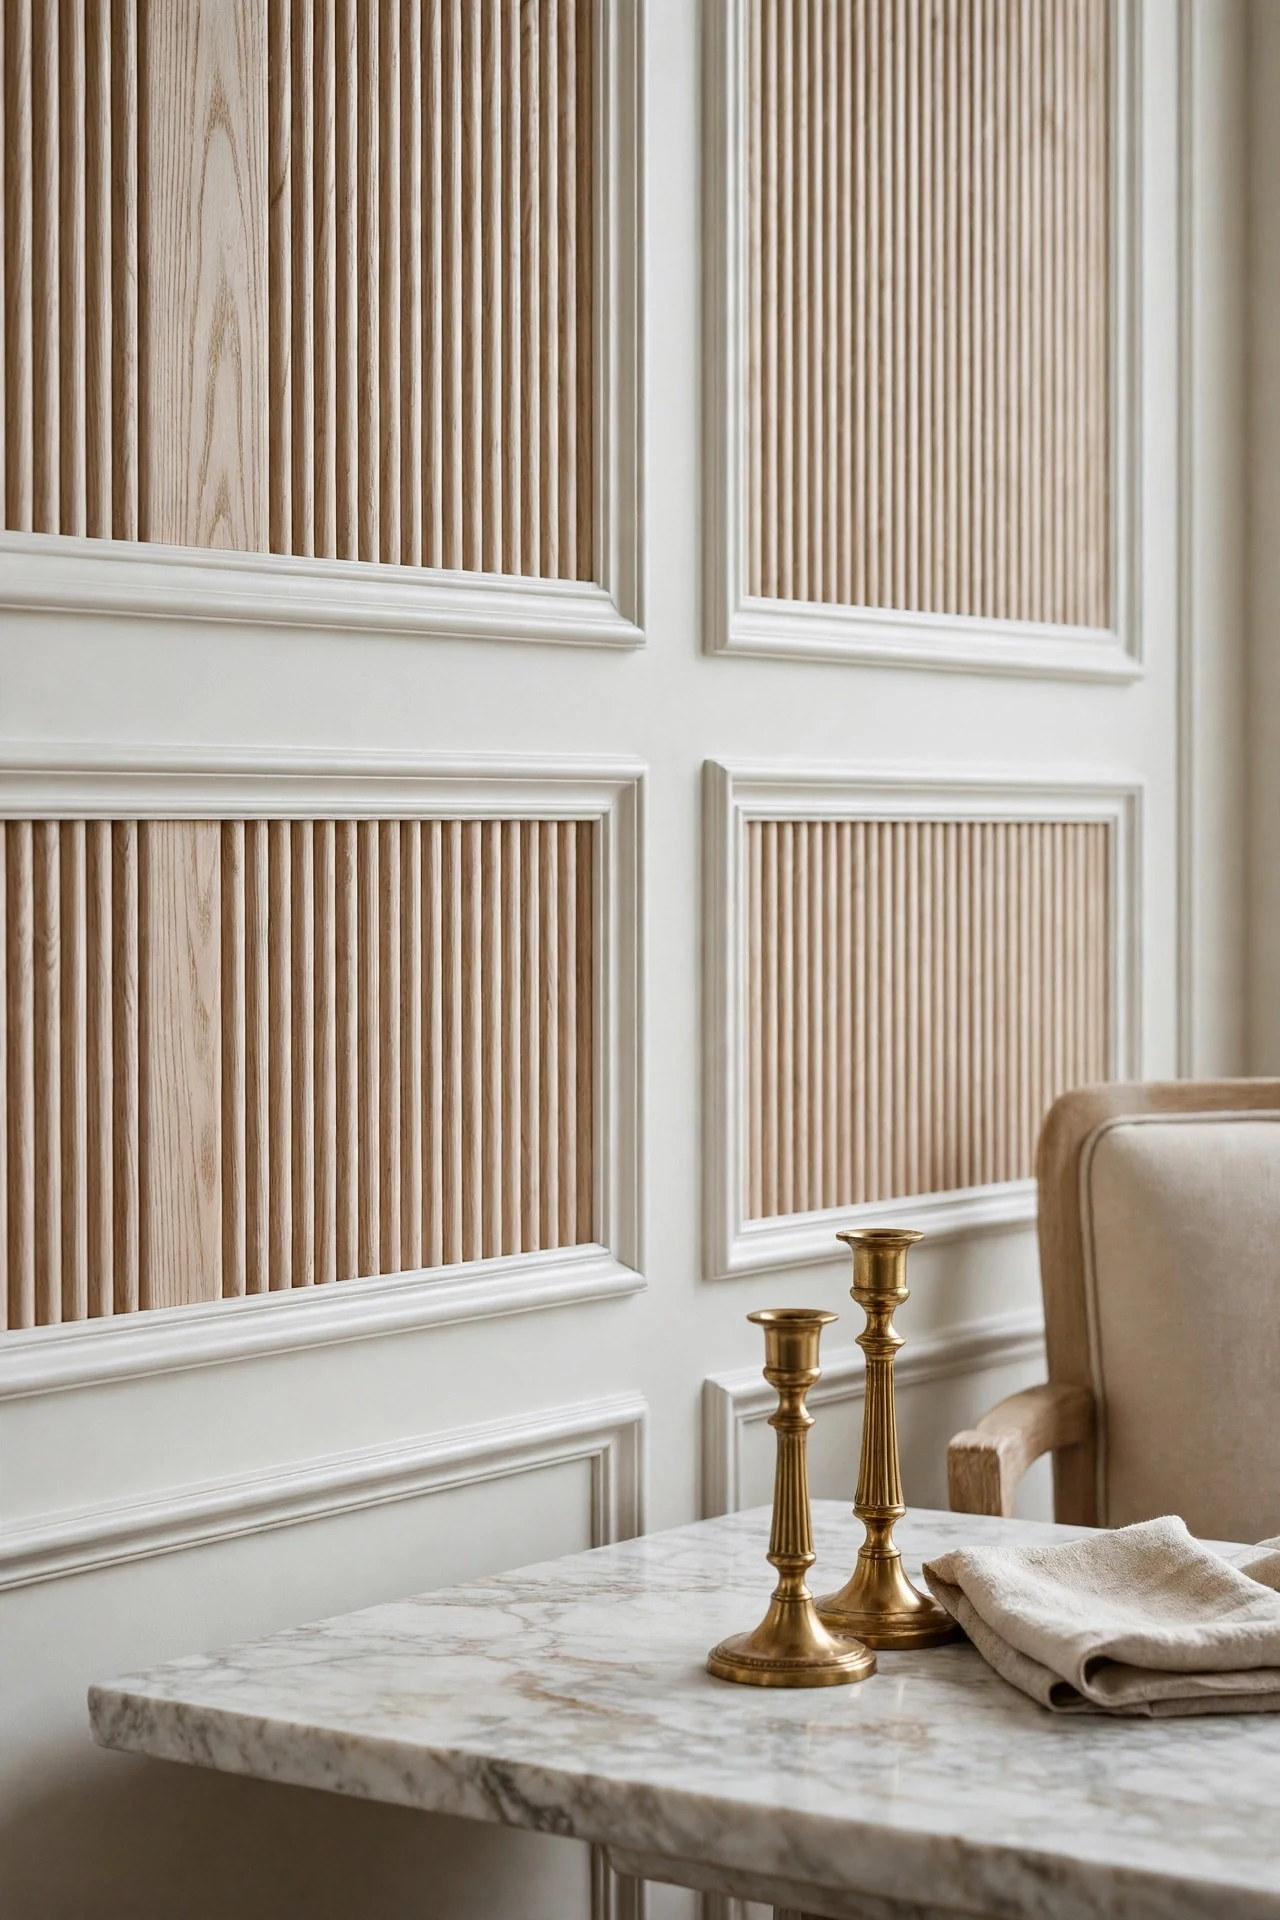
The dining wall feels tailored, tactile, and quietly expensive.
Texture contrast is the principle: fluted inserts add fine vertical grain inside the smooth outer frame, creating two scales of detail on one wall. The eye reads the large rectangle first, then the reeds. That hierarchy feels crafted in a way flat picture frame wainscoting ideas rarely achieve.
Line each frame with flexible fluted MDF tambour sheet, cut on a table saw and glued inside the molding before painting. Pre-paint the tambour separately so its grooves keep crisp shadow instead of filling with brushed paint.
27. Picture Frame Wainscoting on a Staircase Wall Following the Rake
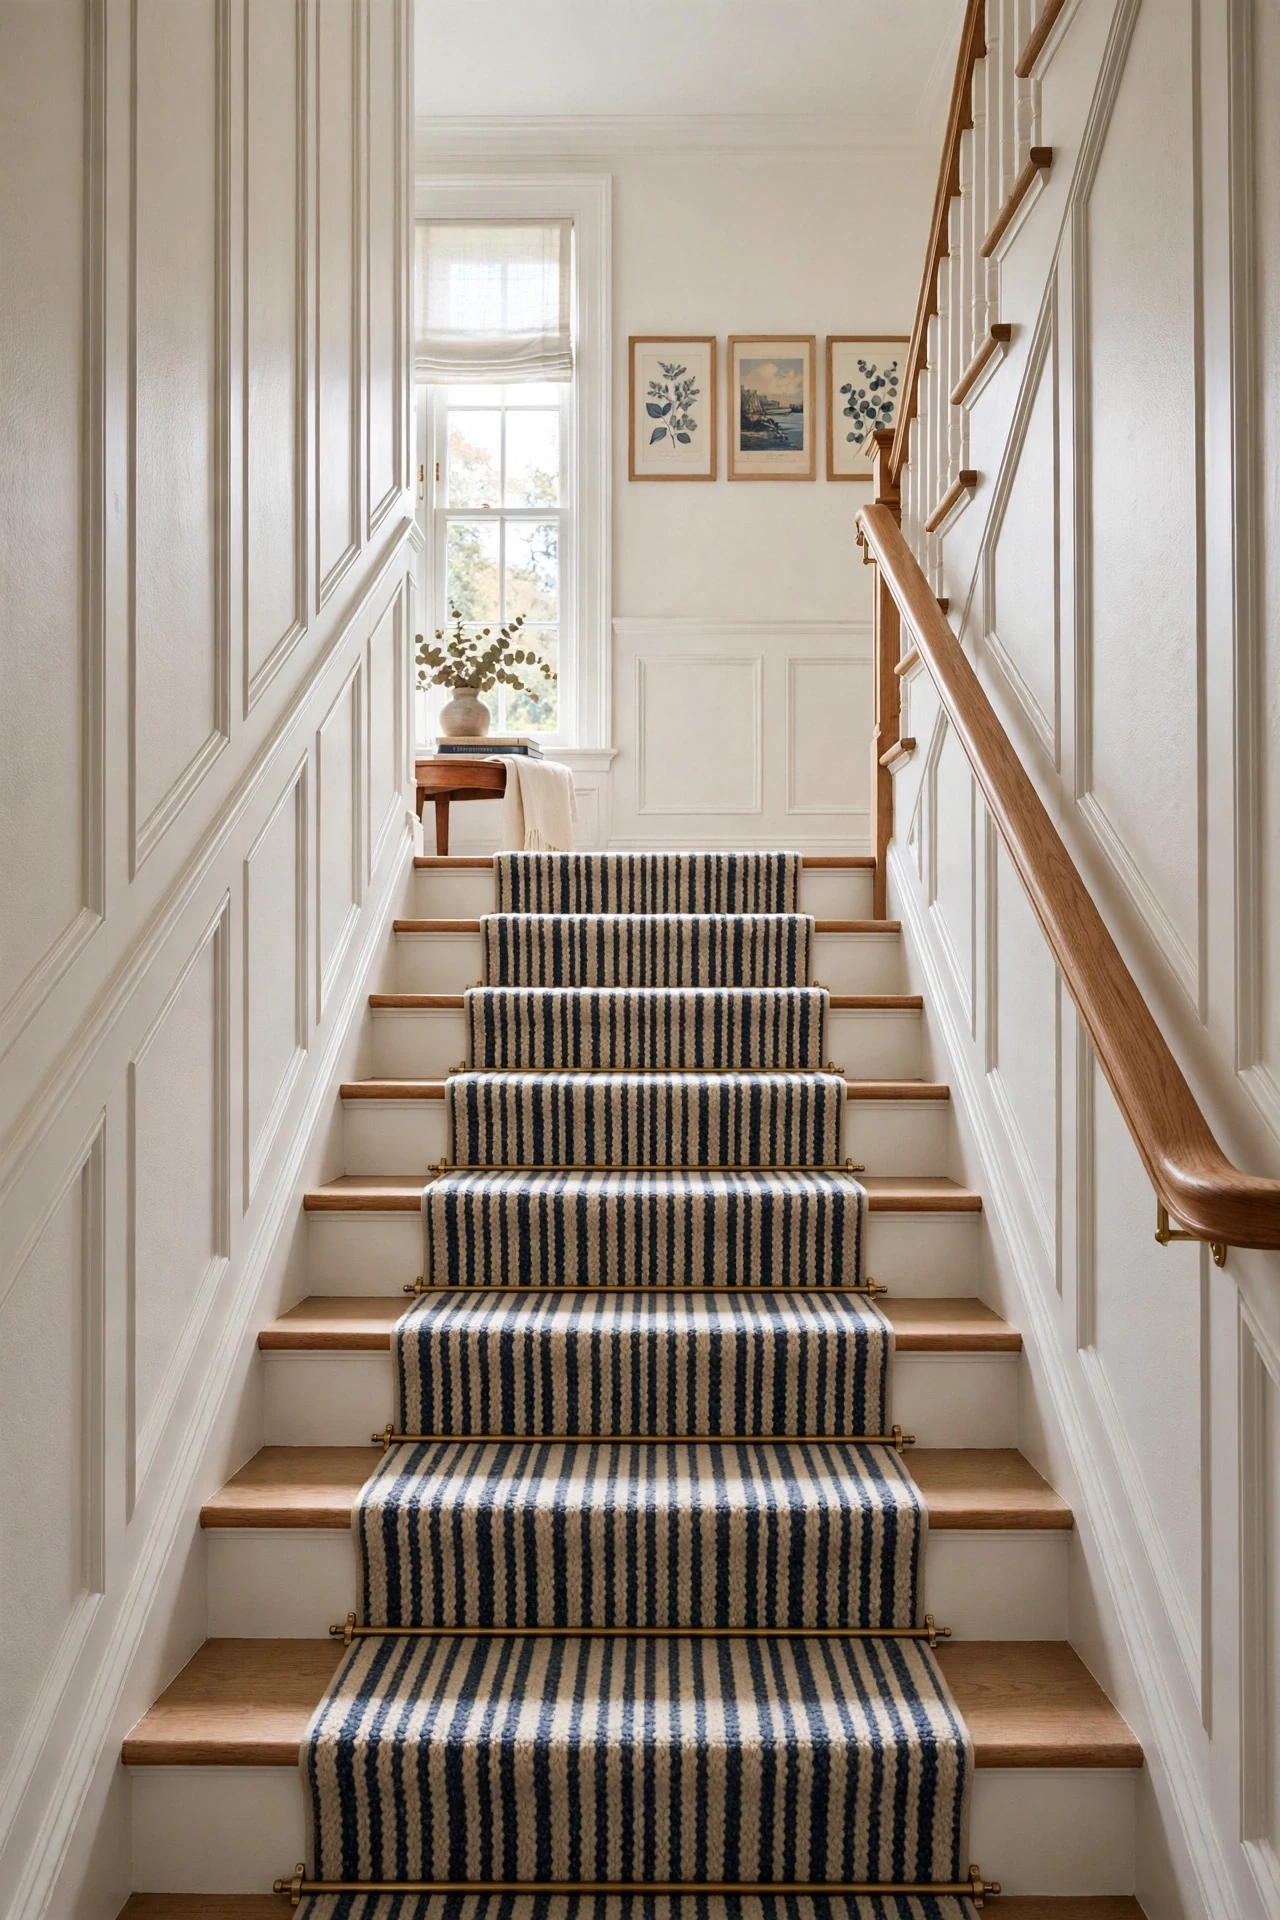
The staircase feels sweeping, classic, and deliberate on every step.
Diagonal geometry is the challenge this idea solves: tops of the frames run parallel to the handrail while stiles stay vertical, turning an awkward sloped wall into measured pattern. That rake line creates movement, leading the eye upward. Consistent spacing keeps the angle feeling architectural, not improvised.
Snap chalk lines parallel to the handrail first, then scribe each angled top rail using a digital angle finder. Cut the raked pieces on a miter saw set from that measured angle, never from a guessed standard.
💡 Quick Win: Chalk the rake line this evening.
28. Grasscloth Inserts Inside Picture Frame Panels in a Home Office
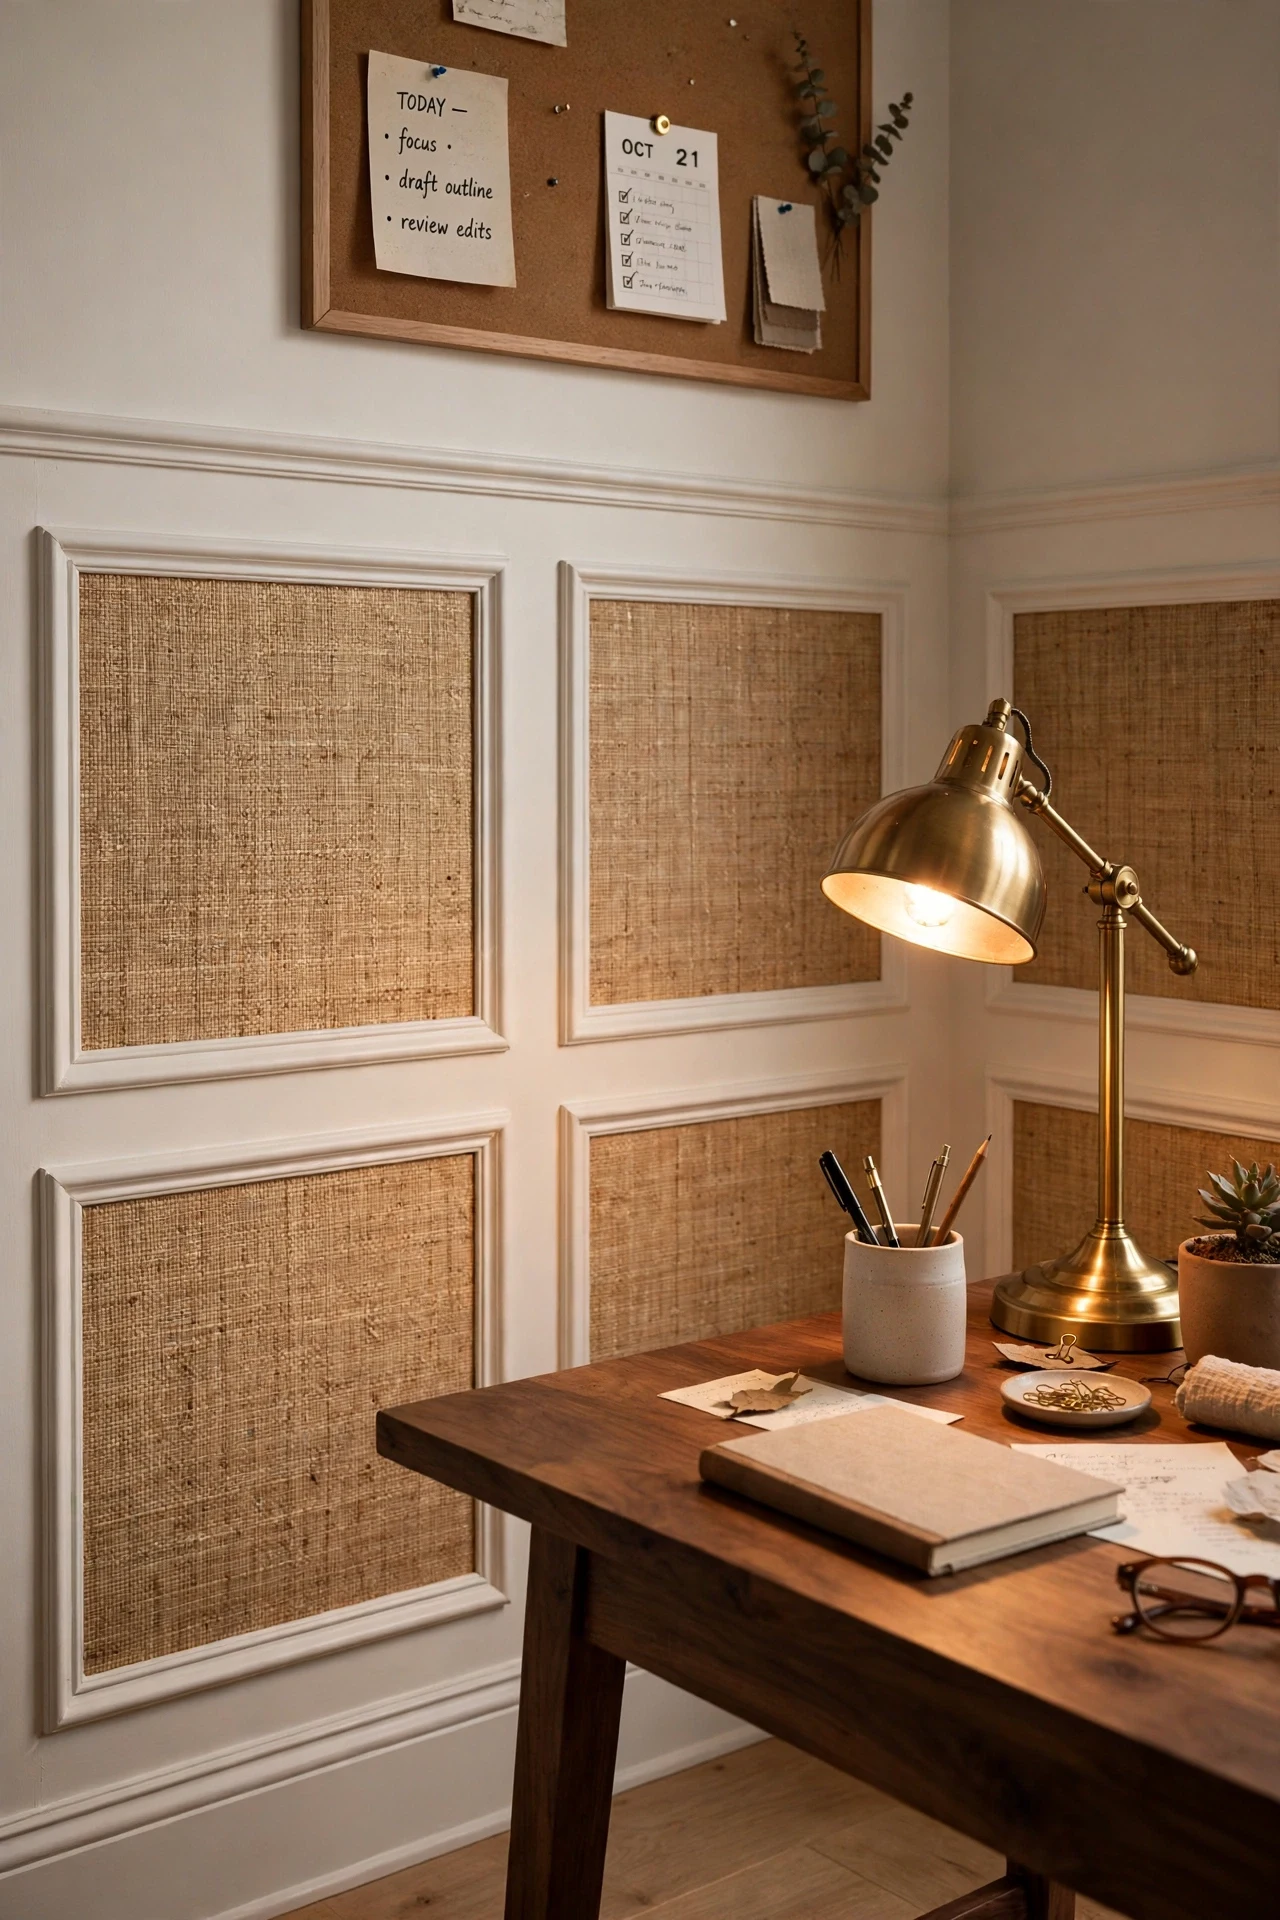
The office feels focused, textured, and warm under lamplight.
Natural fiber inside a painted frame layers two textures at once: woven grasscloth softens the geometry and absorbs sound in a hard-surfaced office. Its tonal variation also hides the small scuffs a chair throws at walls. The frame edge gives grasscloth a clean border wallpaper alone never gets.
Hang grasscloth with heavy-duty clear wallpaper adhesive inside each frame after the molding is painted and cured. Trim excess with a fresh snap-off blade against the molding edge, changing blades often so fibers cut, not tear.
29. Belgian Linen Curtains Layered Over Nursery Picture Frame Panels
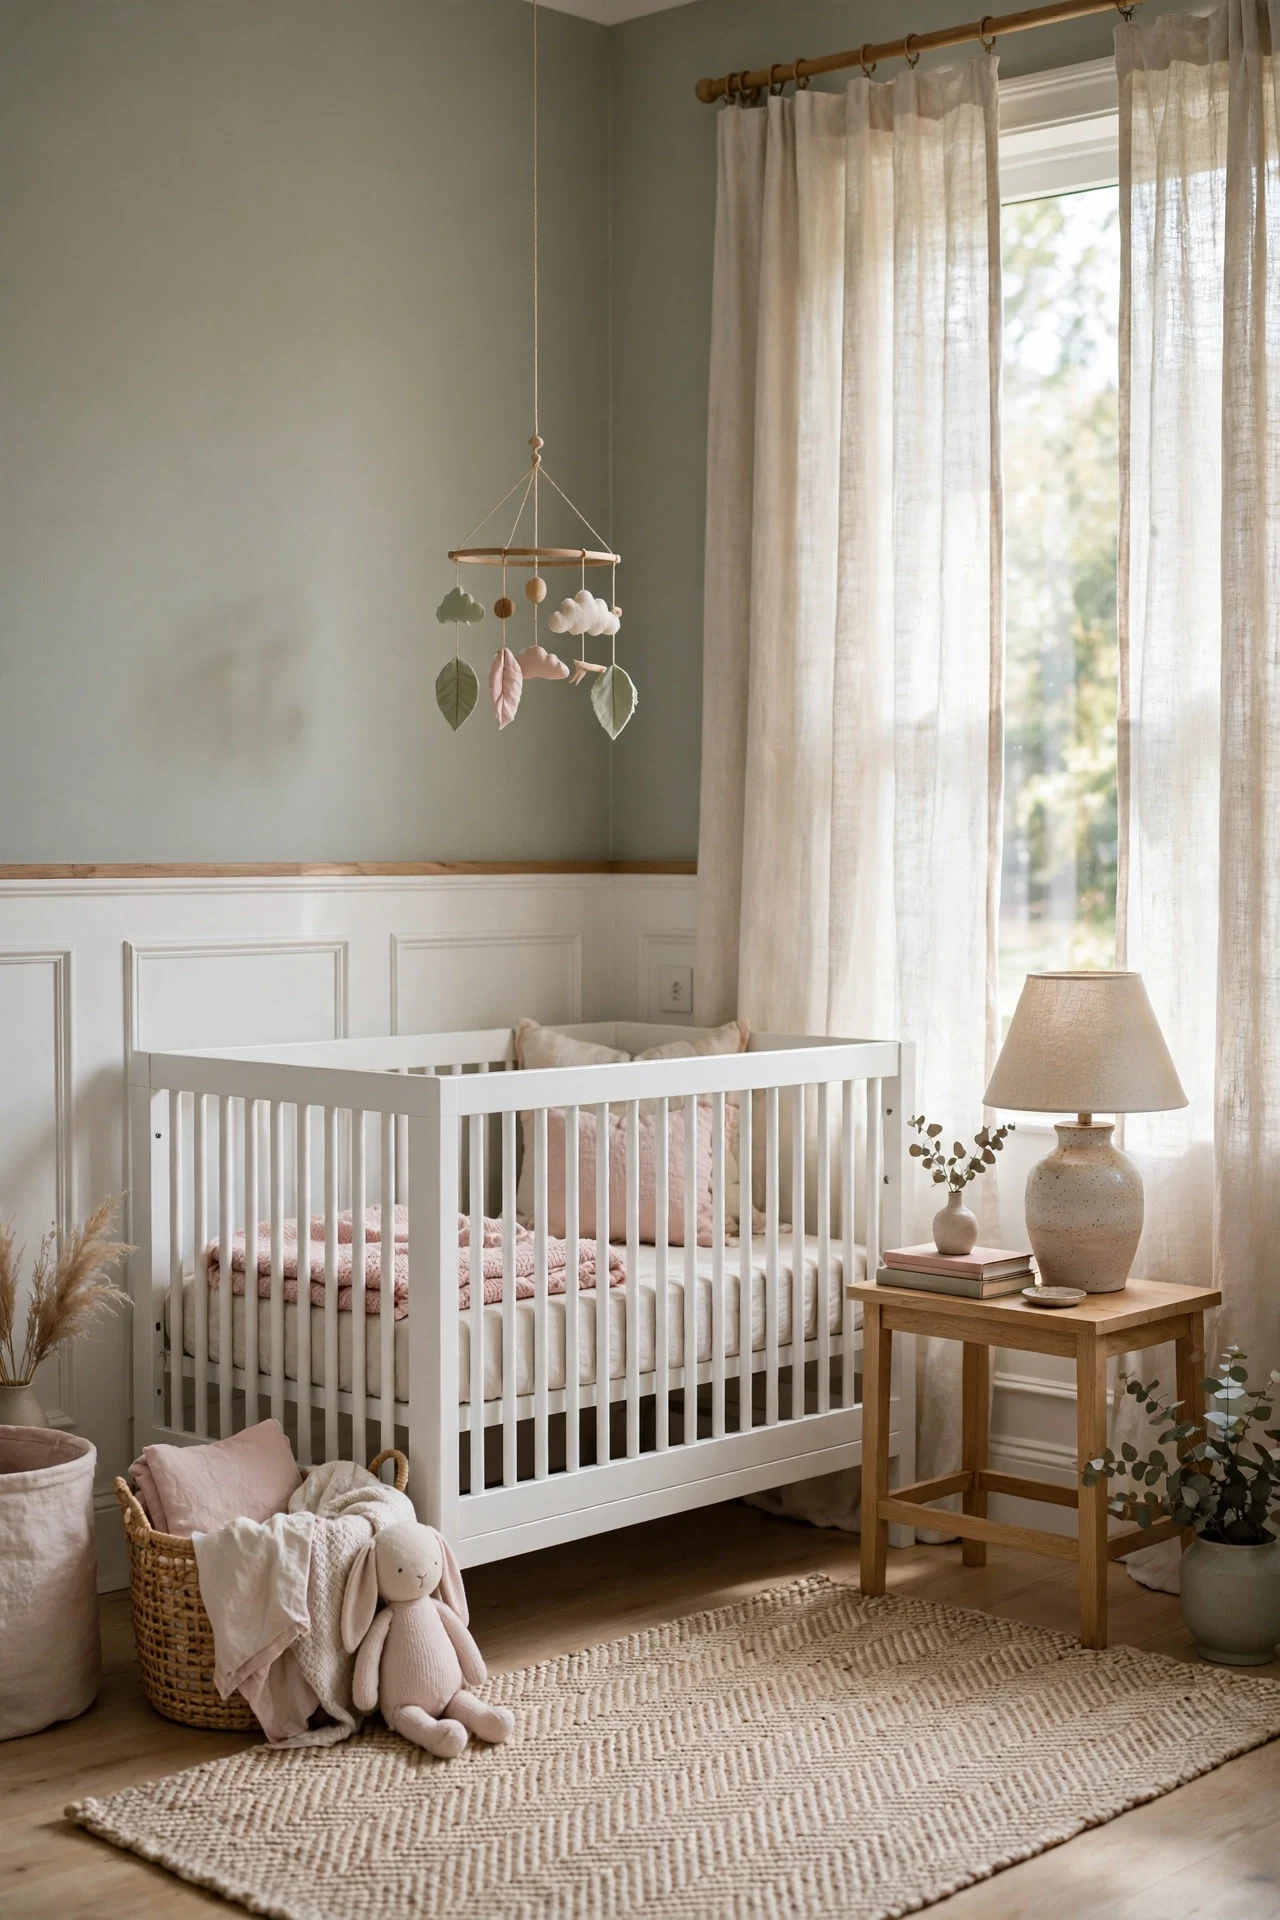
The nursery feels tender, hushed, and soft against small hands.
Layering textiles over hard molding is the principle: undyed linen curtains fall across the upper wall and soften the framed panels' crisp geometry. The wainscoting stays permanent while curtains, bedding, and art change as the child grows. Low panels also protect paint from crib rails and toy traffic.
Hang Belgian linen curtain panels on a ceiling-mounted track so fabric falls straight over the wall without a protruding rod. Keep the rail and frames matte, because shiny paint in a nursery reads cold under soft textile light.
💡 Quick Win: Swap one curtain pair for linen.
30. Black Picture Frame Wainscoting Ideas in a Laundry Room
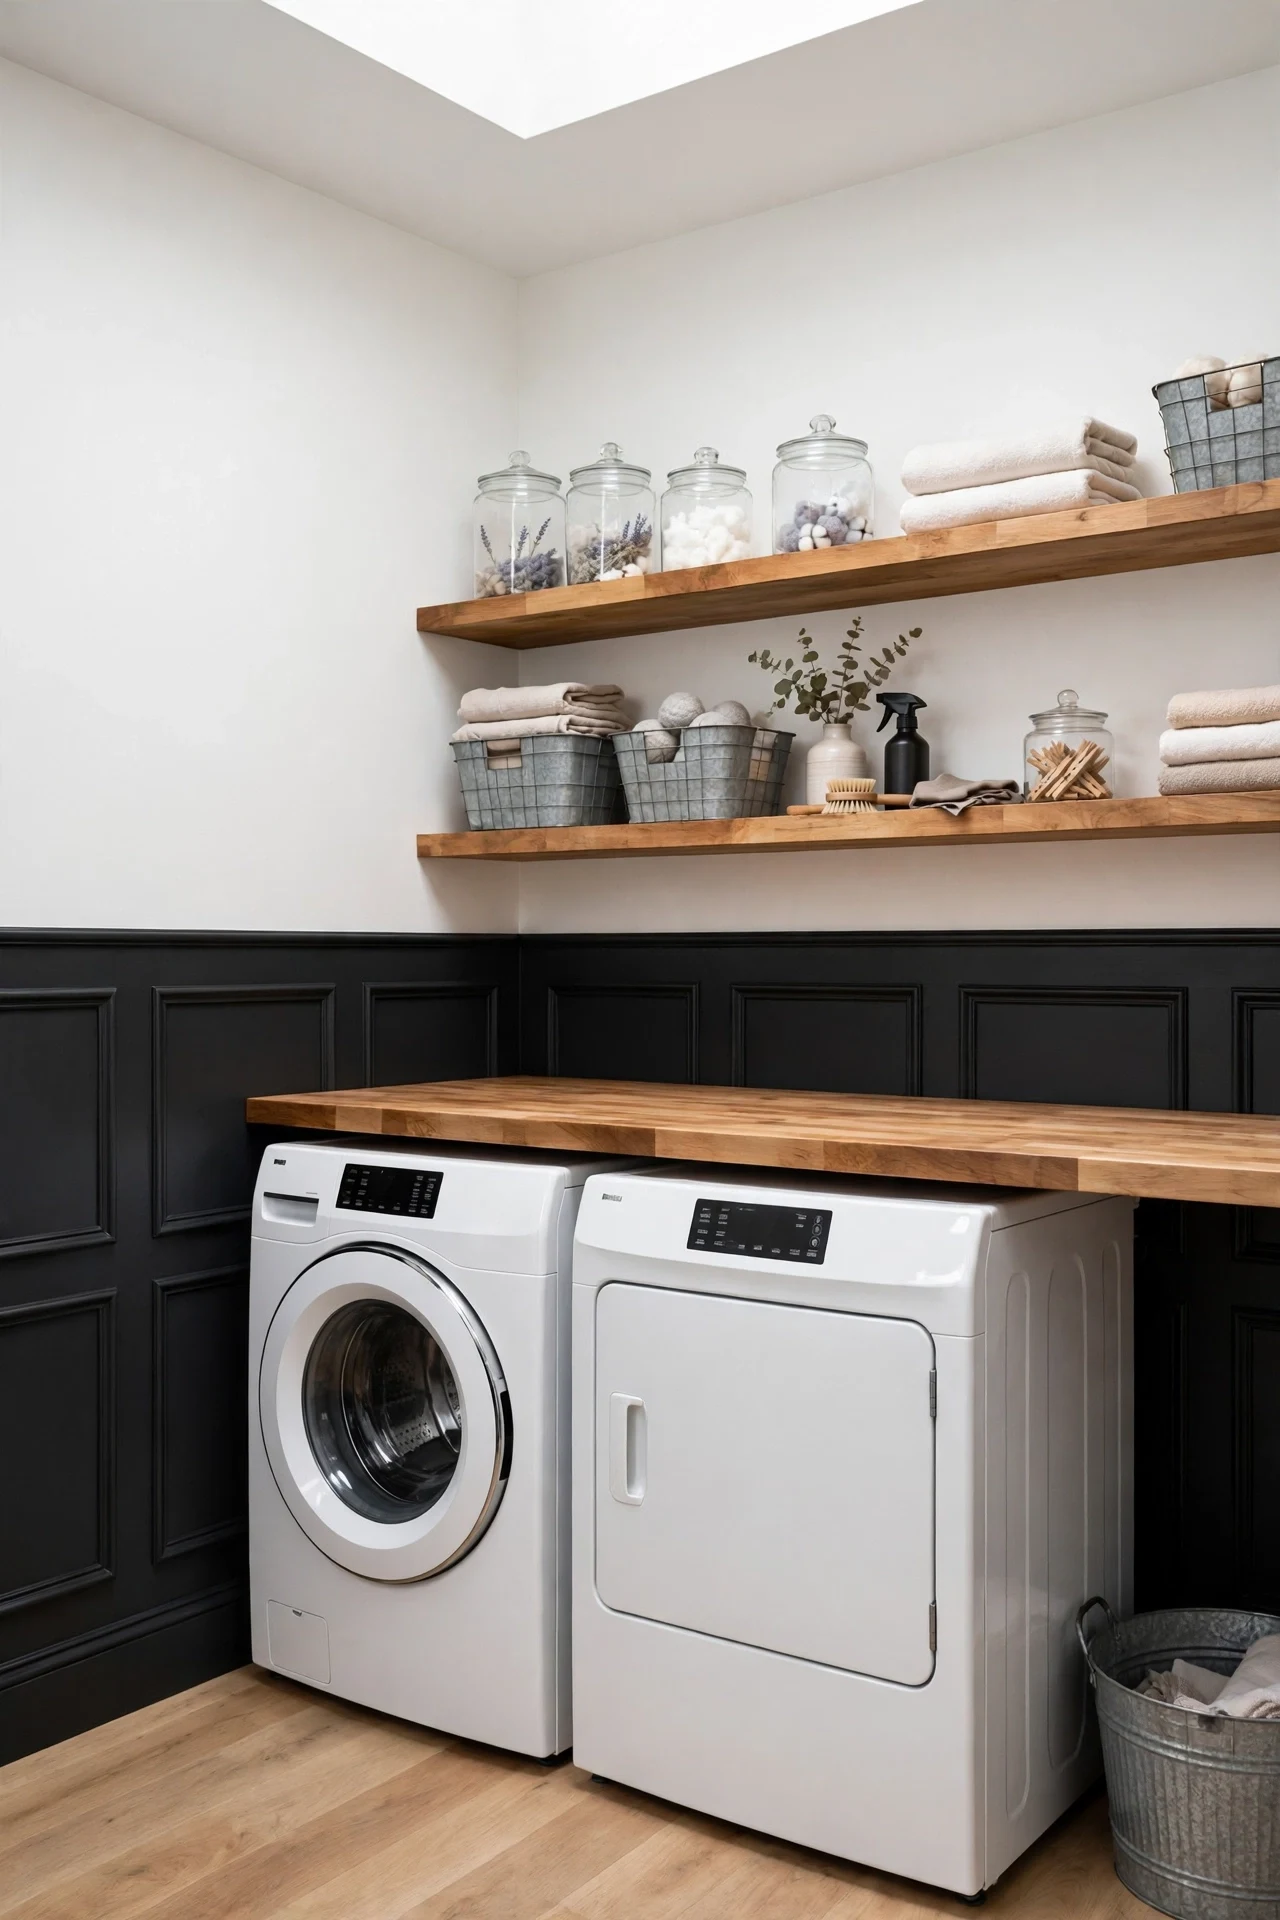
The laundry feels crisp, graphic, and far tidier than chores.
High contrast is the principle in a utility room: black rectangles against white walls and appliances turn a purely functional space into a graphic composition. The frames also divide a long machine wall into bays, one per task. Matte black hides the scuffs laundry rooms inevitably collect.
Paint the frames with a black bonding primer under two coats of matte trim enamel, sanding lightly between coats with 320-grit. That sanding step is what keeps a dark, high-traffic finish from showing every roller texture.
How to Start Your Picture Frame Wainscoting Transformation
Start with paint and one wall. Prime the entry wall and paint it Benjamin Moore White Dove before any molding goes up, because that single tonal foundation makes every frame you add afterwards land in the right color family, undertone, and sheen from the very first cut.
The common mistake is spacing frames by eye, leaving uneven margins that the eye catches instantly, even when the molding itself is perfectly level. Fix it by dividing the wall mathematically, keeping four-inch margins at corners, rail, and baseboard, and taping the full layout before cutting anything at all.
Three sub-$50 starters: a ten-foot length of pre-primed poplar picture molding ($28) from Home Depot, a Bosch laser measure ($49) for exact wall divisions, and a quart of Benjamin Moore White Dove ($24) for the foundation coat and touch-ups afterwards.
One framed wall takes a weekend and $150 to $350 in molding and paint, including primer, caulk, and filler. A full room runs $500 to $900 and two weekends, while real wood trim, professional spraying, or marble rails can double the materials cost and timeline.
Frequently Asked Questions About Picture Frame Wainscoting
What is the difference between picture frame wainscoting and board-and-batten?
Picture frame wainscoting applies slim molding in rectangles onto a flat wainscoting wall, so the panel center is simply painted drywall. Board-and-batten fixes wide vertical boards with battens over every seam, reading bolder and more rustic. Picture frame suits traditional, transitional, and modern rooms because its profile is shallow, usually under one inch deep.
What colors work best for picture frame wainscoting ideas in small rooms?
Warm whites work best in small rooms: Benjamin Moore White Dove, Swiss Coffee, and Sherwin-Williams Alabaster keep frames and walls unified while bouncing light. Pale sage such as Evergreen Fog adds color without shrinking the room. Paint frames and wall the same color and sheen so shadow, not contrast, does the dividing.
How much does picture frame wainscoting cost to install?
DIY materials for one wall typically run $150 to $350, with pre-primed MDF molding at roughly $1 to $2 per linear foot. Poplar costs more, and professional installation usually adds $800 to $1,500 per room. It is one of the cheapest wainscoting ideas per wall because no inset panels or sheet goods are required.
Can I mix picture frame wainscoting with other styles?
Yes, picture frame wainscoting mixes easily with traditional, transitional, coastal, and modern rooms because the rectangle is a neutral classical shape. Pair it with Shaker cabinetry, linen upholstery, or black iron hardware without changing the molding. Keep the profile consistent from room to room so the house reads as one story.
What molding profile works best for picture frame wainscoting?
A small ogee or stepped picture molding, roughly 1.5 to 2 inches wide, works best for most rooms. Brands such as Ekena Millwork and House of Fara sell pre-primed versions that miter cleanly and take paint evenly. Avoid very flat trim, which casts almost no shadow and loses the framed effect entirely.
Ready to Create Your Dream Picture Frame Wainscoting?
From sage entryways and navy studies to fluted dining walls, grasscloth offices, and raked staircases, these picture frame wainscoting ideas covered color, materials, lighting, furniture, accessories, and layout. Starting with one wall is not a compromise; it is exactly how real rooms gain character, one rectangle at a time. Today, tape four-inch margins and one full frame outline on your plainest wainscoting wall and live with it until tomorrow morning. Once low light starts pooling inside those frames, the room will feel older, calmer, and unmistakably more yours. Save your favorite picture frame combinations now, and pin the one you will build first this weekend.