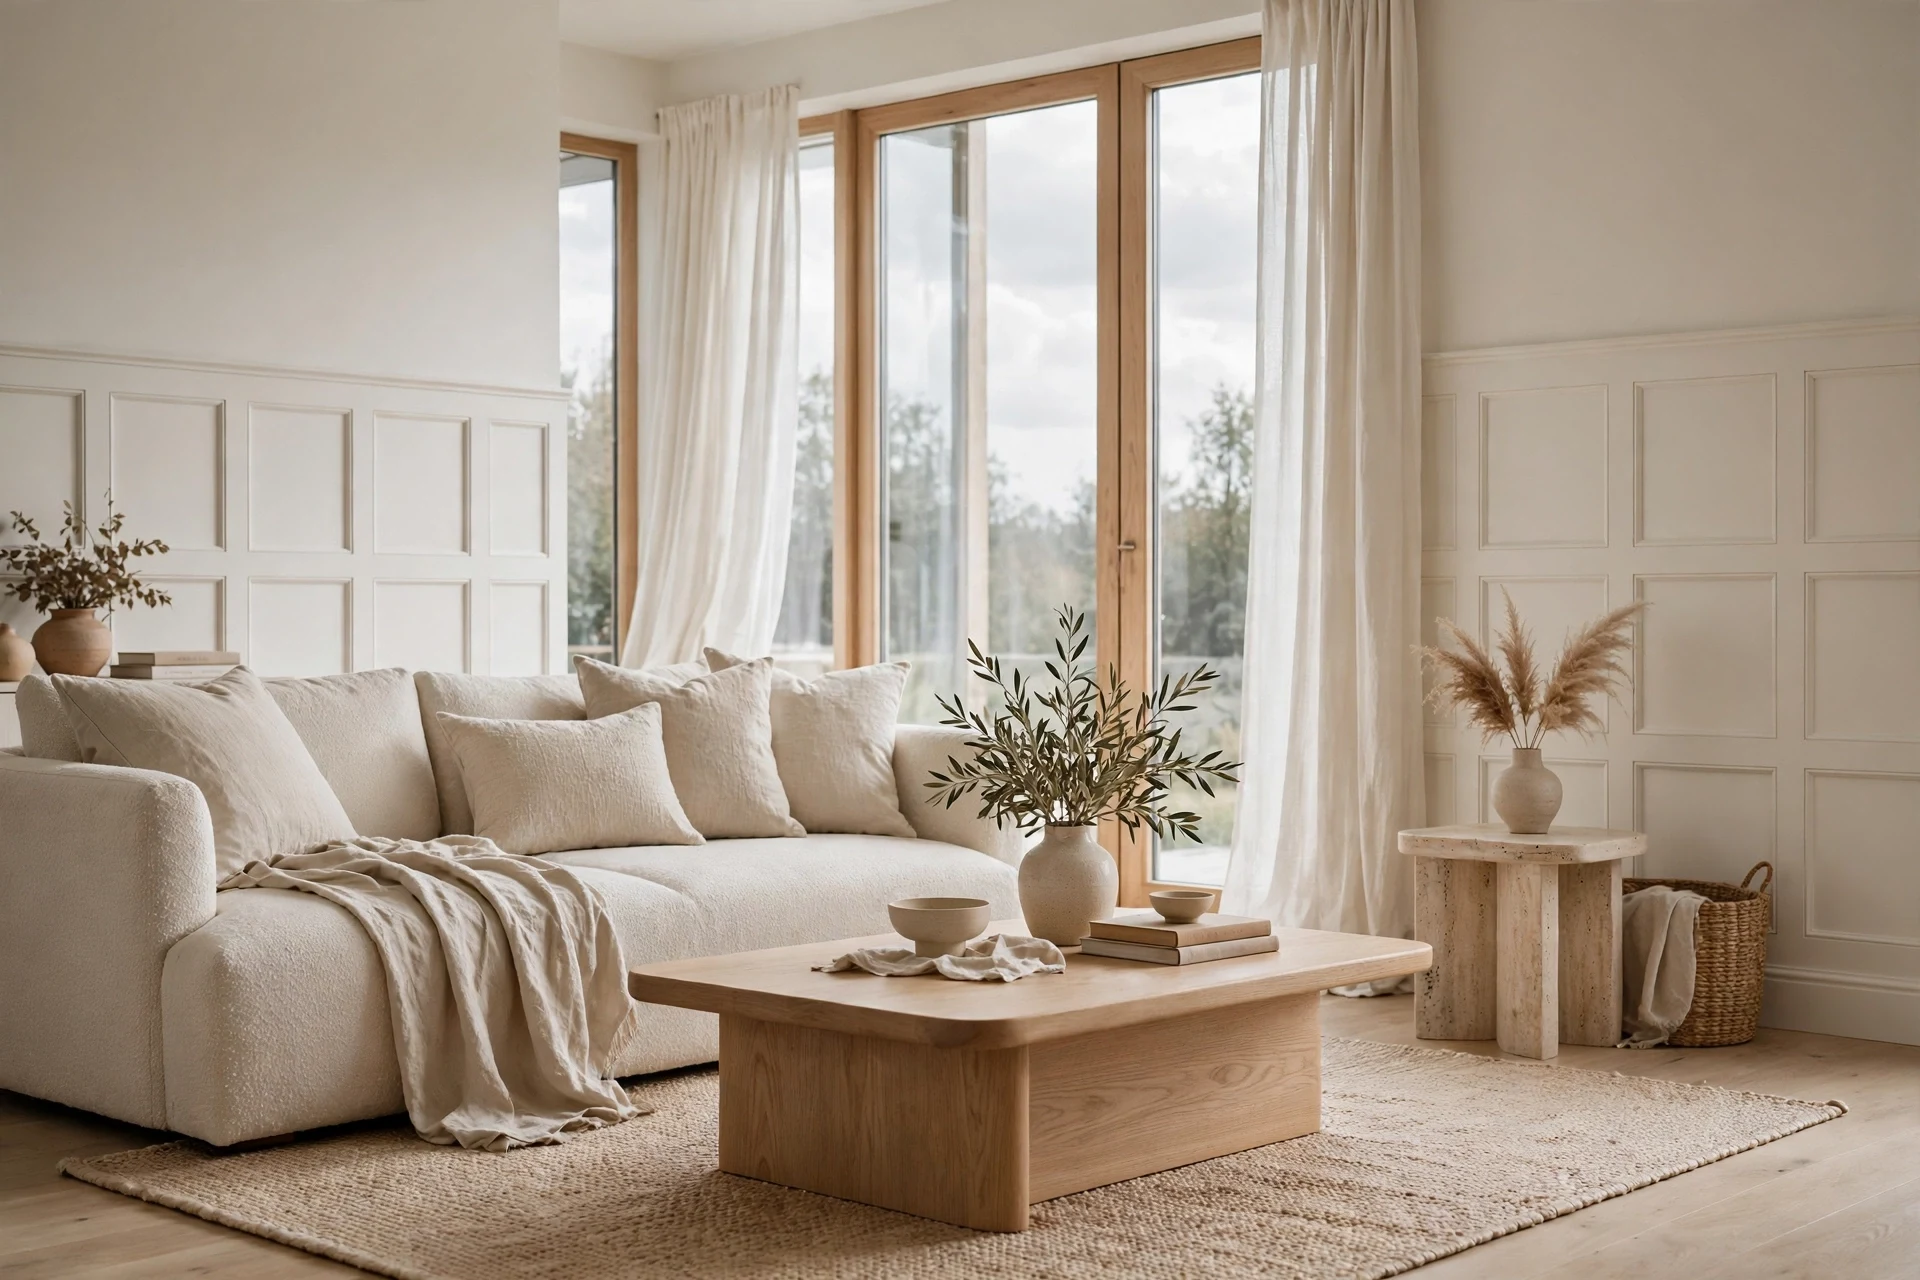
Flat panel wainscoting is a wall treatment of smooth, recessed panels framed by flat rails and stiles, giving walls quiet architectural structure without raised ornament. These flat panel wainscoting ideas — all 34 of them — show how that clean geometry works in entries, bathrooms, bedrooms, and beyond. The finish feels hushed and tailored, like a well-cut jacket for a room. Morning light slides across the flat planes and pools softly in each recessed field. Paint, wood grain, and shadow do all the talking here, so every proportion has to earn its place. Here are 34 ideas worth saving — and stealing.
Why Flat Panel Wainscoting Works So Well
Flat panel wainscoting descends from the Shaker and Craftsman traditions, where cabinetmakers framed plain recessed fields with square-edged rails and stiles. Colonial Revival millwork kept the geometry but dropped the hand-planed fussiness. Unlike raised-panel wainscoting, nothing projects from the wall, so the look reads modern even in century-old houses. That restraint is exactly its signature.
The core build is simple: 1×4 or 1×6 MDF or poplar stiles, a top rail with a shallow chair-rail cap, and wallboard or 1/4-inch MDF skin inside each frame. Paint carries the style — Benjamin Moore 'White Dove' OC-17, Farrow & Ball 'Strong White' No. 2001, and Sherwin-Williams 'Evergreen Fog' SW 9130 are proven performers. Natural versions use white oak or walnut veneer panels with matte lacquer.
Flat paneling is trending because it photographs like architecture, not decoration, and it suits the current shift toward calmer, lower-contrast rooms. It also hides scuffs in high-traffic zones better than bare drywall. Renters and first-time DIYers have adopted it because the whole system installs with a nail gun and caulk. Pinterest saves keep climbing as open-plan homes look for ways to define zones without adding walls.
Small spaces take this style well because the panels sit almost flush, stealing under half an inch of depth. In a narrow hall, run panels at 36 inches high so the wall still breathes above them. One caution: tiny rooms need fewer, wider panels — grids of small squares shrink a space visually. Start with the wall you see from the doorway.
| Element | Flat Panel Trait | Supporting Trait |
|---|---|---|
| Philosophy | Restrained geometry | Function before ornament |
| Materials | Painted MDF or poplar | White oak, walnut veneer |
| Color palette | Warm whites, soft neutrals | Deep greens, inky navy |
34 Flat Panel Wainscoting Ideas
1. Warm White Panels in a Sunlit Entryway
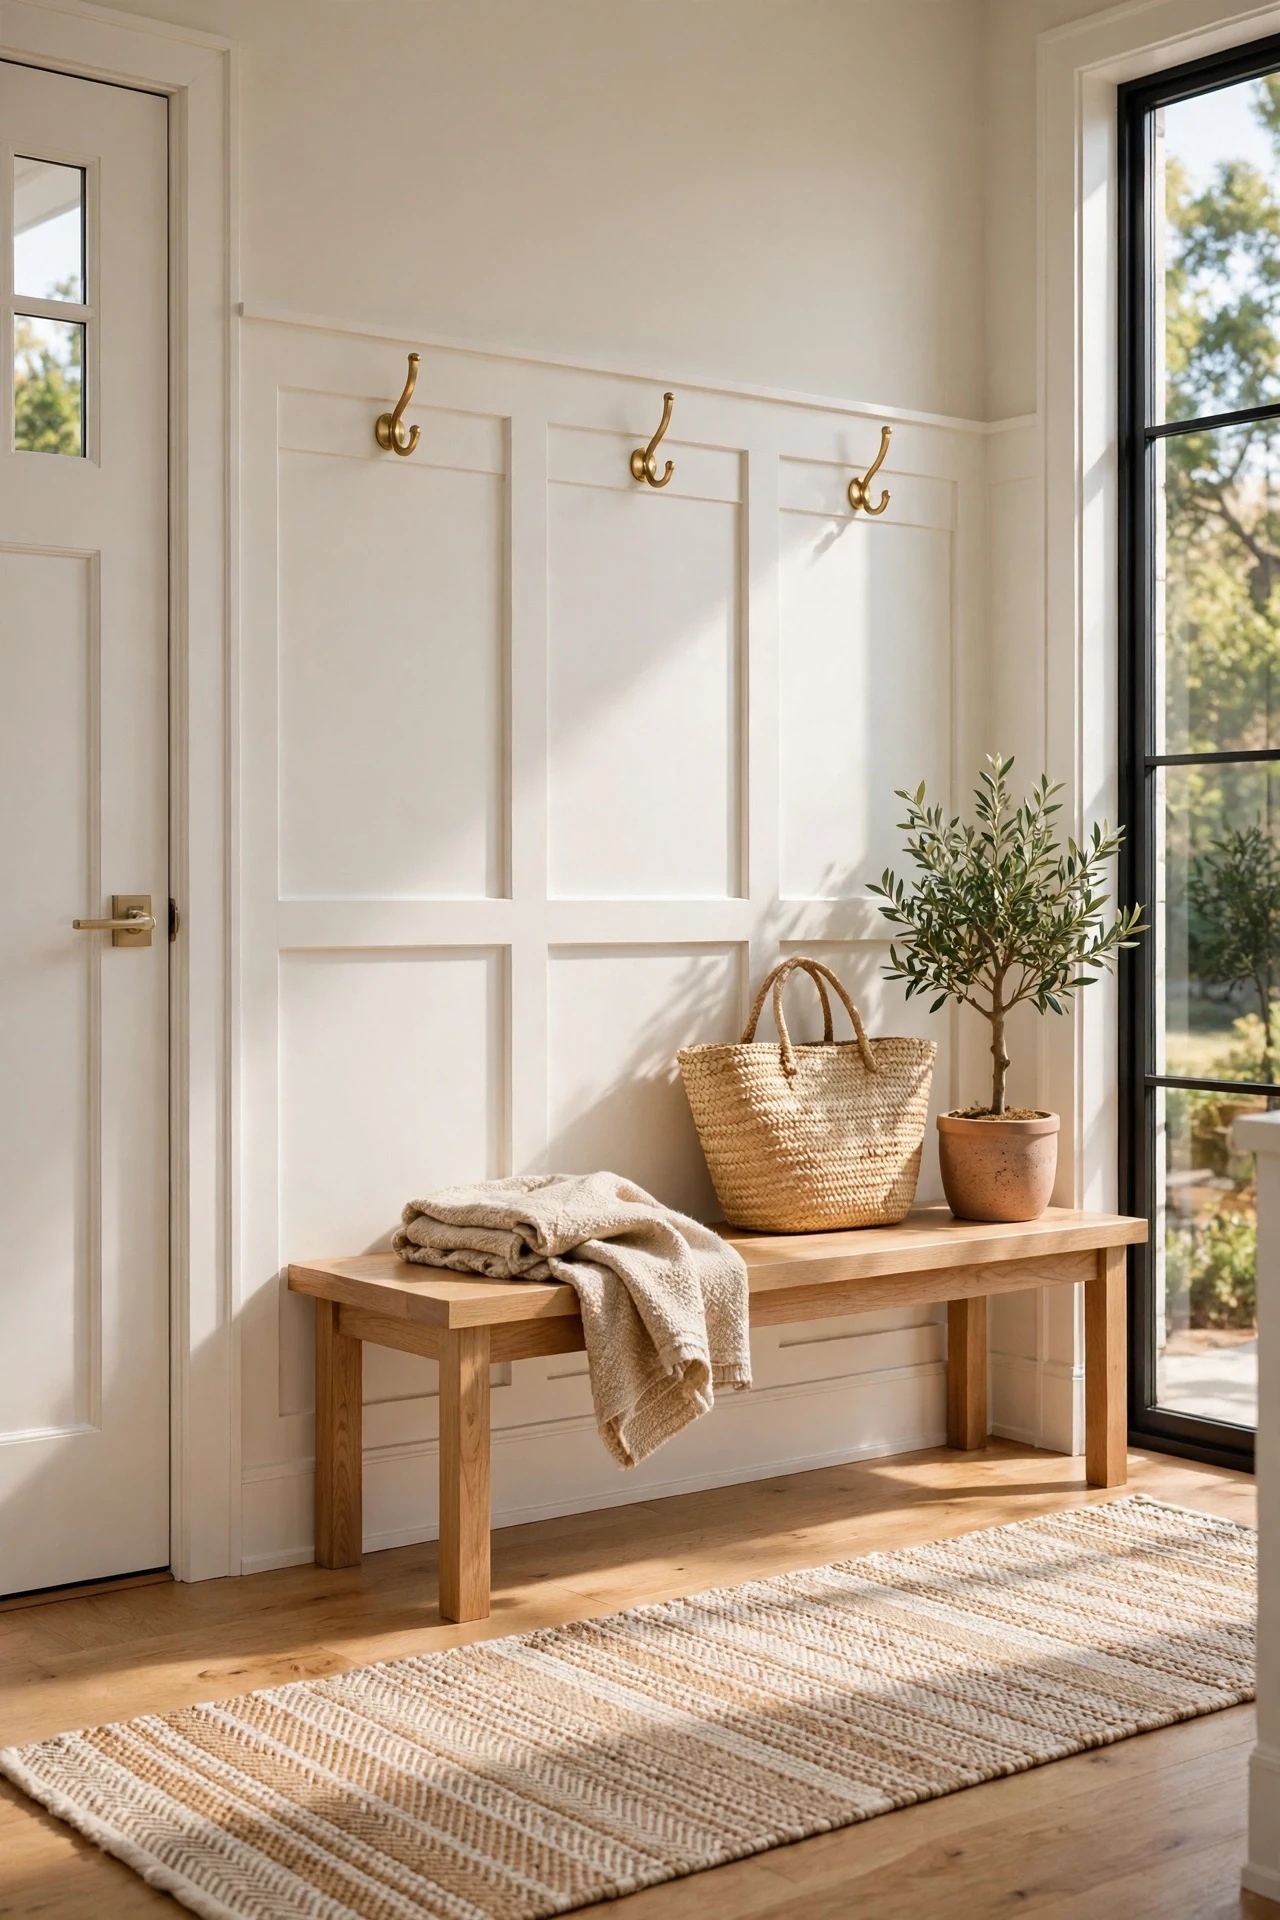
The entry feels hushed and orderly, sunlight washing the flat panels like calm water.
Tone-on-tone layering works because recessed fields catch light differently than the rails, creating depth without contrast. Benjamin Moore 'White Dove' OC-17 on the MDF panels, one shade lighter above, keeps the geometry readable. A white oak bench repeats the warmth so the white never reads cold.
Paint the panels satin and the wall above eggshell in the same color. The sheen shift alone makes flat panels visible in flat light. Caulk every seam with paintable latex caulk before the final coat.
2. Rift-Sawn White Oak Panels in a Calm Living Room

The room feels grounded, the oak grain moving across the panels like slow water.
Grain continuity is the principle here: book-matched rift-sawn white oak veneer makes separate panels read as one carved surface. The vertical grain also stretches perceived wall height. Matte lacquer keeps the MDF-core panels honest, with no plastic shine to break the illusion.
Order veneer panels in sequence-numbered sets and hang them in order. Number the backs in pencil before finishing so the grain flow survives installation. One mixed-up panel ruins the whole rhythm.
💡 Quick Win: Test finish on offcuts first — oak darkens noticeably under the first lacquer coat.
3. Brass Sconces Washing a Paneled Hallway
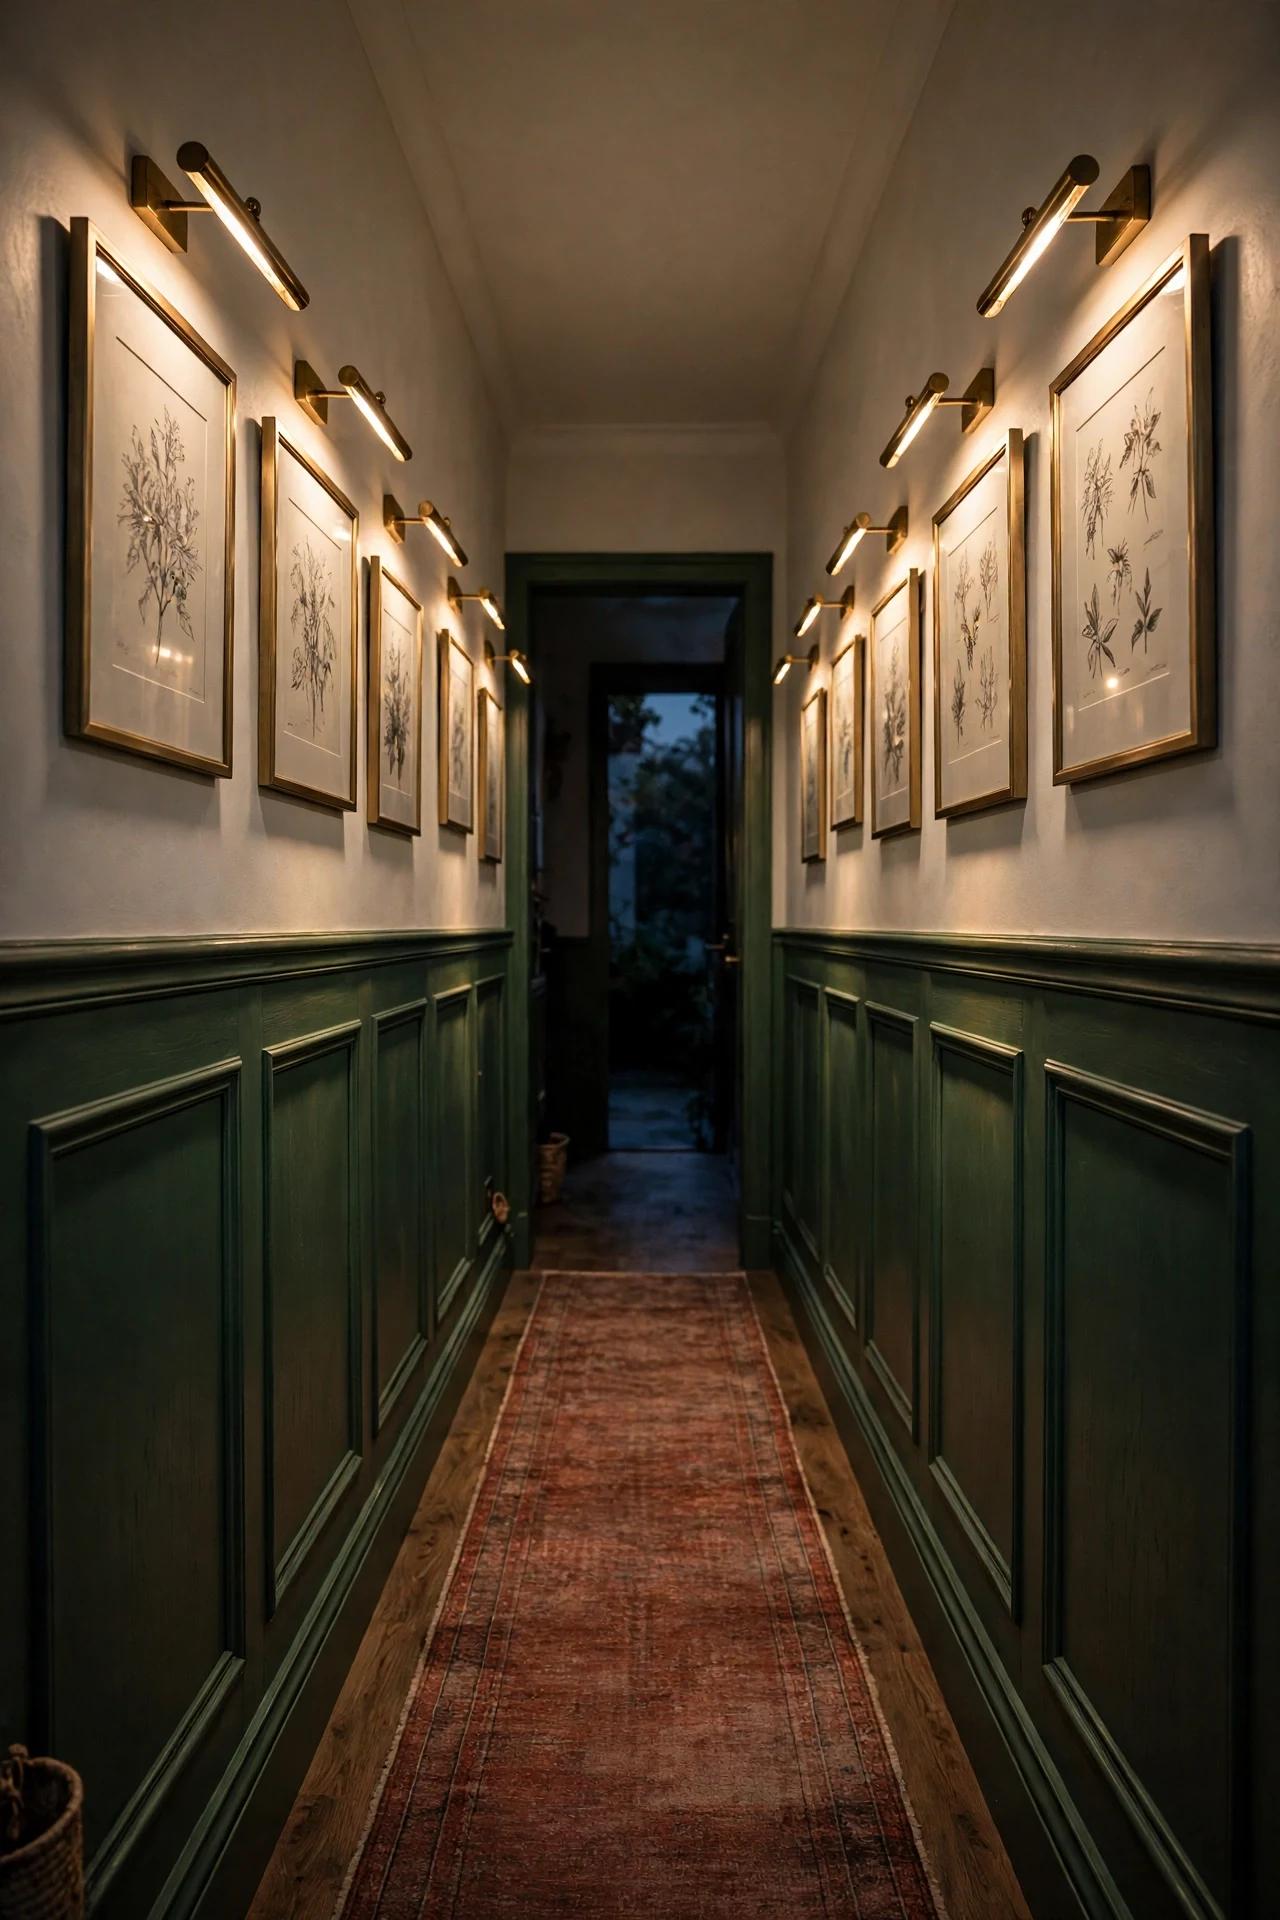
The hallway feels intimate at dusk, each panel holding a soft pool of lamplight.
Light grazing is the principle: sconces mounted just above the chair rail wash downward, and the recessed fields catch shadow at their edges. That raking light doubles the panel depth visually. Brushed brass fixtures against deep green painted poplar keep the palette warm, never stark.
Mount sconces 66 inches from the floor and center each one over a panel, not a stile. Hardwire if you can; otherwise use puck-light inserts with a warm 2700K temperature. Even spacing matters more than brightness here.
4. A Low Ledge Shelf Riding the Chair Rail in a Bedroom
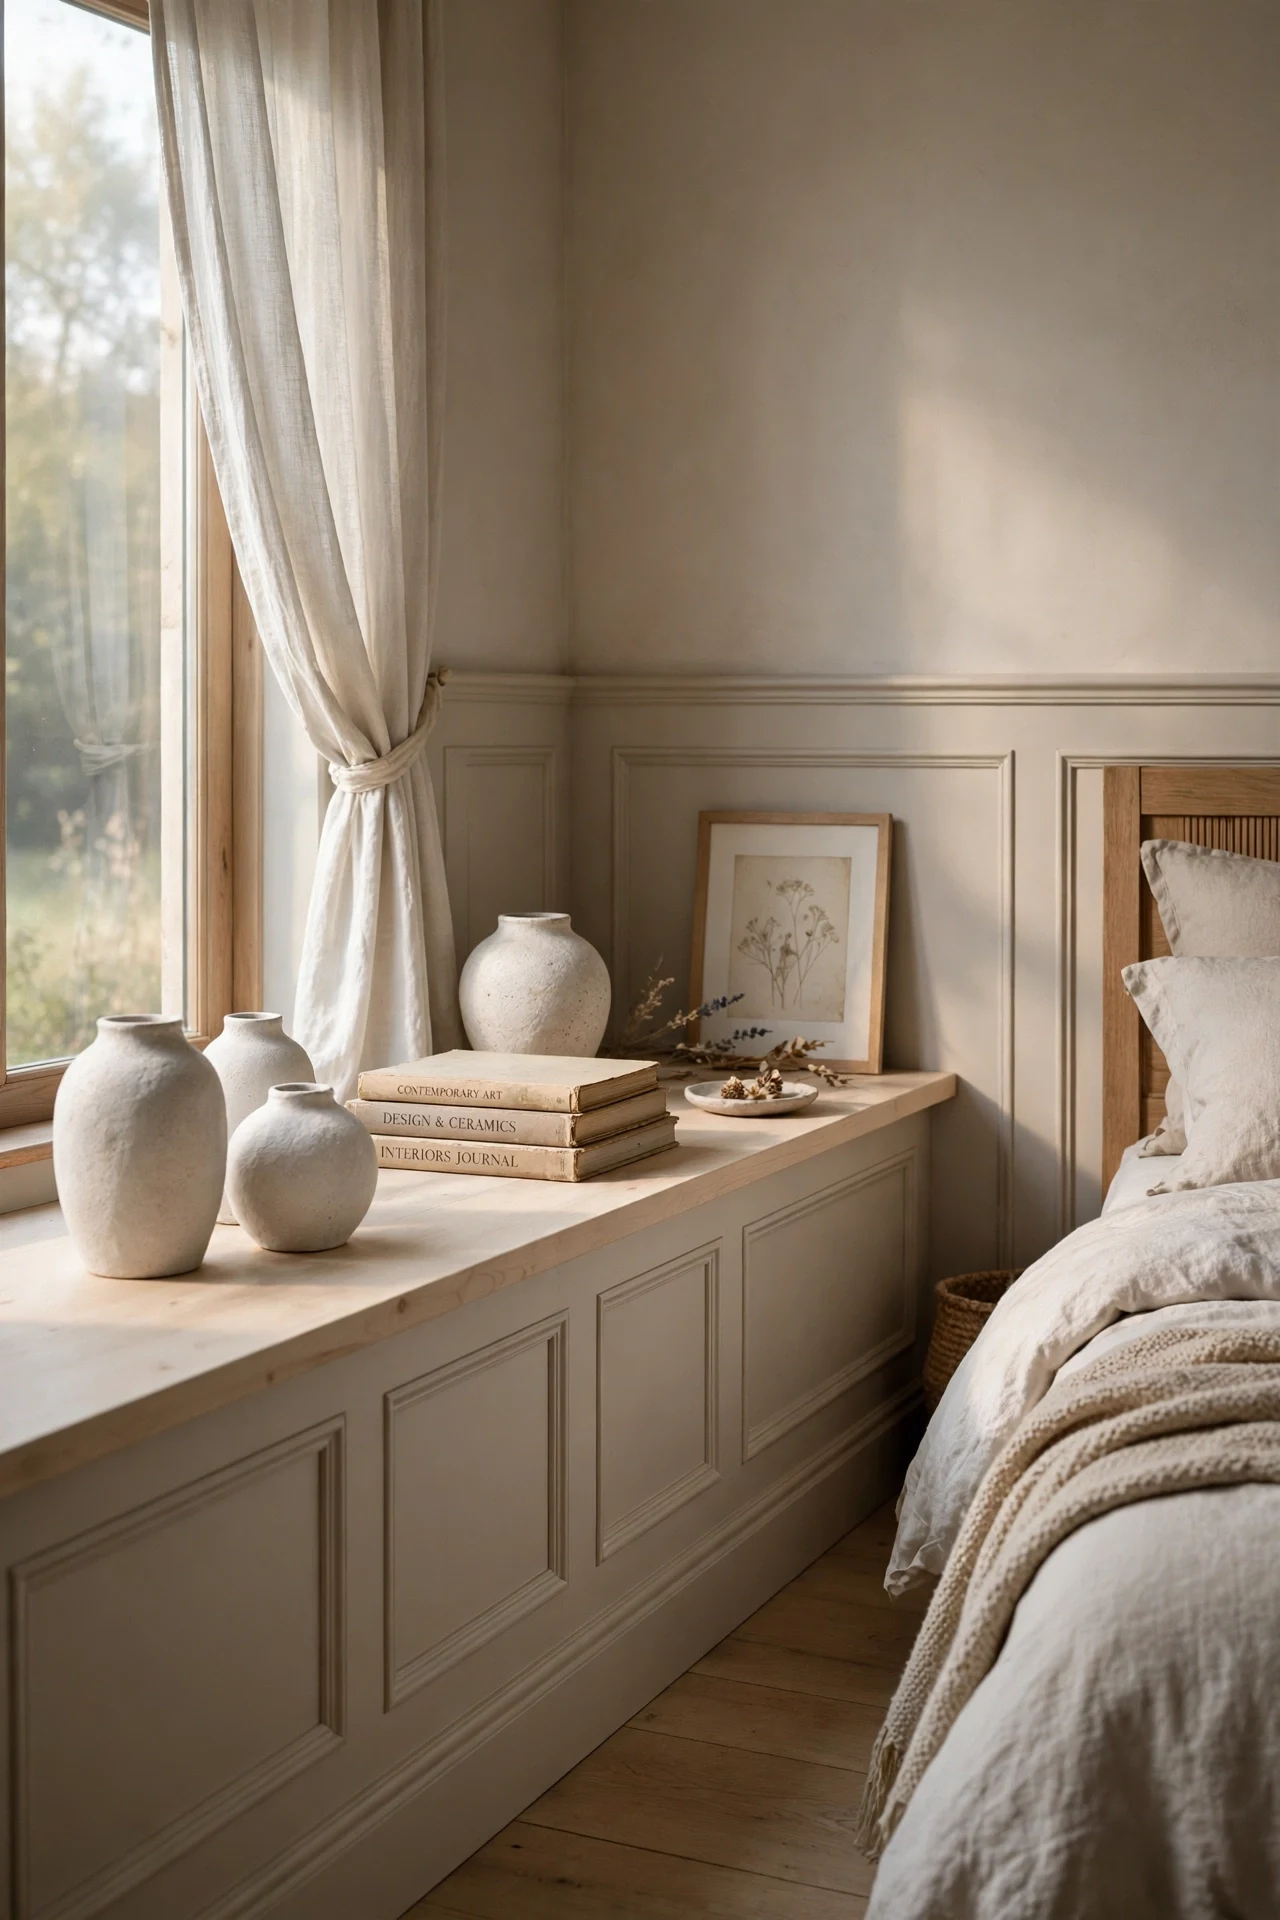
The bedroom feels personal and hushed, favorite objects resting at pillow height along the wall.
Repeating a horizontal datum line is the principle: the deepened ledge runs unbroken, so objects read as one composed layer rather than clutter. Poplar painted to match the panels keeps the ledge architectural, not furniture-like. The 4-inch depth fits ceramics and paperbacks without crowding the bed.
Rip the ledge from 1×4 poplar and add a tiny 1/4-inch stop bead at its front edge. That bead keeps frames from sliding off when doors slam. Paint the ledge satin so it wipes clean easily.
💡 Quick Win: Style in threes: vase, book stack, frame — then stop.
5. Gallery Frames Aligned to the Panel Grid in a Dining Room
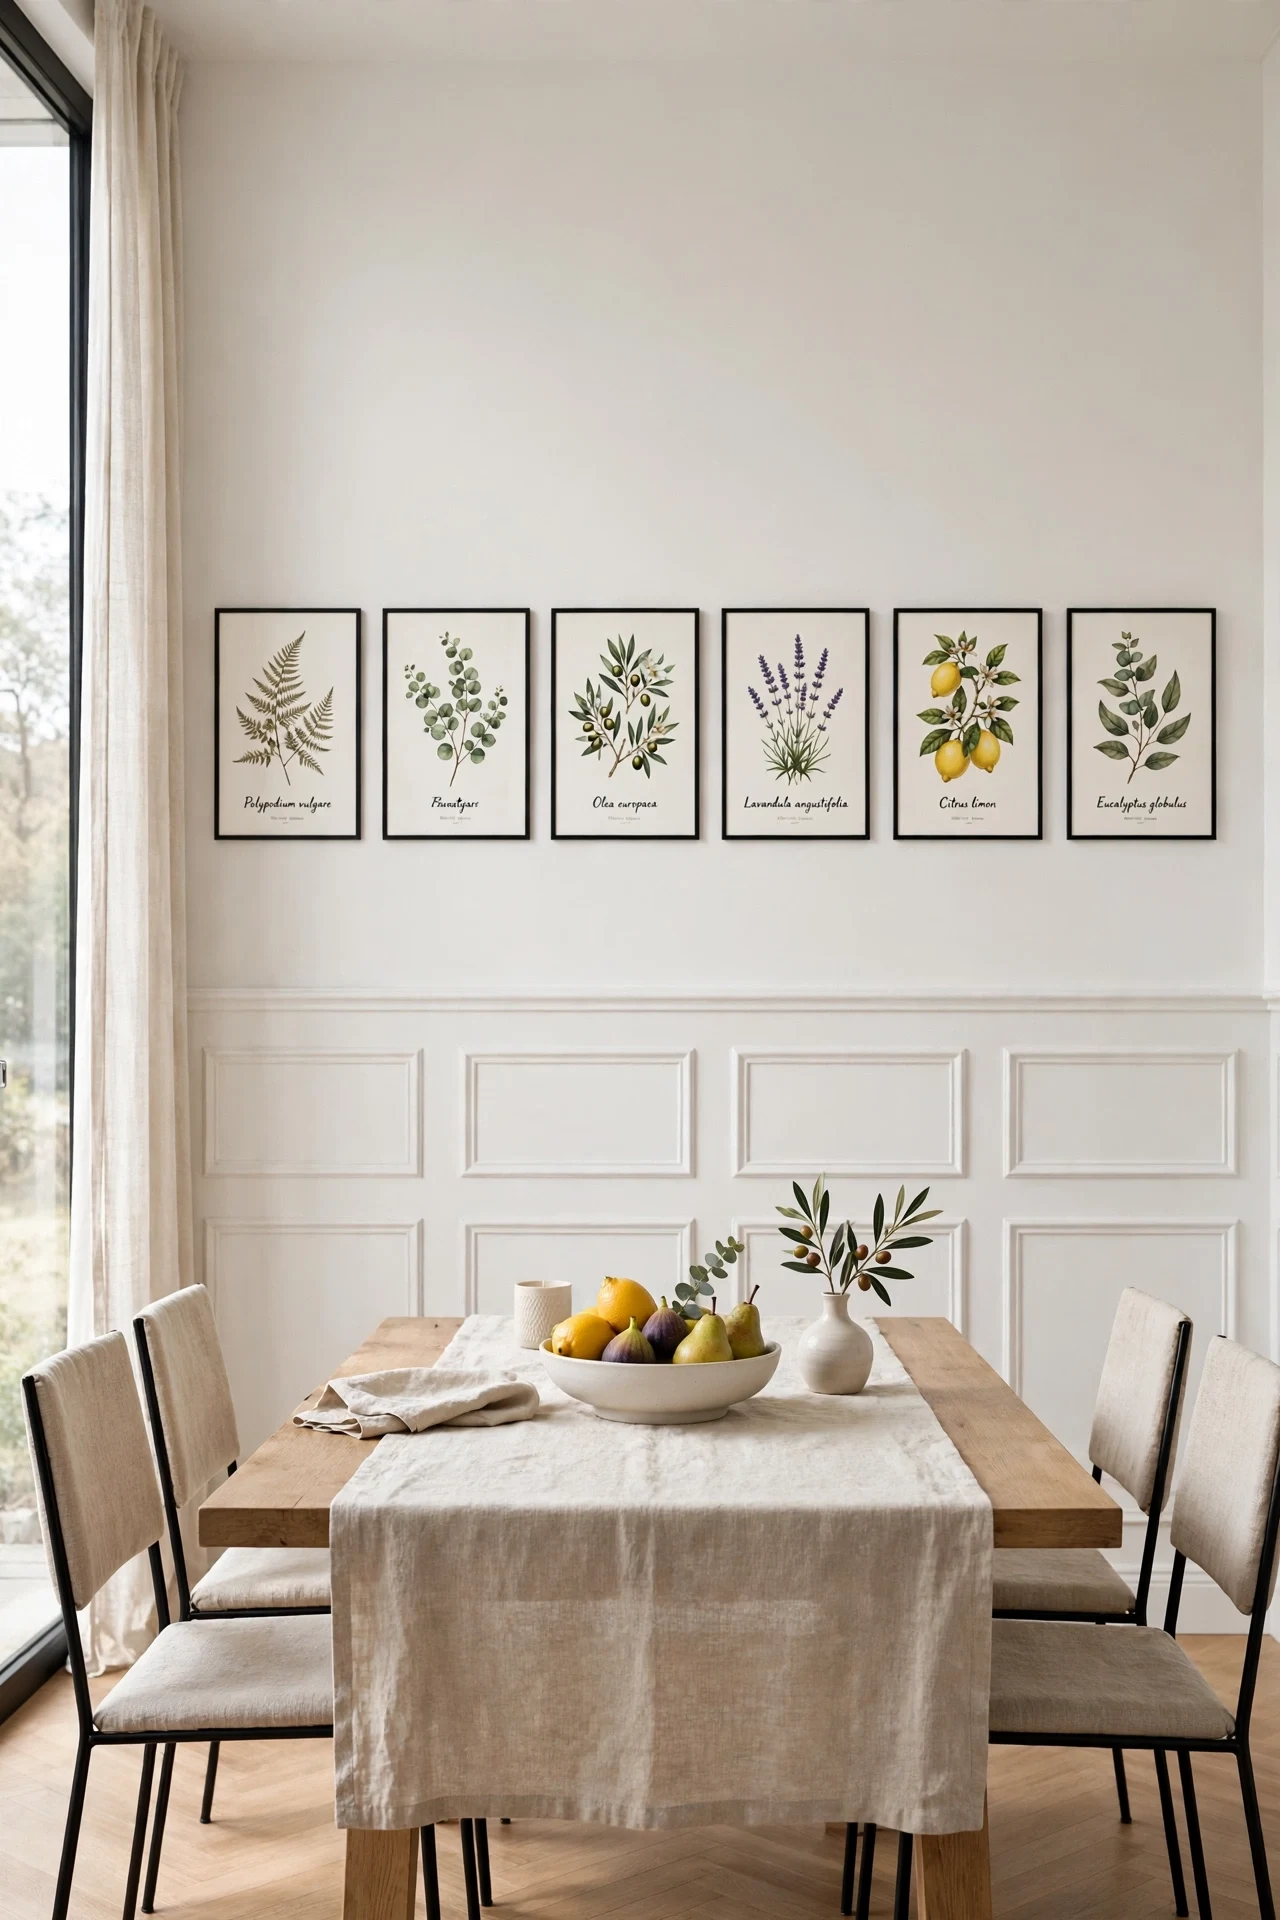
The dining room feels composed, every frame landing with the quiet confidence of a gallery wall.
Alignment is the principle: hanging each frame centered on a panel below turns two separate systems into one grid. The eye reads order even before it reads art. Thin black metal frames echo the panel reveals, while the prints stay pale so the wall never competes with the table.
Measure panel centers first and transfer them upward with a laser level before drilling. Hang frames so their centers sit exactly on those lines. Keep 2 inches between frame bottom and chair rail for breathing room.
6. Double-Height Panels Anchoring an Open-Plan Living Wall
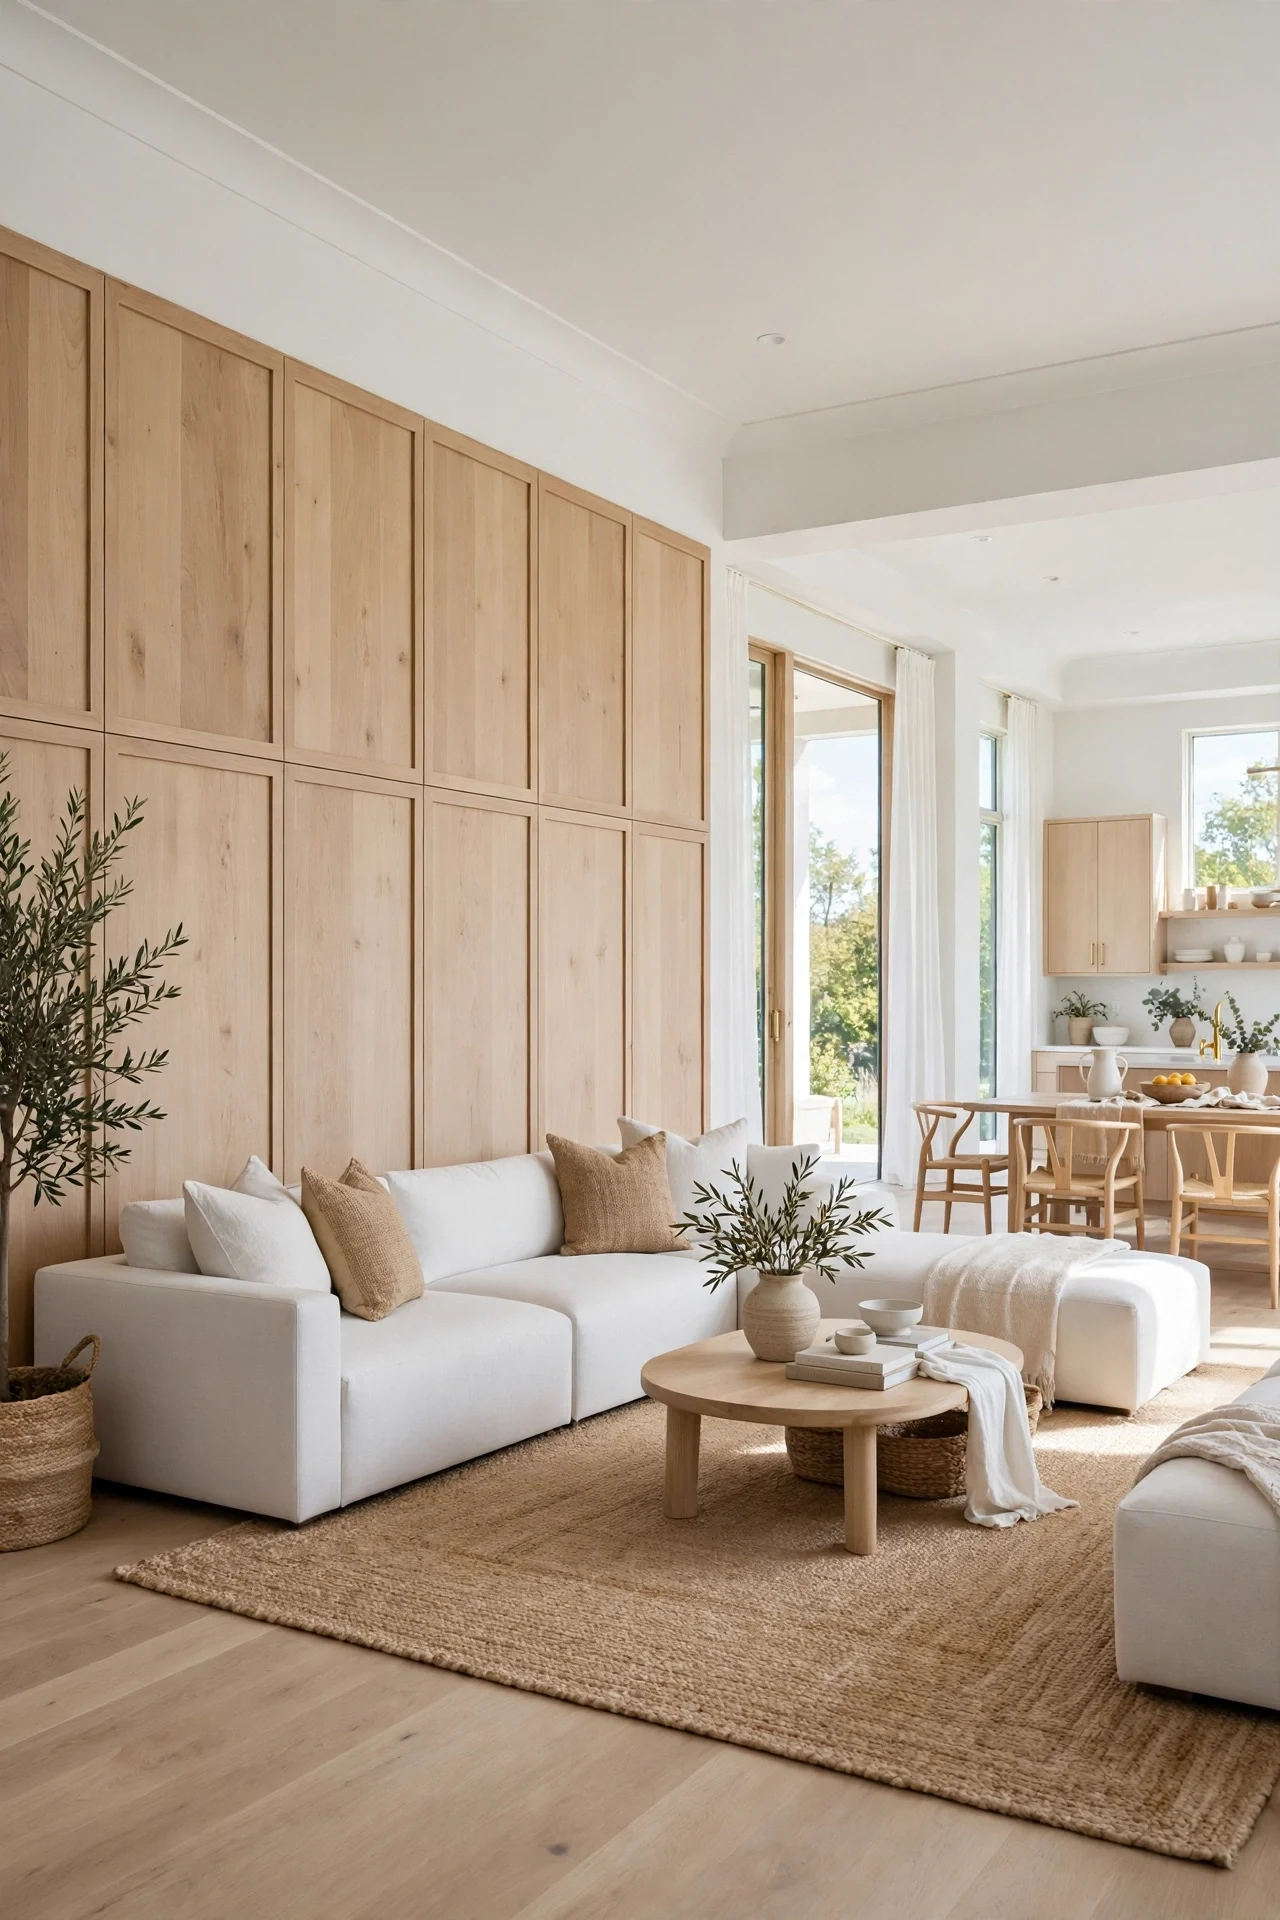
The open room feels structured at last, the tall panels giving the seating zone a quiet backbone.
Zoning through vertical emphasis is the principle: stacking two panel rows to 8 feet marks territory without a single partition. The grid gives the eye a boundary, so furniture groups inside it. Poplar panels painted soft white keep the wall light despite its scale.
Snap a chalk line at the midpoint and build the upper row first, working down. Gravity helps panels settle onto the mid rail. Keep upper and lower stiles aligned exactly for one continuous grid.
💡 Quick Win: Paint first, arrange furniture second — the zone reads instantly.
7. Slim 36-Inch Panels for a Narrow Hallway
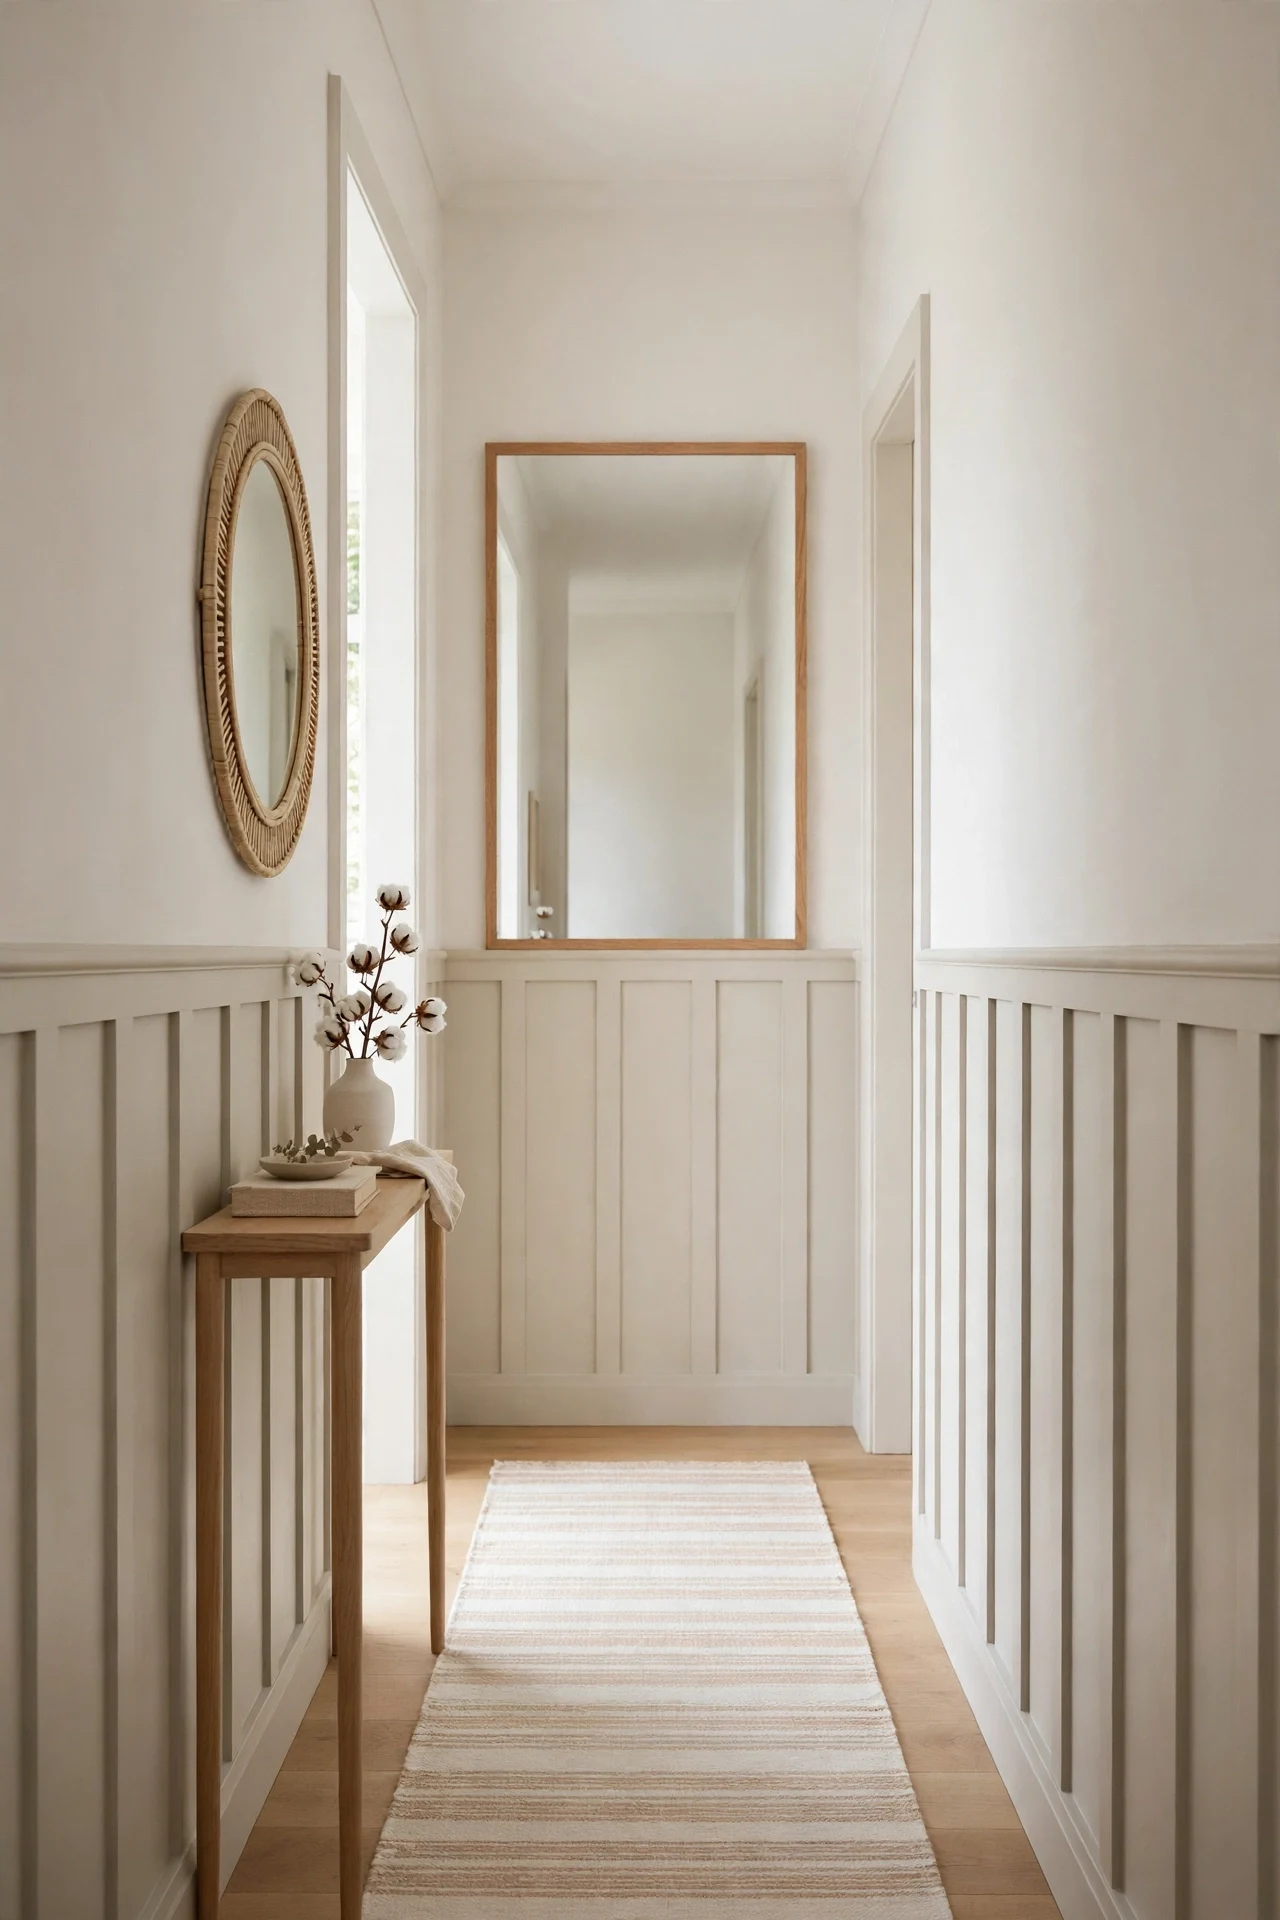
The narrow hall feels elongated and airy, the low panels skimming past like a horizon line.
Proportion is the principle: stopping panels at 36 inches leaves two-thirds of the wall pale, so the eye travels up and out instead of closing in. Extra-wide panel spacing — 24 inches or more — avoids the busy grid that shrinks tight spaces. Sherwin-Williams 'Accessible Beige' SW 7036 keeps the tone warm.
Use a story pole: mark one panel layout on a strip of scrap wood, then repeat it down the hall. It guarantees even spacing around corners and outlets. Cut once, measure never again.
8. Evergreen Fog Panels in a Restful Primary Bedroom
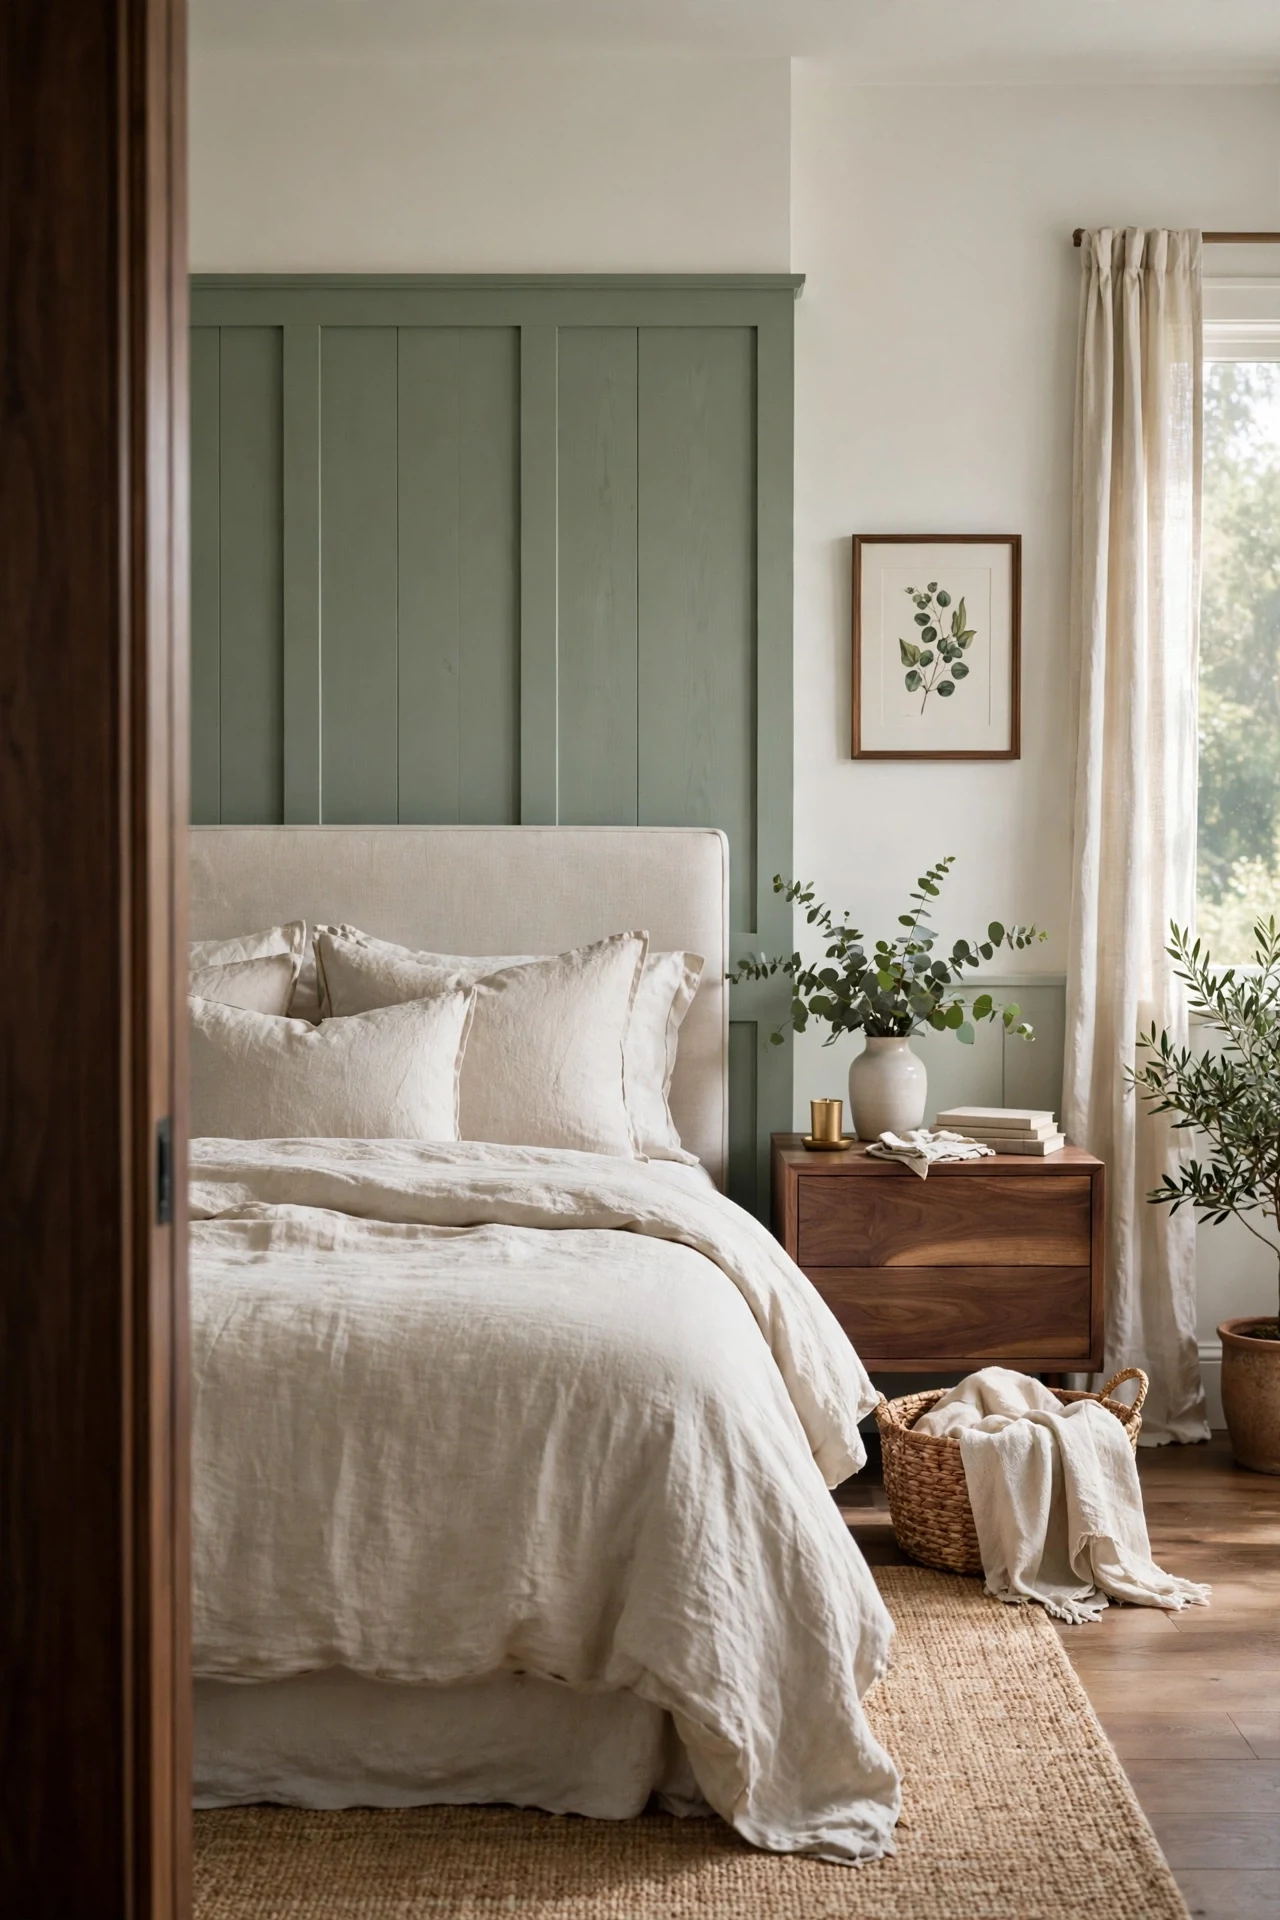
The bedroom feels restful and leafy, the sage panels settling behind the bed like garden shade.
Visual weight is the principle: mid-tone sage grounds the bed while pale walls above keep the room lifted. Sherwin-Williams 'Evergreen Fog' SW 9130 shifts gray-green through the day, flattering north-facing rooms. Walnut nightstands bridge the green and the linen.
Carry the sage onto the closet doors for a wrapped, built-in effect. Flat panel doors painted the same color disappear into the grid. Keep the ceiling white so the green stays fresh, not swampy.
💡 Quick Win: Buy the sample pot first — it reads far grayer on walls than on the chip.
9. Fluted Glass Inserts in Kitchen Cabinet-Height Panels

The kitchen feels crisp and crafted, light bending softly through the fluted glass fields.
Diffusion is the principle: fluted glass blurs the wall behind it, so panels gain texture without pattern or color. The reeding also echoes the vertical stiles, doubling the rhythm. Hardwood frames painted cream keep the glass from feeling like a shower door.
Order tempered fluted glass cut 1/8 inch undersize and set it in silicone, not putty, so panels can be replaced. Frost the edges at the glass shop for a finished reveal. Never use standard glass at bar-stool height.
10. Candlelit Panels and a Picture Light in a Moody Dining Room
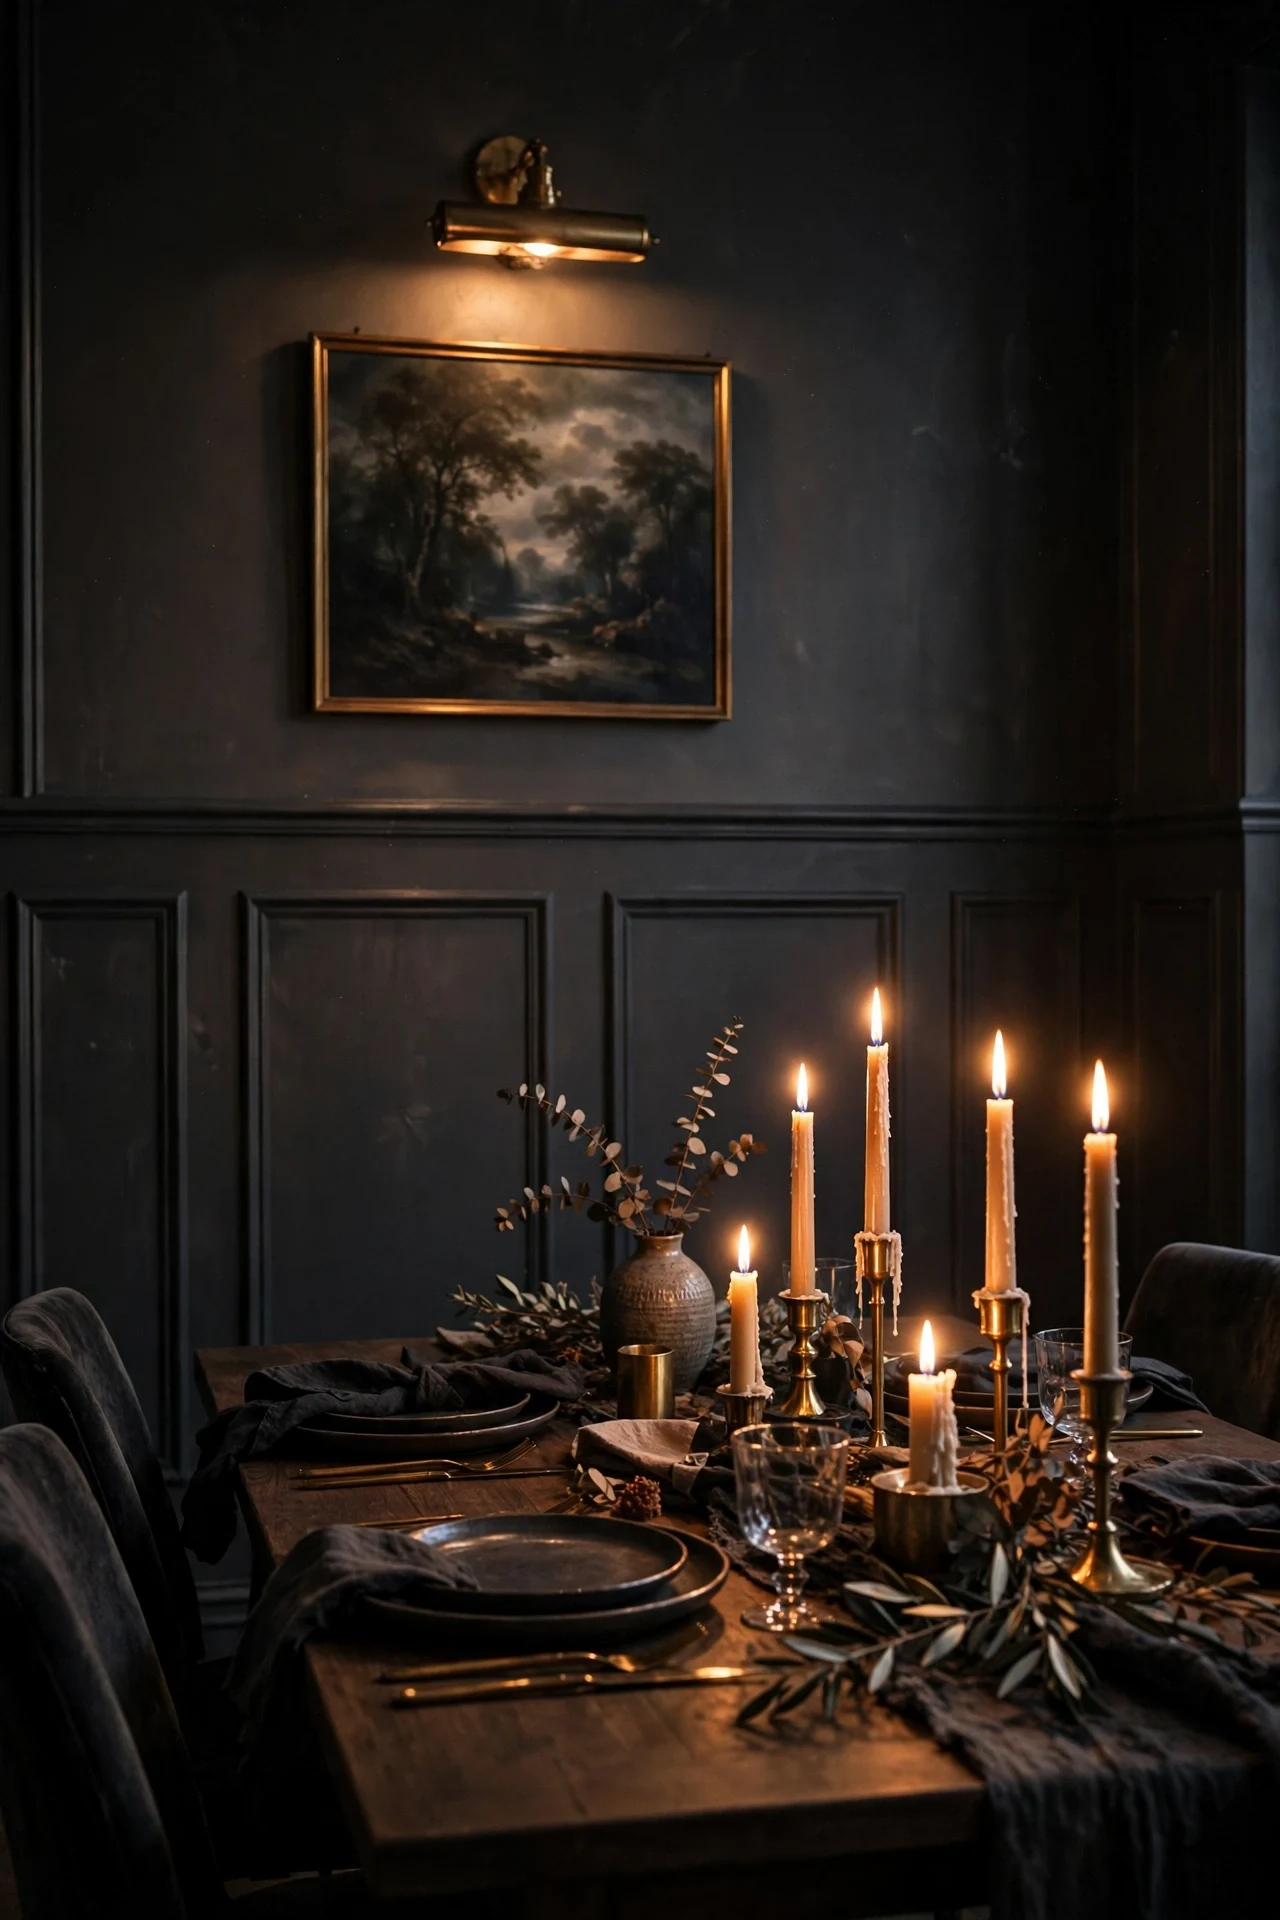
The dining room feels intimate and candlelit, conversation staying low under the picture light's glow.
A single focal light source is the principle: one brass picture light above the artwork gives the charcoal panels a stage, and darkness does the rest. Benjamin Moore 'Iron Mountain' 2134-30 absorbs light, so faces and candles carry the brightness. Drama comes from restraint, not wattage.
Put the picture light on its own dimmer. Run candles at three heights — 8, 10, and 12 inches — so flames stagger across the panel reveals. Use unscented tapers only.
💡 Quick Win: Swap in 2200K amber bulbs on dinner nights — instant candlelit warmth.
11. Banquette Seating Built Against Paneled Walls in a Breakfast Nook
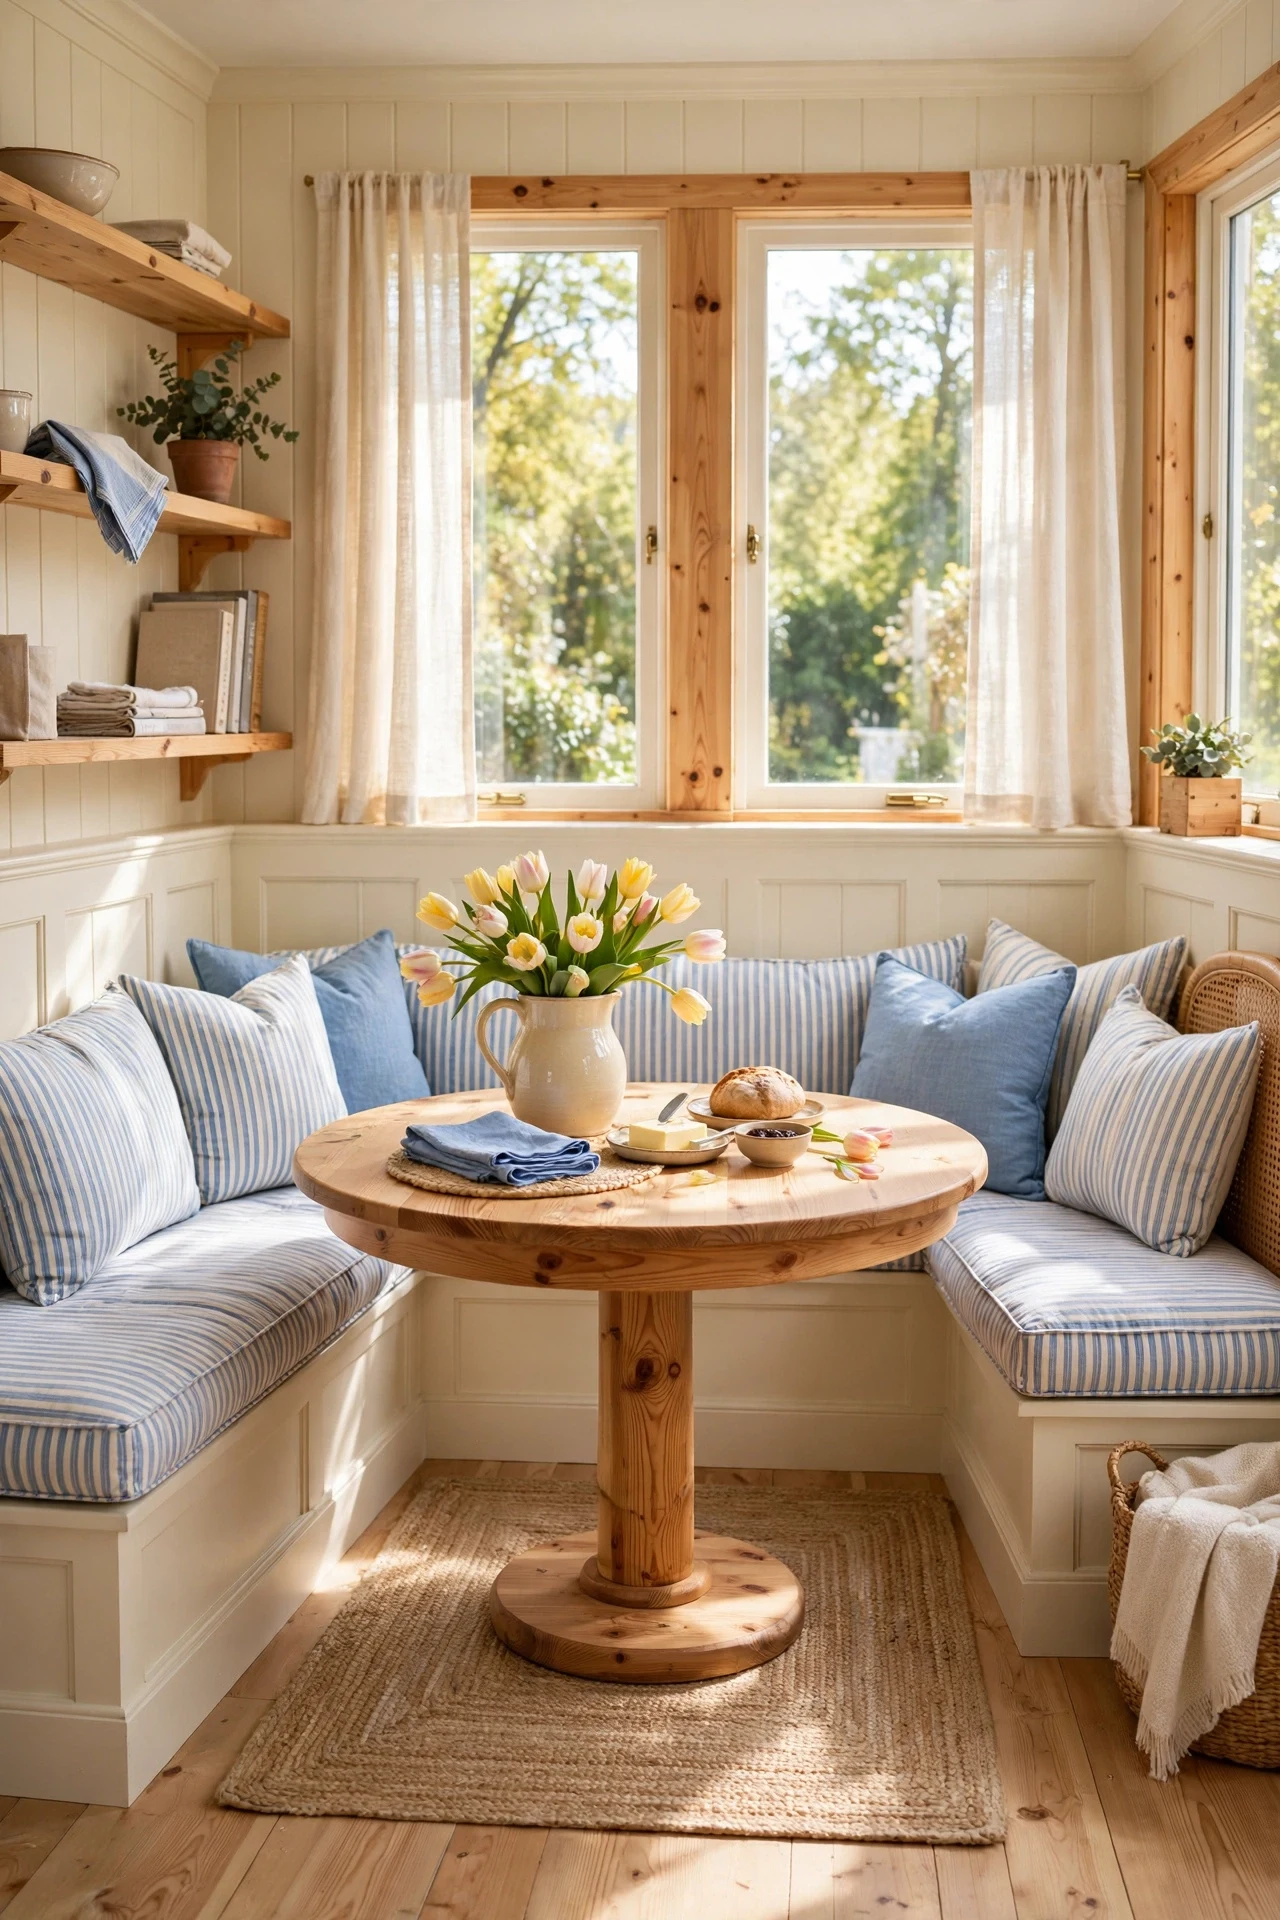
The nook feels snug and cheerful, morning coffee landing in a corner made for lingering.
Matching datum heights is the principle: when the banquette back tops out exactly at the chair rail, seating and wall read as one built-in. That single alignment line is what separates custom from cobbled. Cream painted panels keep the small nook bright behind the striped cushions.
Build the banquette box first, then run panels into it, not behind it. You save material and gain a cleaner joint. Add a piano hinge to the seat top for linen storage inside.
12. Woven Cane Webbing Set Into Bathroom Panels
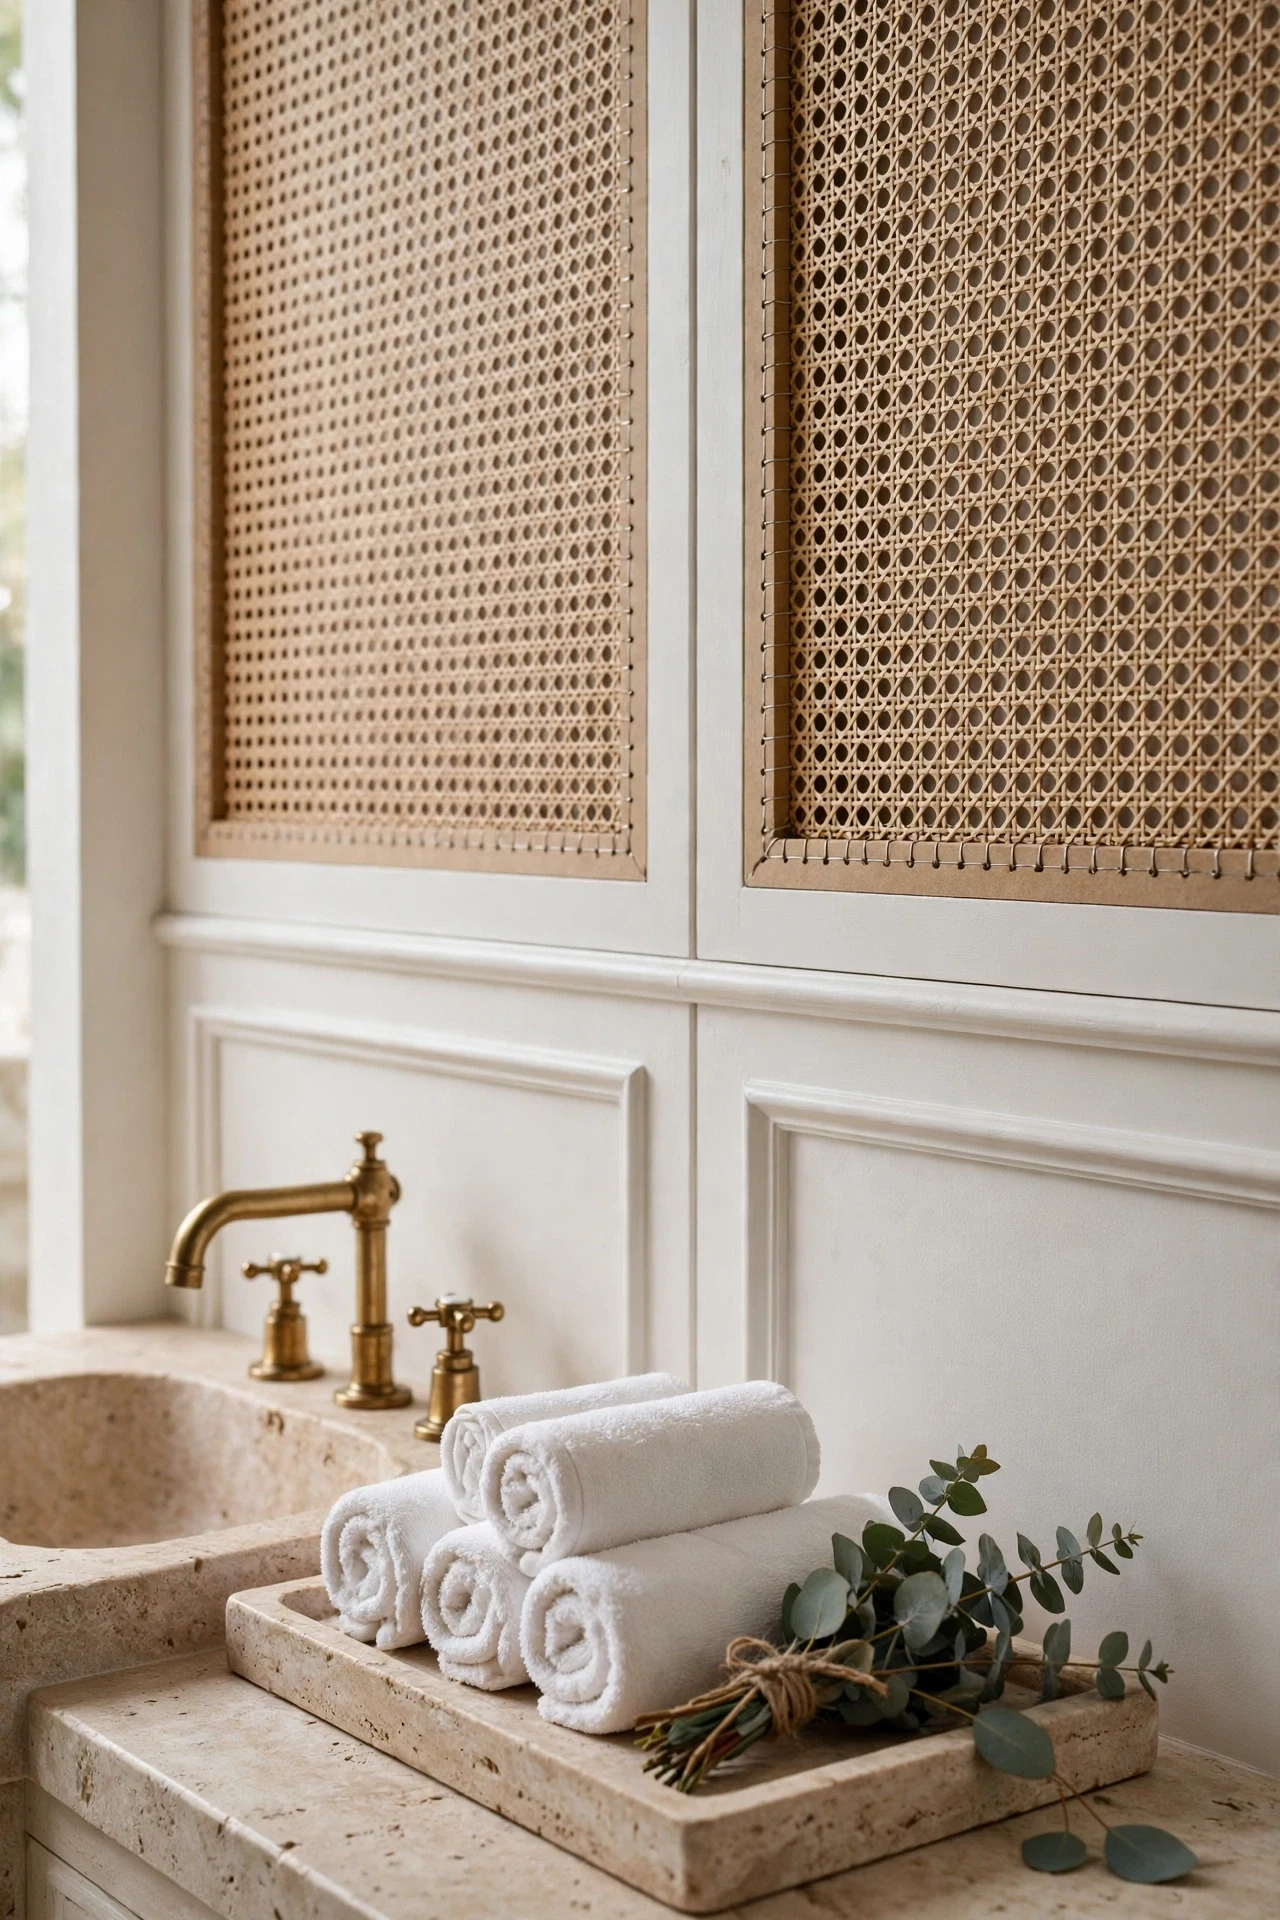
The bathroom feels tactile and spa-calm, the cane webbing breathing against the smooth stone sink.
Texture contrast is the principle: open cane webbing against flat painted MDF gives the wall two tempos, woven and smooth. The cane also softens bathroom acoustics slightly in tiled rooms. Sealing the frames matters — raw MDF drinks humidity and swells.
Soak cane webbing in warm water for 30 minutes before stapling; it tightens as it dries for a drum-flat finish. Seal every frame edge with two coats of oil-based primer. Keep cane panels above splash height only.
💡 Quick Win: Buy pre-woven cane by the foot — a bathroom needs under $40 worth.
13. Floor-to-Ceiling Panels Hiding a Door in a Home Office
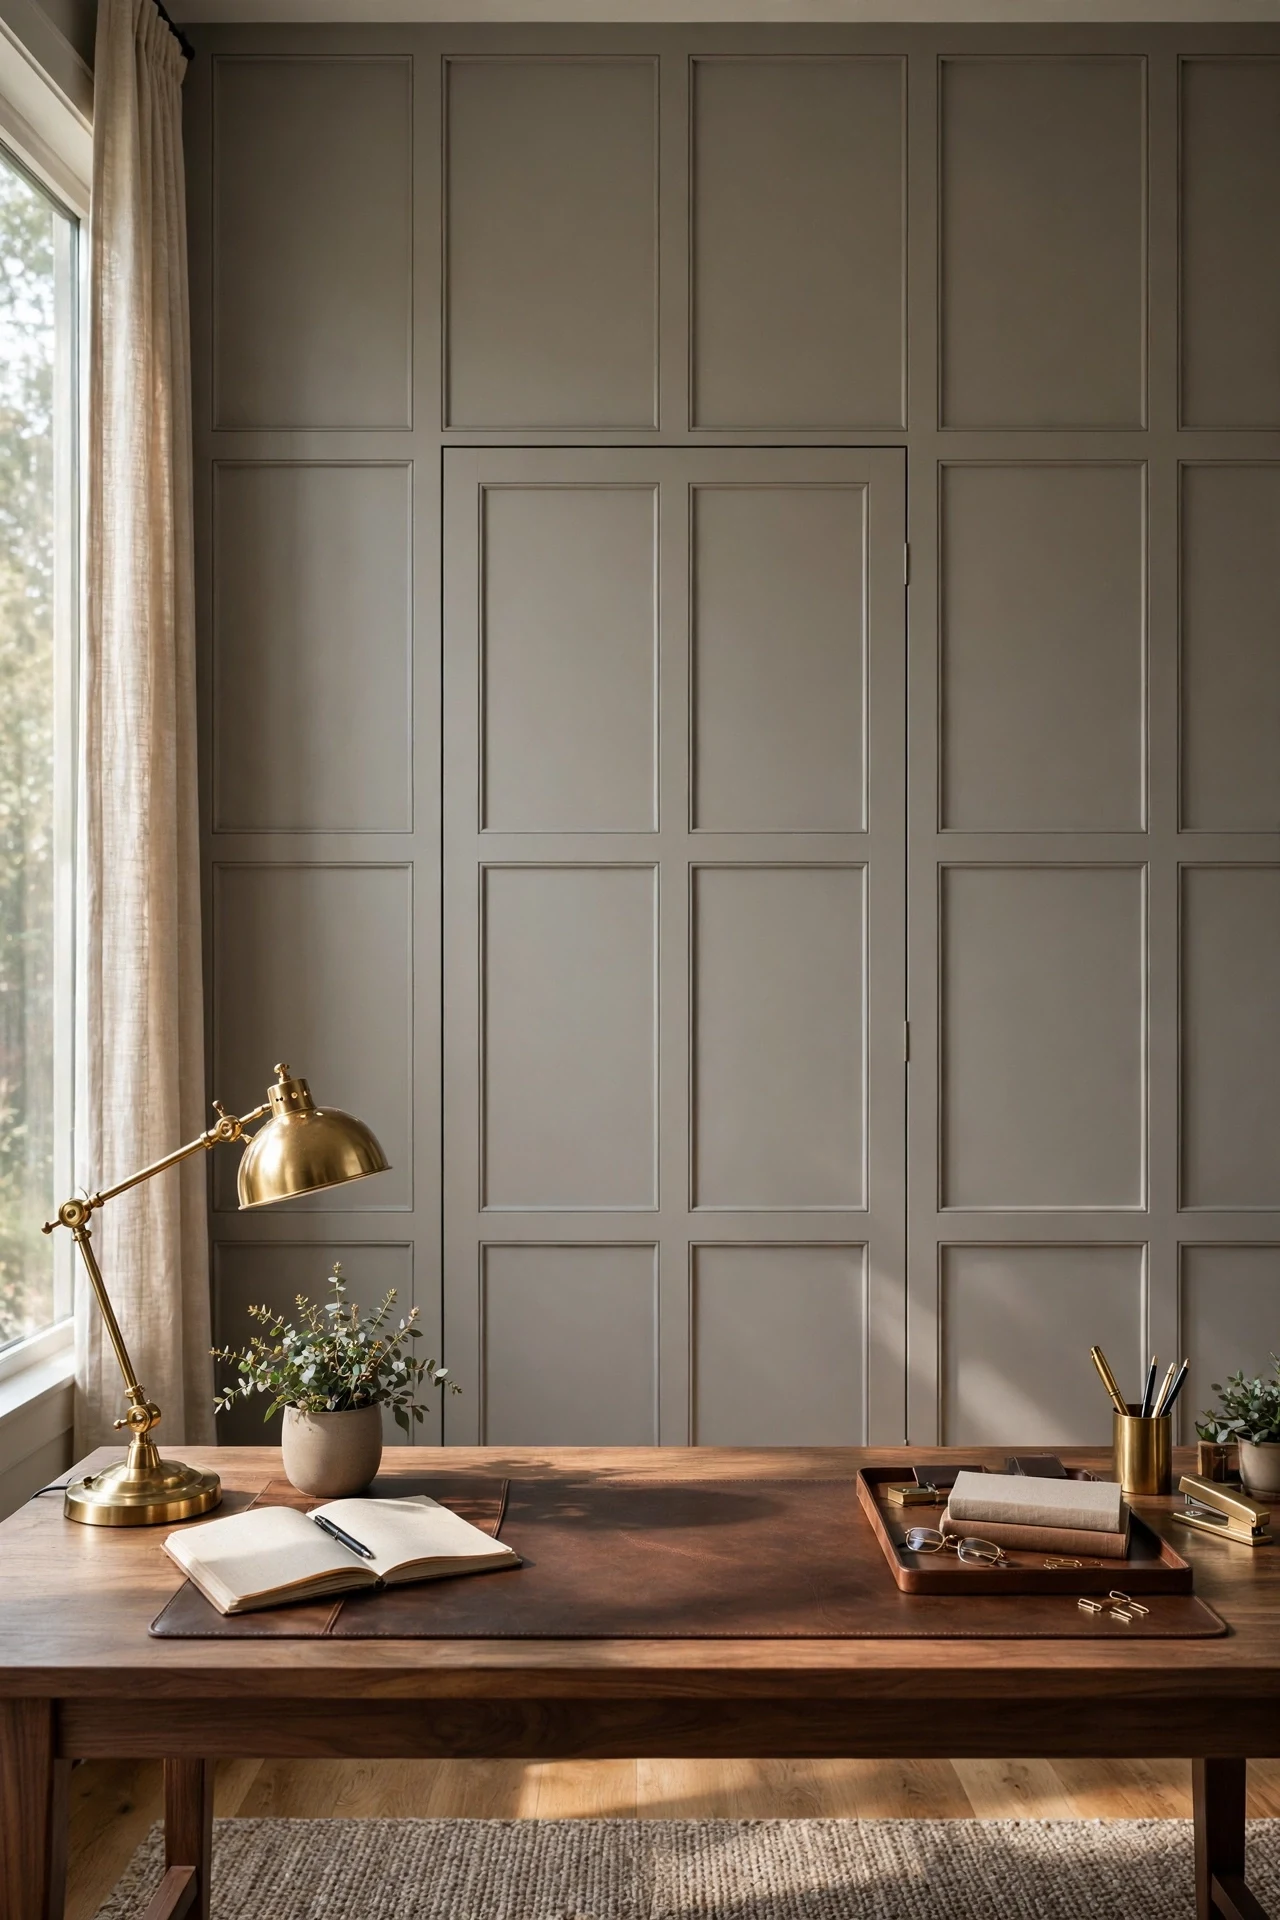
The office feels focused and seamless, one wall of panels with no visible door at all.
Continuity is the principle: carrying the panel grid across a jib door erases the doorway, and the brain stops tracking an exit it cannot see. Concealed SOSS hinges and a touch latch keep the surface uninterrupted. Warm gray painted poplar reads professional on video calls, too.
Hang the door and panel it in place, shimming until reveals match the fixed panels at 1/8 inch. Paint after final adjustment — earlier paint chips at the latch. Mark the latch spot with one small brass pin dot.
14. Under-Stair Panels Turning Dead Space Into Storage
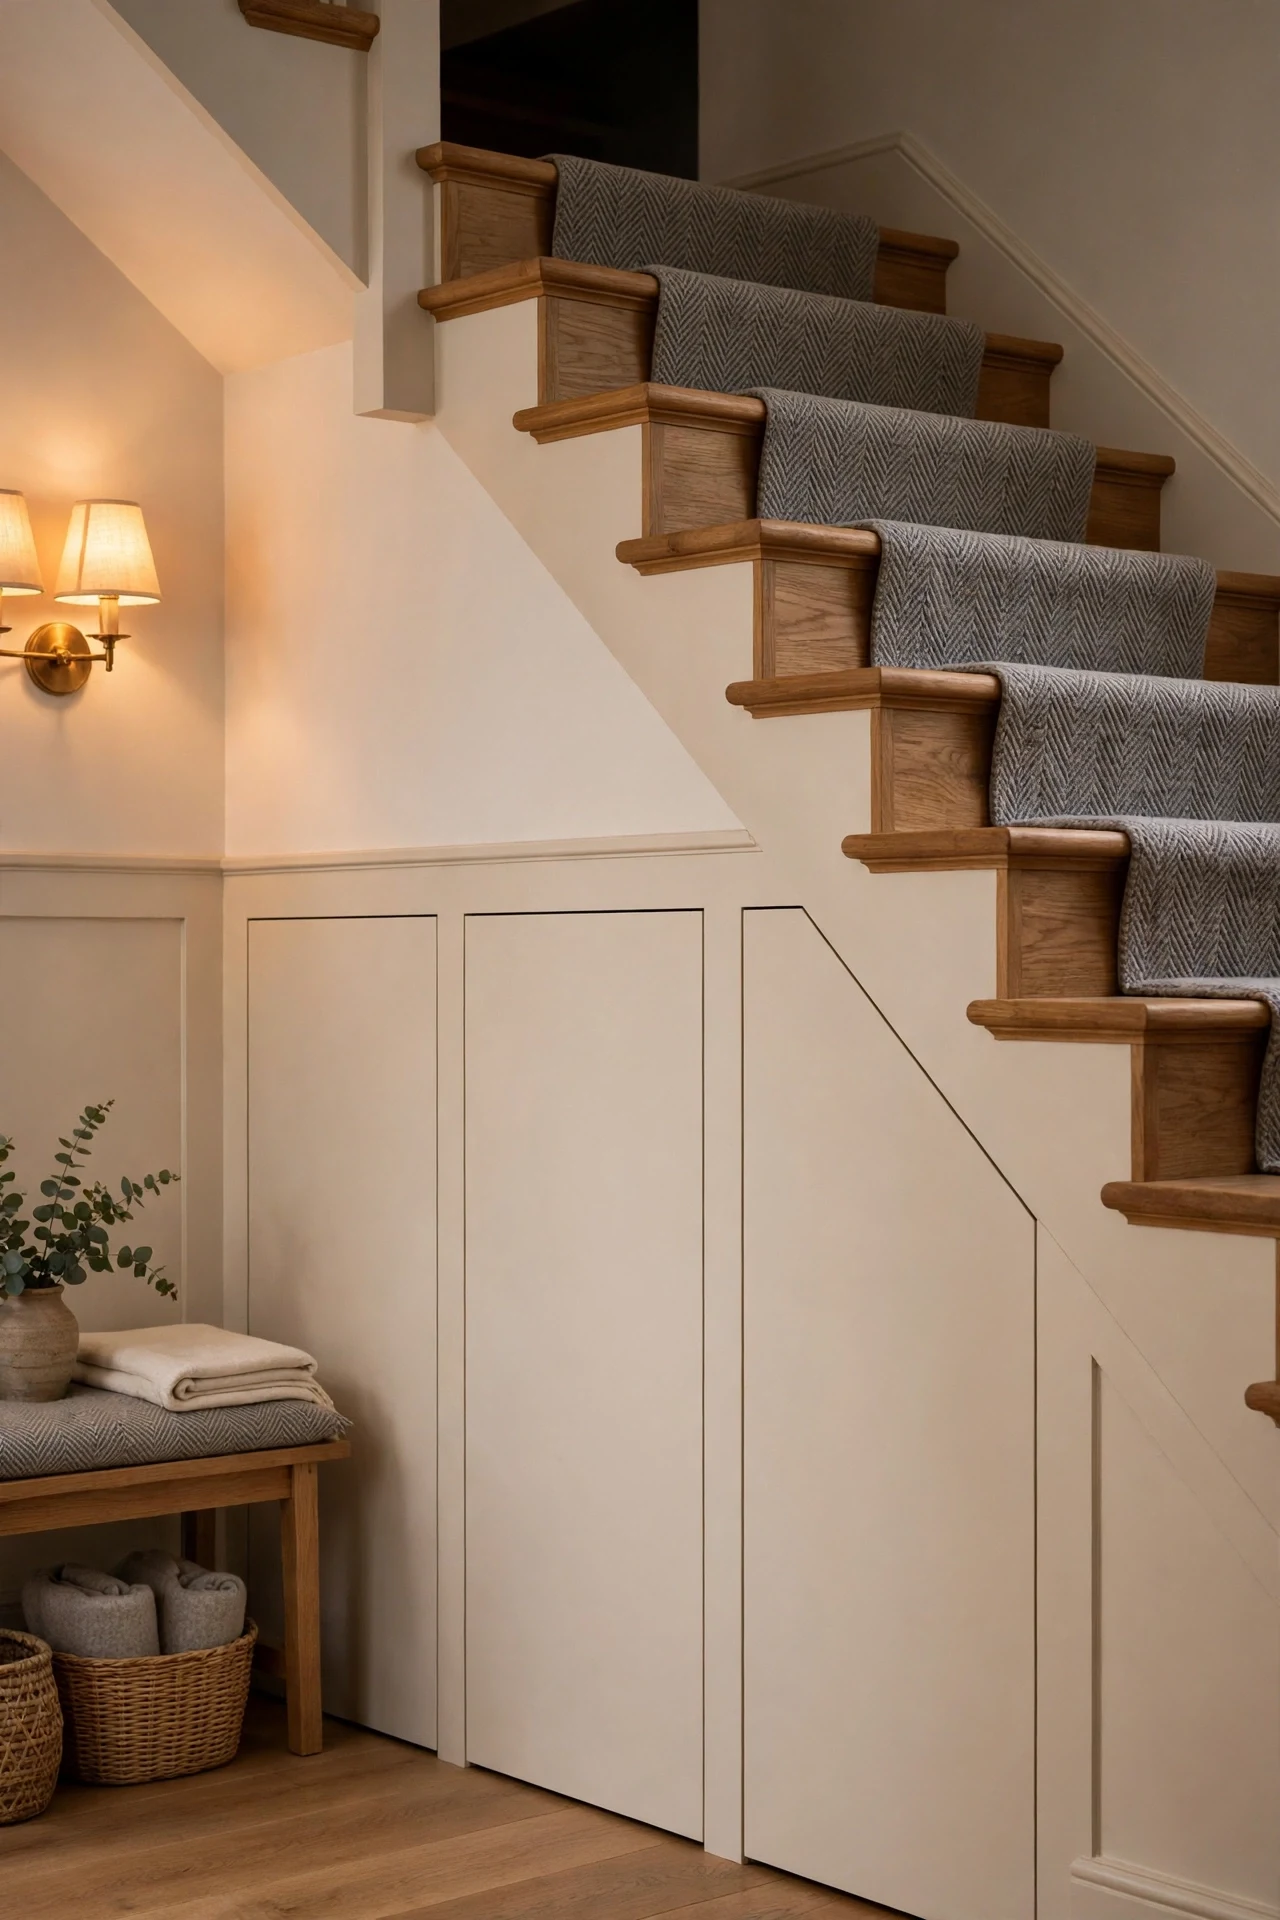
The staircase feels clever and tidy, dead space quietly working as the home's hardest cupboard.
Found volume is the principle: the triangle under a stair run holds luggage and boxes, and flat panels disguise the doors better than any raised style could. Push-latch openings keep the grid unbroken. Painting the panels warm white bounces hallway light into a dark zone.
Frame the largest door first around your biggest item — usually a suitcase — then divide what remains. Add battery motion lights inside each bay. Label contents on the inside of each door.
💡 Quick Win: Start with one door — one finished bay proves the system in a weekend.
15. Inky Navy Panels in a Library Corner
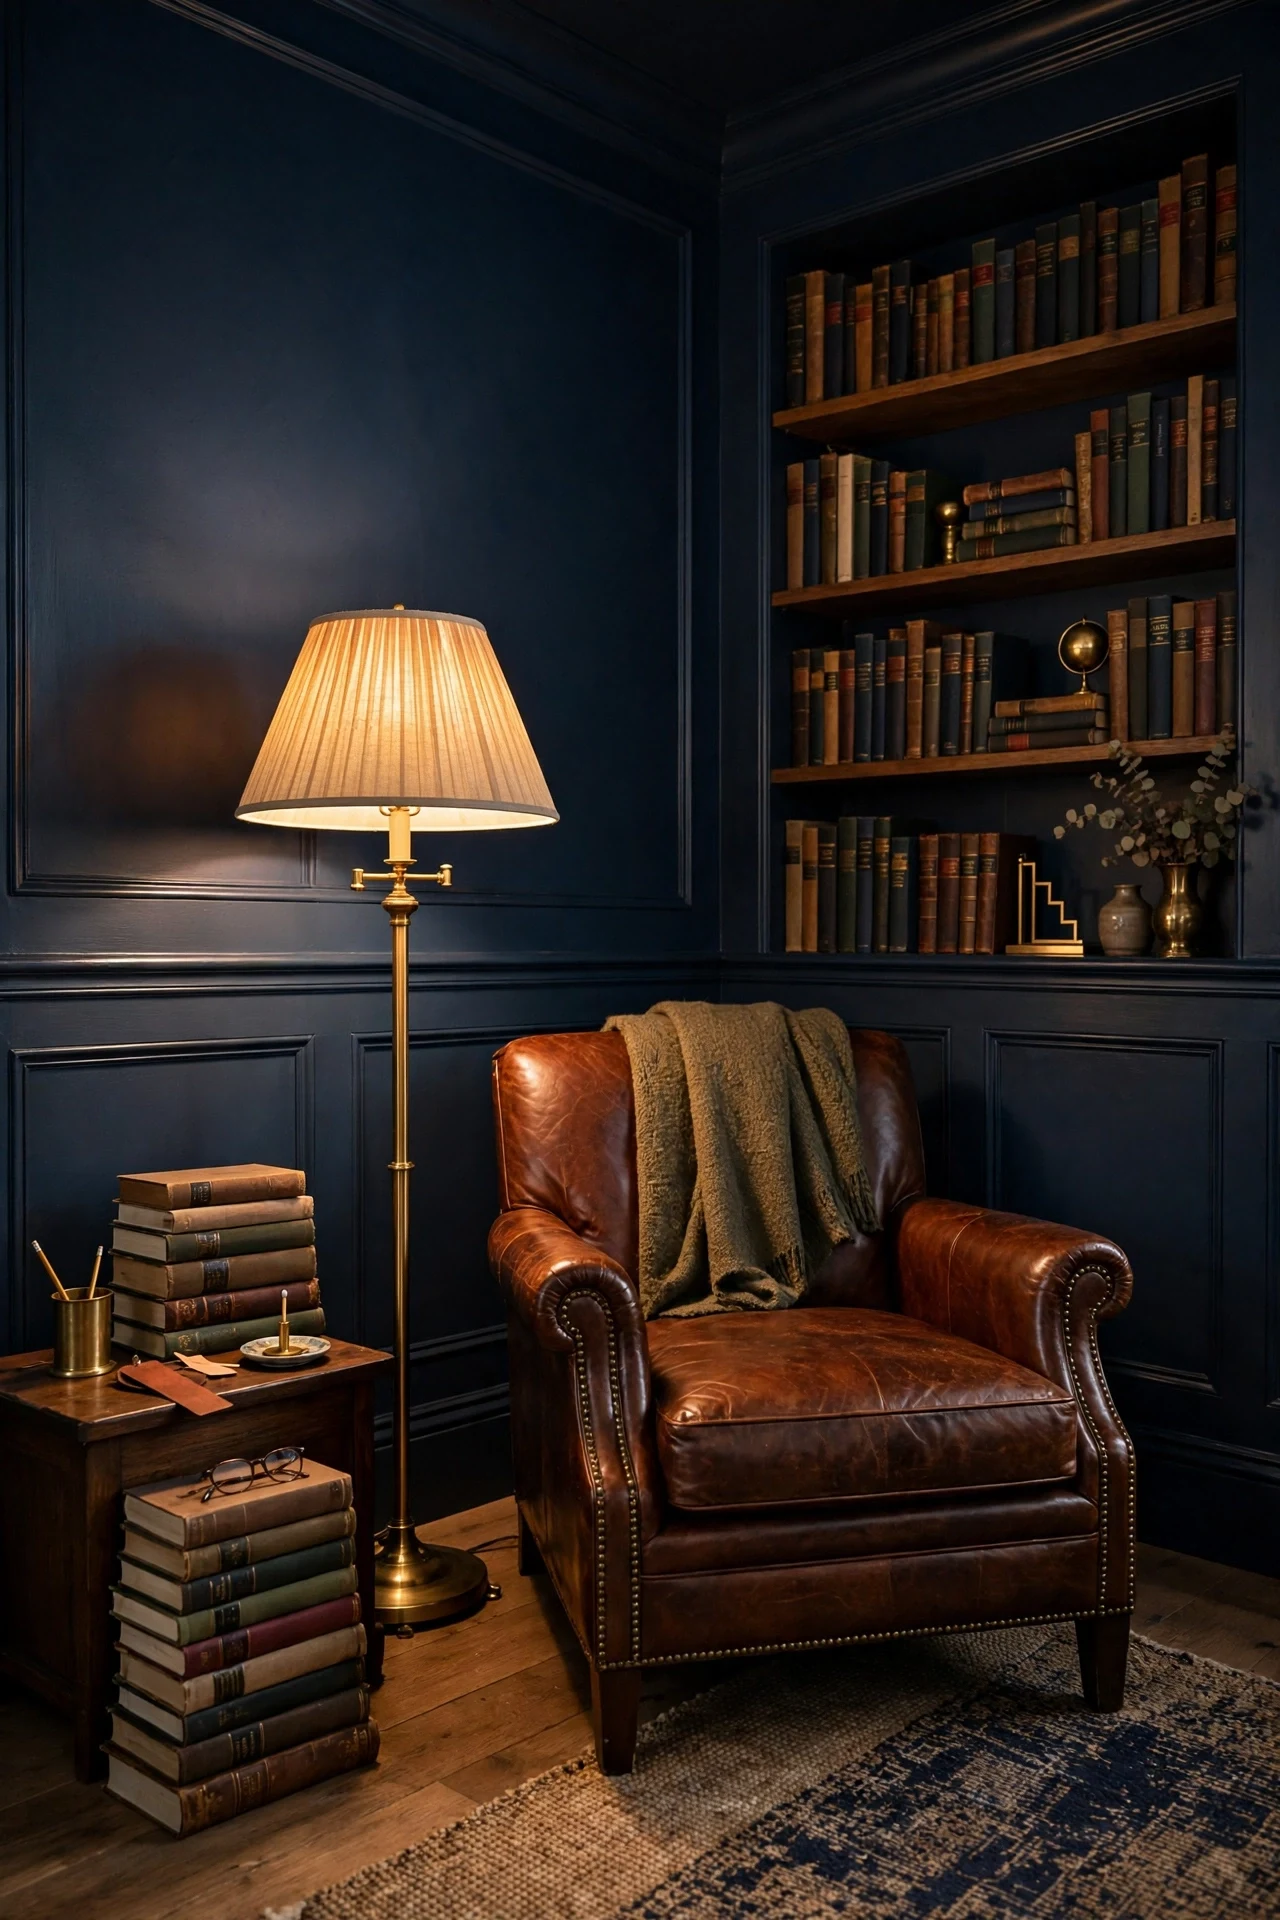
The corner feels cocooning and scholarly, navy panels folding around the reading chair like a book cover.
Saturation at low height is the principle: deep color below the rail concentrates richness where the body sits, while pale upper walls keep air moving. Farrow & Ball 'Hague Blue' No. 30 shifts between navy and teal as light changes. Cognac leather is its classic partner, each making the other look richer.
Use a low-sheen eggshell on dark panels — satin shows every roller mark on deep colors. Apply two thin coats rather than one thick one. A tinted primer in mid-gray halves your coat count.
16. Walnut Veneer Panels in a Mid-Century Living Room
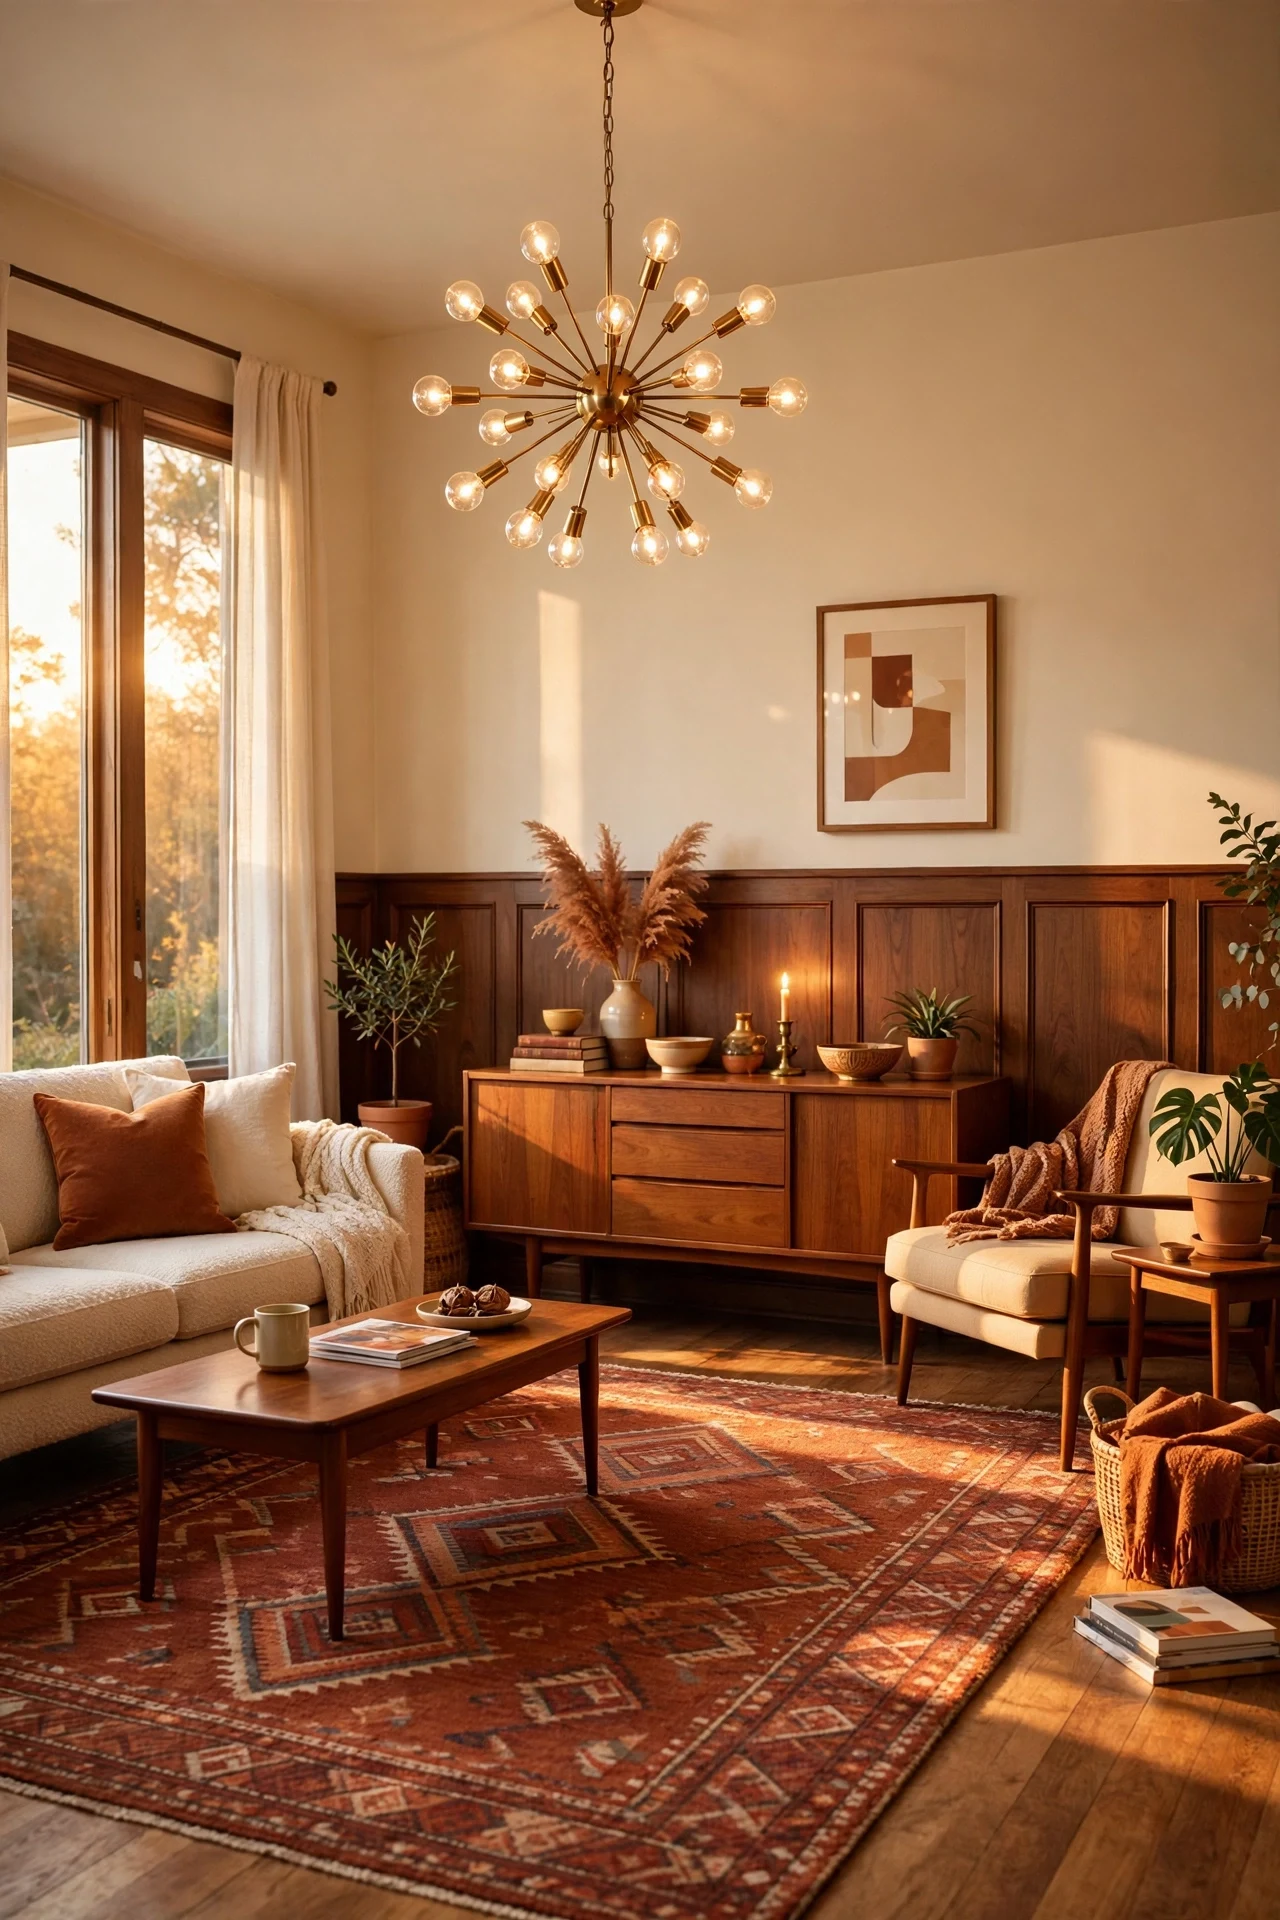
The living room feels warm and tailored, golden light raking across the walnut's long grain.
Horizontal grain direction is the principle: running walnut grain sideways stretches the wall and echoes mid-century credenzas and case goods. Plain-sliced American walnut veneer gives that long, calm figure without solid-timber cost. A hardwax oil finish keeps the surface matte and repairable.
Butt veneer panels with a 1/16-inch shadow gap instead of stiles for a sleeker, period-true look. Fill the gap with black felt tape for depth. Re-oil high-touch zones yearly with a cotton cloth.
💡 Quick Win: A $22 bottle of hardwax oil refreshes scuffed walnut panels in under an hour, no sanding.
17. Flat Panel Wainscoting Ideas for a Two-Tone Staircase Wall

The staircase feels fresh and architectural, the olive base anchoring each step like a plinth.
A raked color break is the principle: cutting the two-tone line parallel to the handrail turns a paint choice into architecture. Deep olive below — Benjamin Moore 'Backwoods' 469 — hides scuffs from hands and bags. Cream above keeps the stairwell from tunneling into darkness.
Snap the diagonal with a laser level set to the handrail angle, then tape below the line. Paint the darker color first and let it creep 1/4 inch above the tape. Peel tape while the second color is still tacky for a razor edge.
18. A Paneled Headboard Wall in a Guest Bedroom
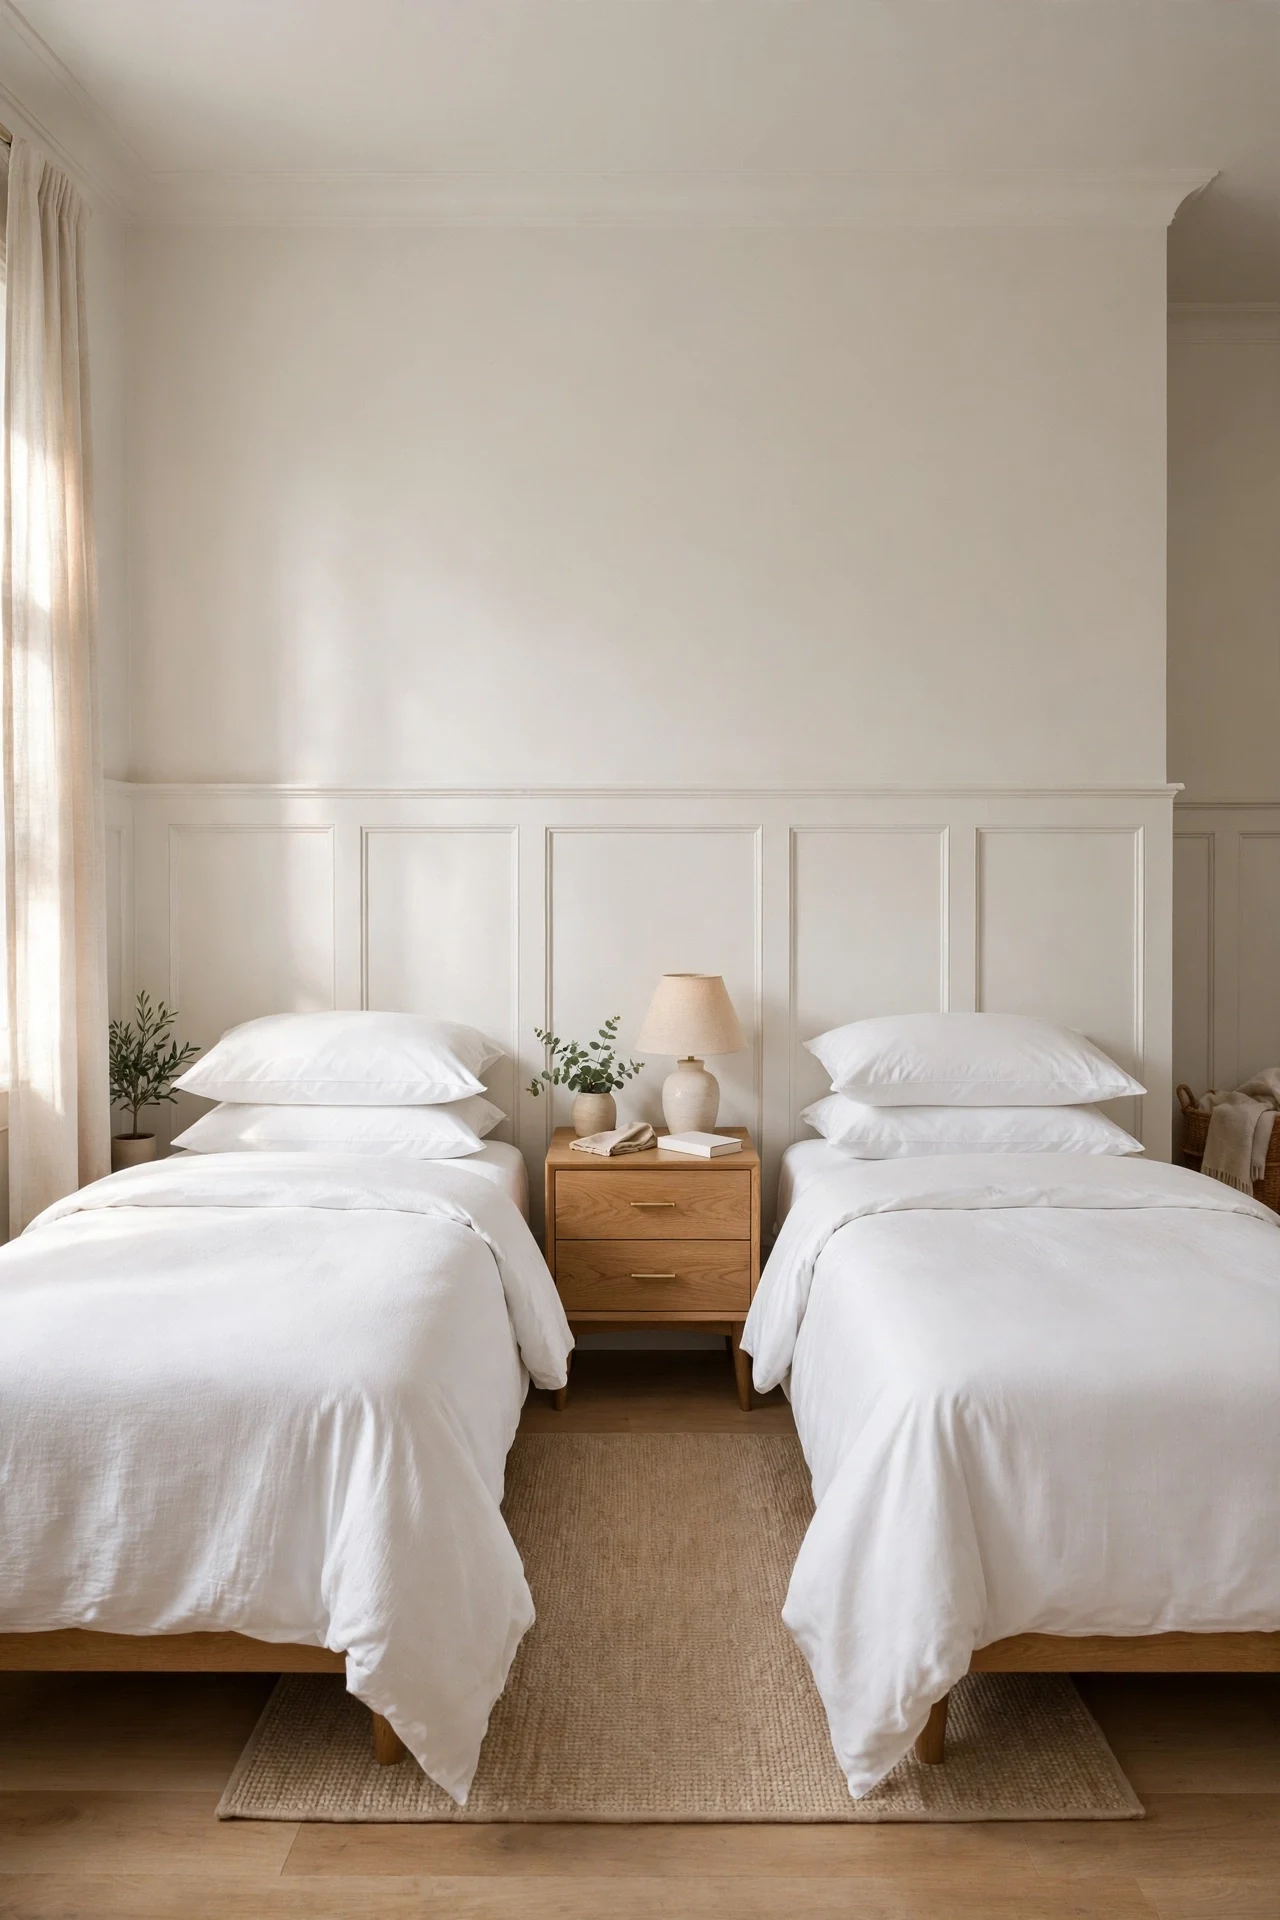
The guest room feels hotel-crisp and welcoming, the paneled headboard line running behind both beds.
Extending one datum across multiple pieces is the principle: a single 54-inch panel cap ties twin beds, nightstand, and wall into one composition. Guests read it as intentional hospitality. Warm white painted MDF keeps the look fresh against percale and oak.
Screw a doubled top rail at headboard height so leaning pillows never flex the panels. Cap it with a 1×3 ledge deep enough for a phone and water glass. Run the cap wall to wall, no gaps at corners.
💡 Quick Win: Clip-on reading lights on the cap rail: guest task light, zero wiring.
19. Ceramic Tiles Set Into Kitchen Panels Below the Rail
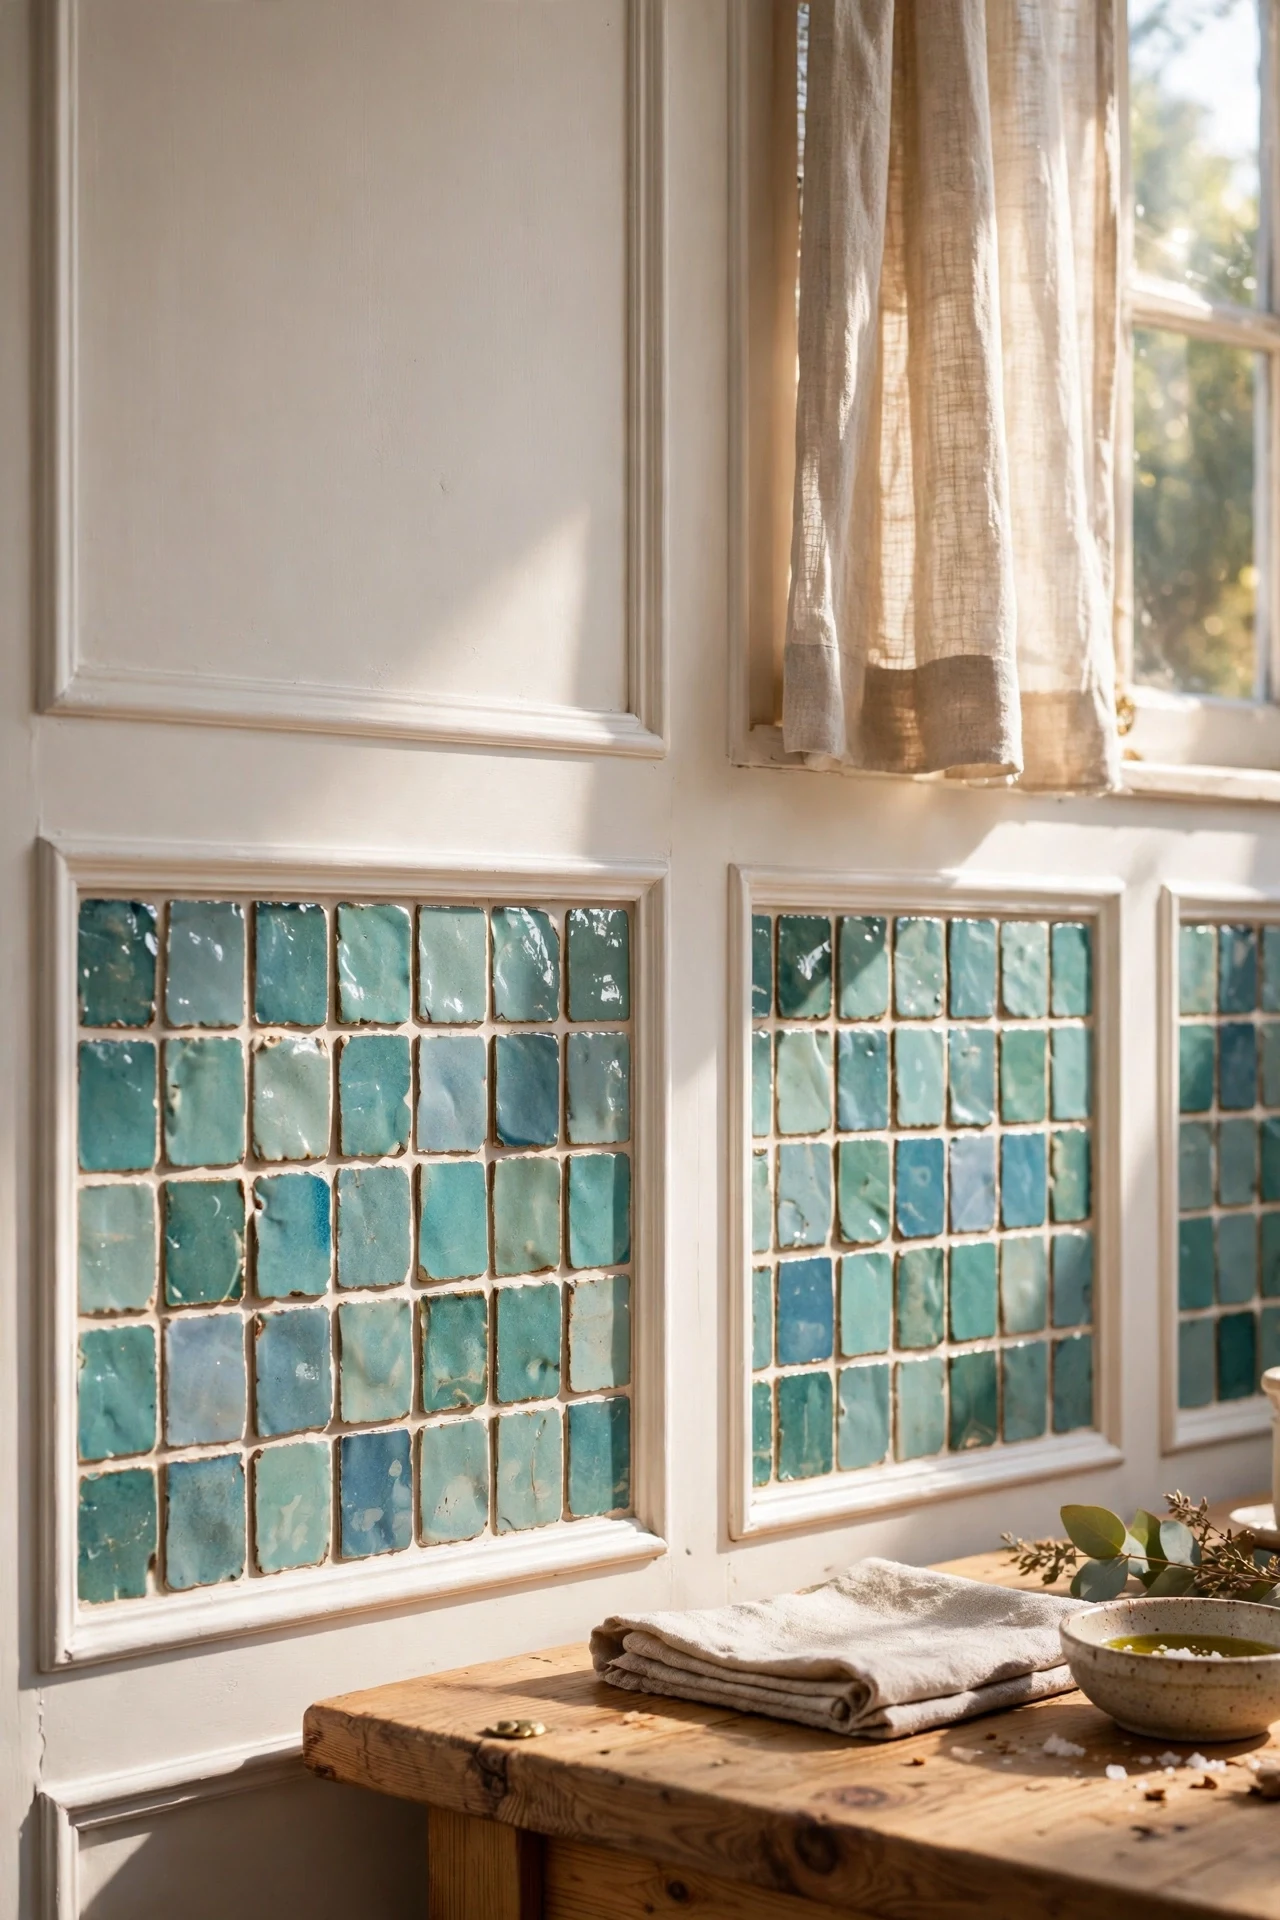
The kitchen corner feels crafted and sunlit, the zellige tiles shimmering unevenly inside their painted frames.
Reflectance contrast is the principle: handmade zellige tiles bounce light in a dozen directions while the matte painted frames stay still. That sparkle makes a small eating corner feel sunlit even on gray days. The tile also shrugs off chair scuffs and jam fingerprints better than paint.
Set tiles on 1/4-inch cement board inside the frame, never directly on MDF near sinks. Use unsanded grout in warm gray to protect the tile edges. Seal grout lines twice — kitchen splashes are relentless.
20. A Reading Nook Carved From a Paneled Alcove
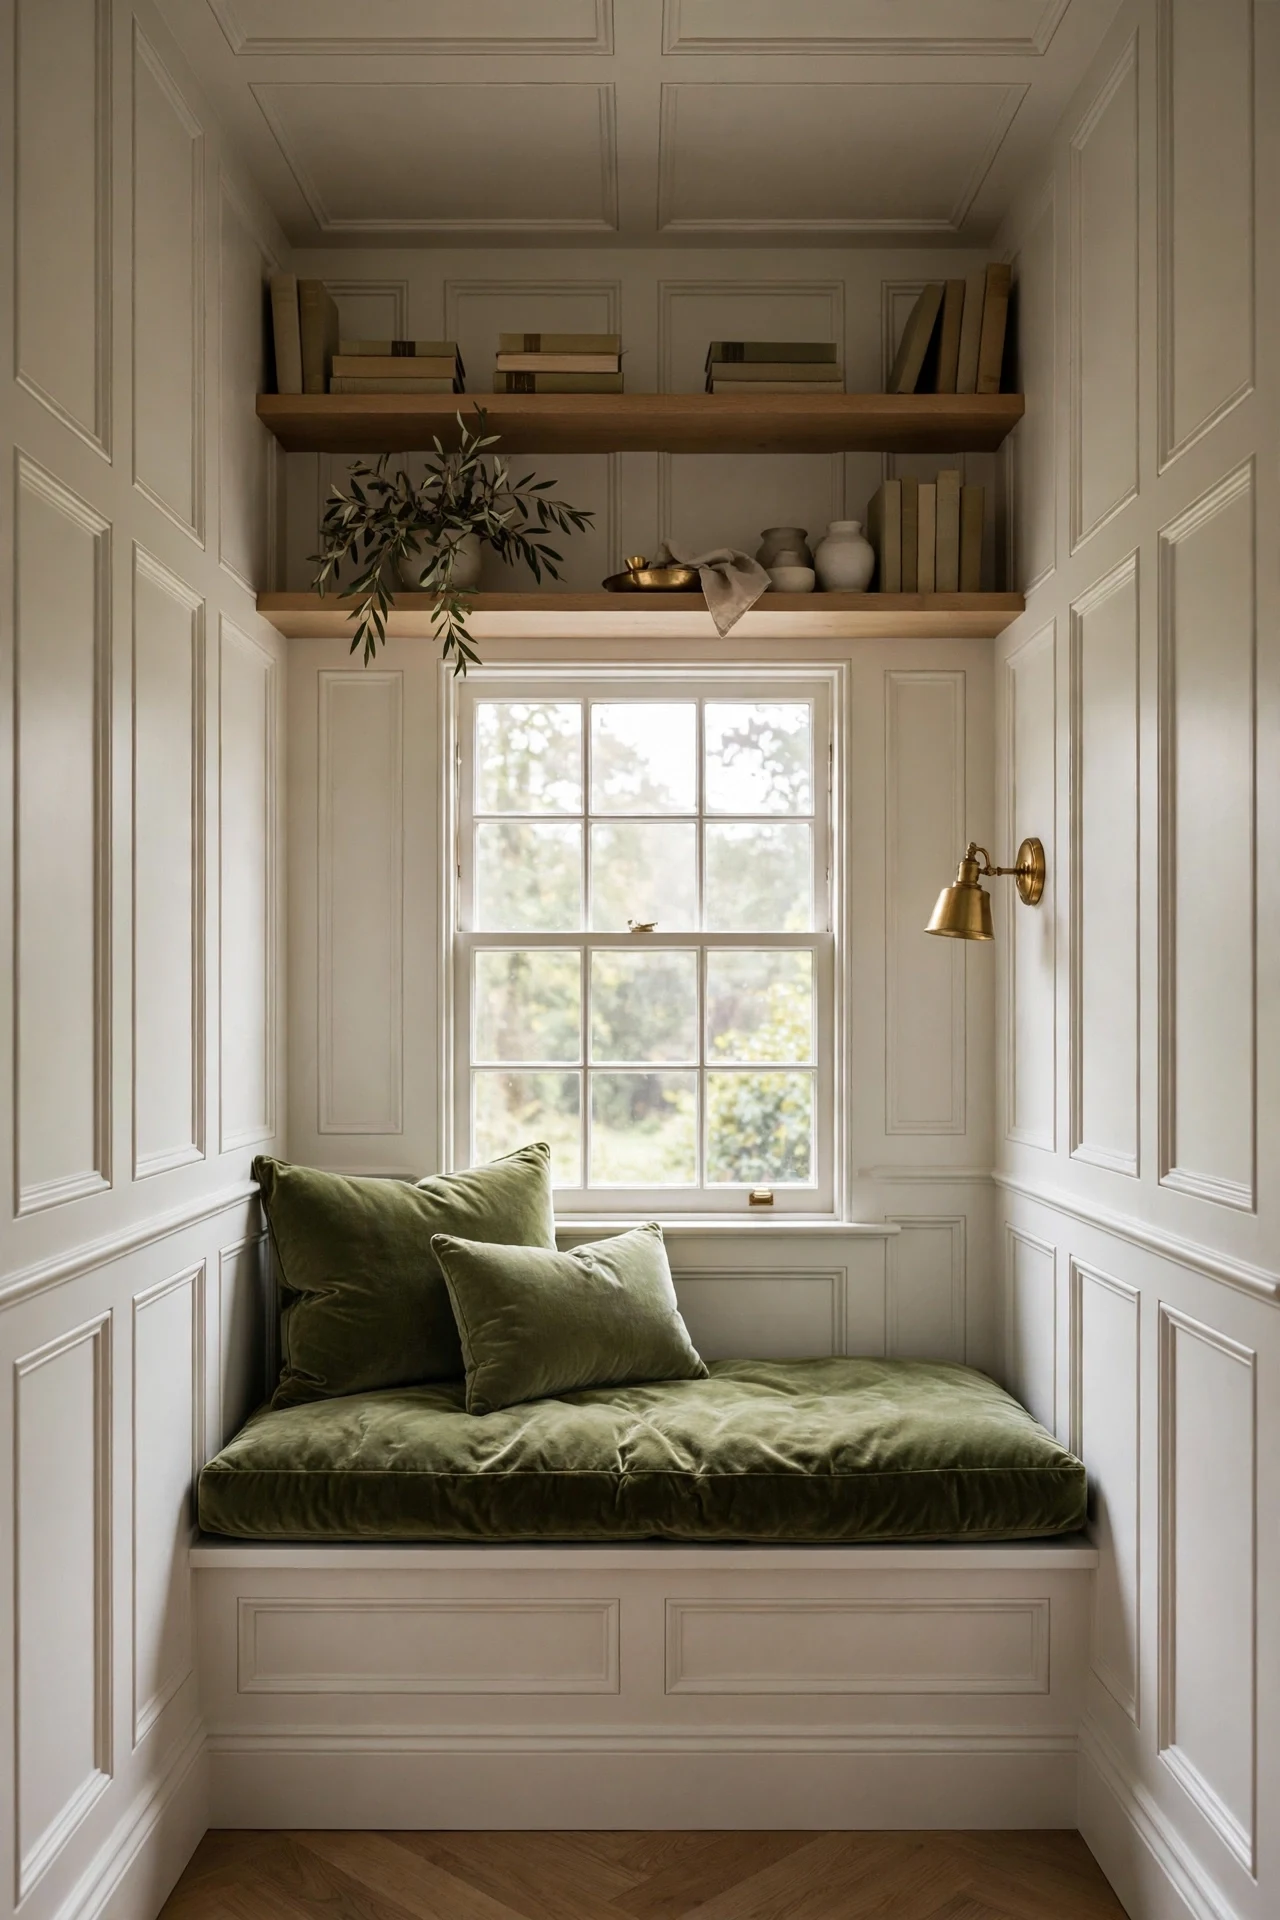
The nook feels hushed and enclosed, a room-within-a-room made entirely of panels and cushions.
Enclosure is the principle: wrapping all three alcove walls in one panel system turns leftover architecture into a destination. The eye reads a complete interior, not a decorated leftover. Full-height panels matter here — stopping halfway would break the cocoon.
Line the alcove ceiling with the same paint color to complete the enclosure. Add the window seat last, sized from leftover panel stock so the grid continues across its face. One fabric, one color, no patterns competing.
💡 Quick Win: A battery sconce and a thrifted cushion transform an alcove in one afternoon, panels or not.
21. Mirrored Panels Doubling Light in a Small Bathroom

The small bathroom feels bright and doubled, every surface borrowing light from the antiqued mirrors.
Borrowed light is the principle: antiqued mirror inside panel frames reflects the window without the hard glare of a full mirror wall. The mottled glass forgives splashes and age spots, unlike clear mirror at sink height. Sealed hardwood frames keep moisture out of the mirror backing.
Order mirror cut with safety film backing — essential anywhere near a sink. Set it on setting blocks with a hairline gap for expansion. Never let mirror edges sit in standing water on the rail.
22. Terracotta-Toned Panels in a Sunroom
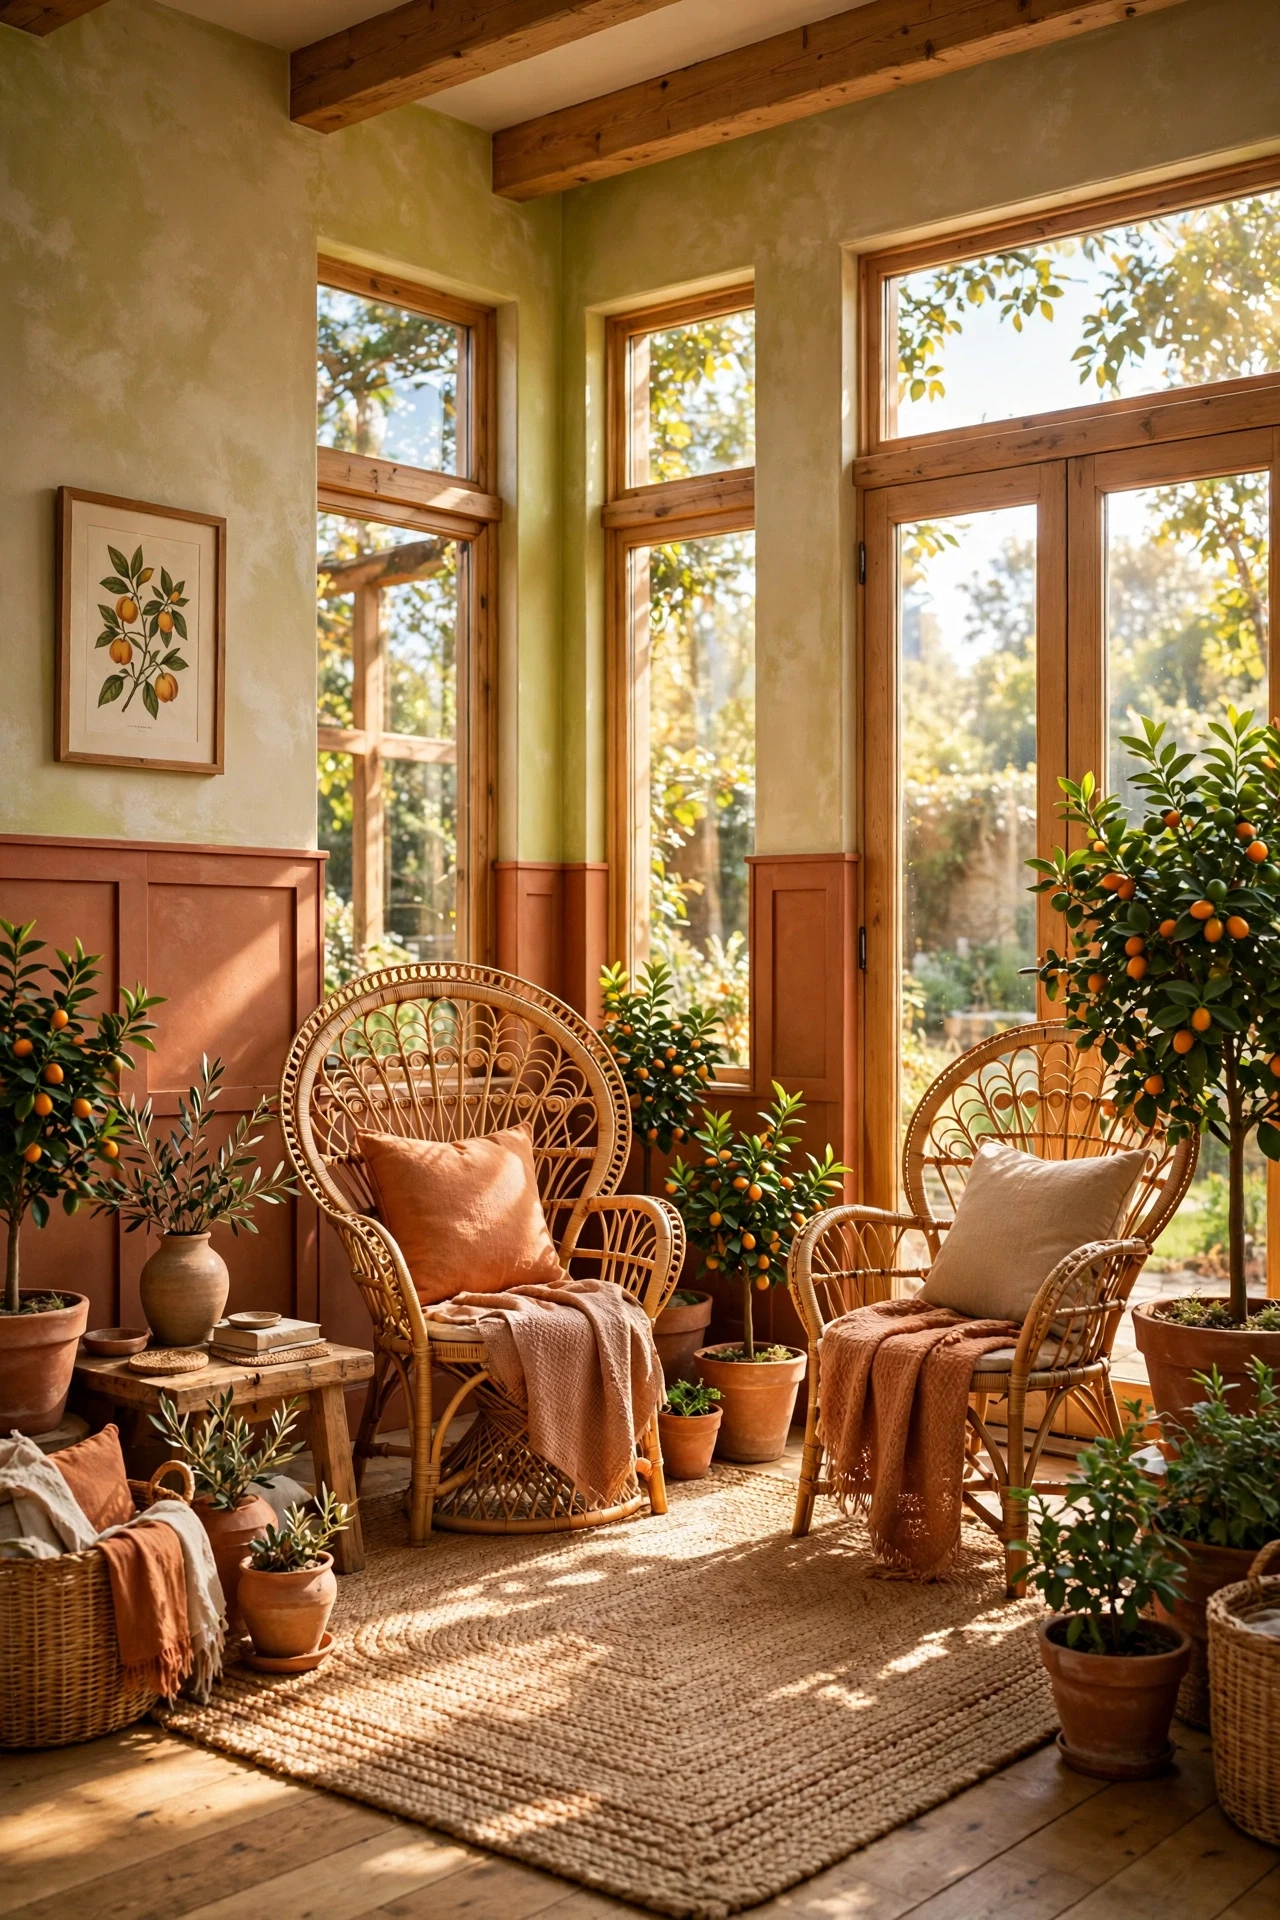
The sunroom feels sun-warmed and earthy, terracotta panels glowing like garden walls at golden hour.
Warm undertone layering is the principle: terracotta panels, rattan, and clay pots stack three versions of one warmth, so the room feels saturated without a loud color. A limewash-effect finish keeps the flat panels from looking plasticky in hard sun. Farrow & Ball 'Red Earth' No. 64 is the reference.
Apply two cross-hatched coats of portola-style limewash paint with a block brush. Work panel by panel — limewash dries fast and laps visibly. Test in direct sun, not shade.
💡 Quick Win: Cluster three unglazed terracotta pots at one corner to echo the wall.
23. Leather-Wrapped Panels in a Sophisticated Study
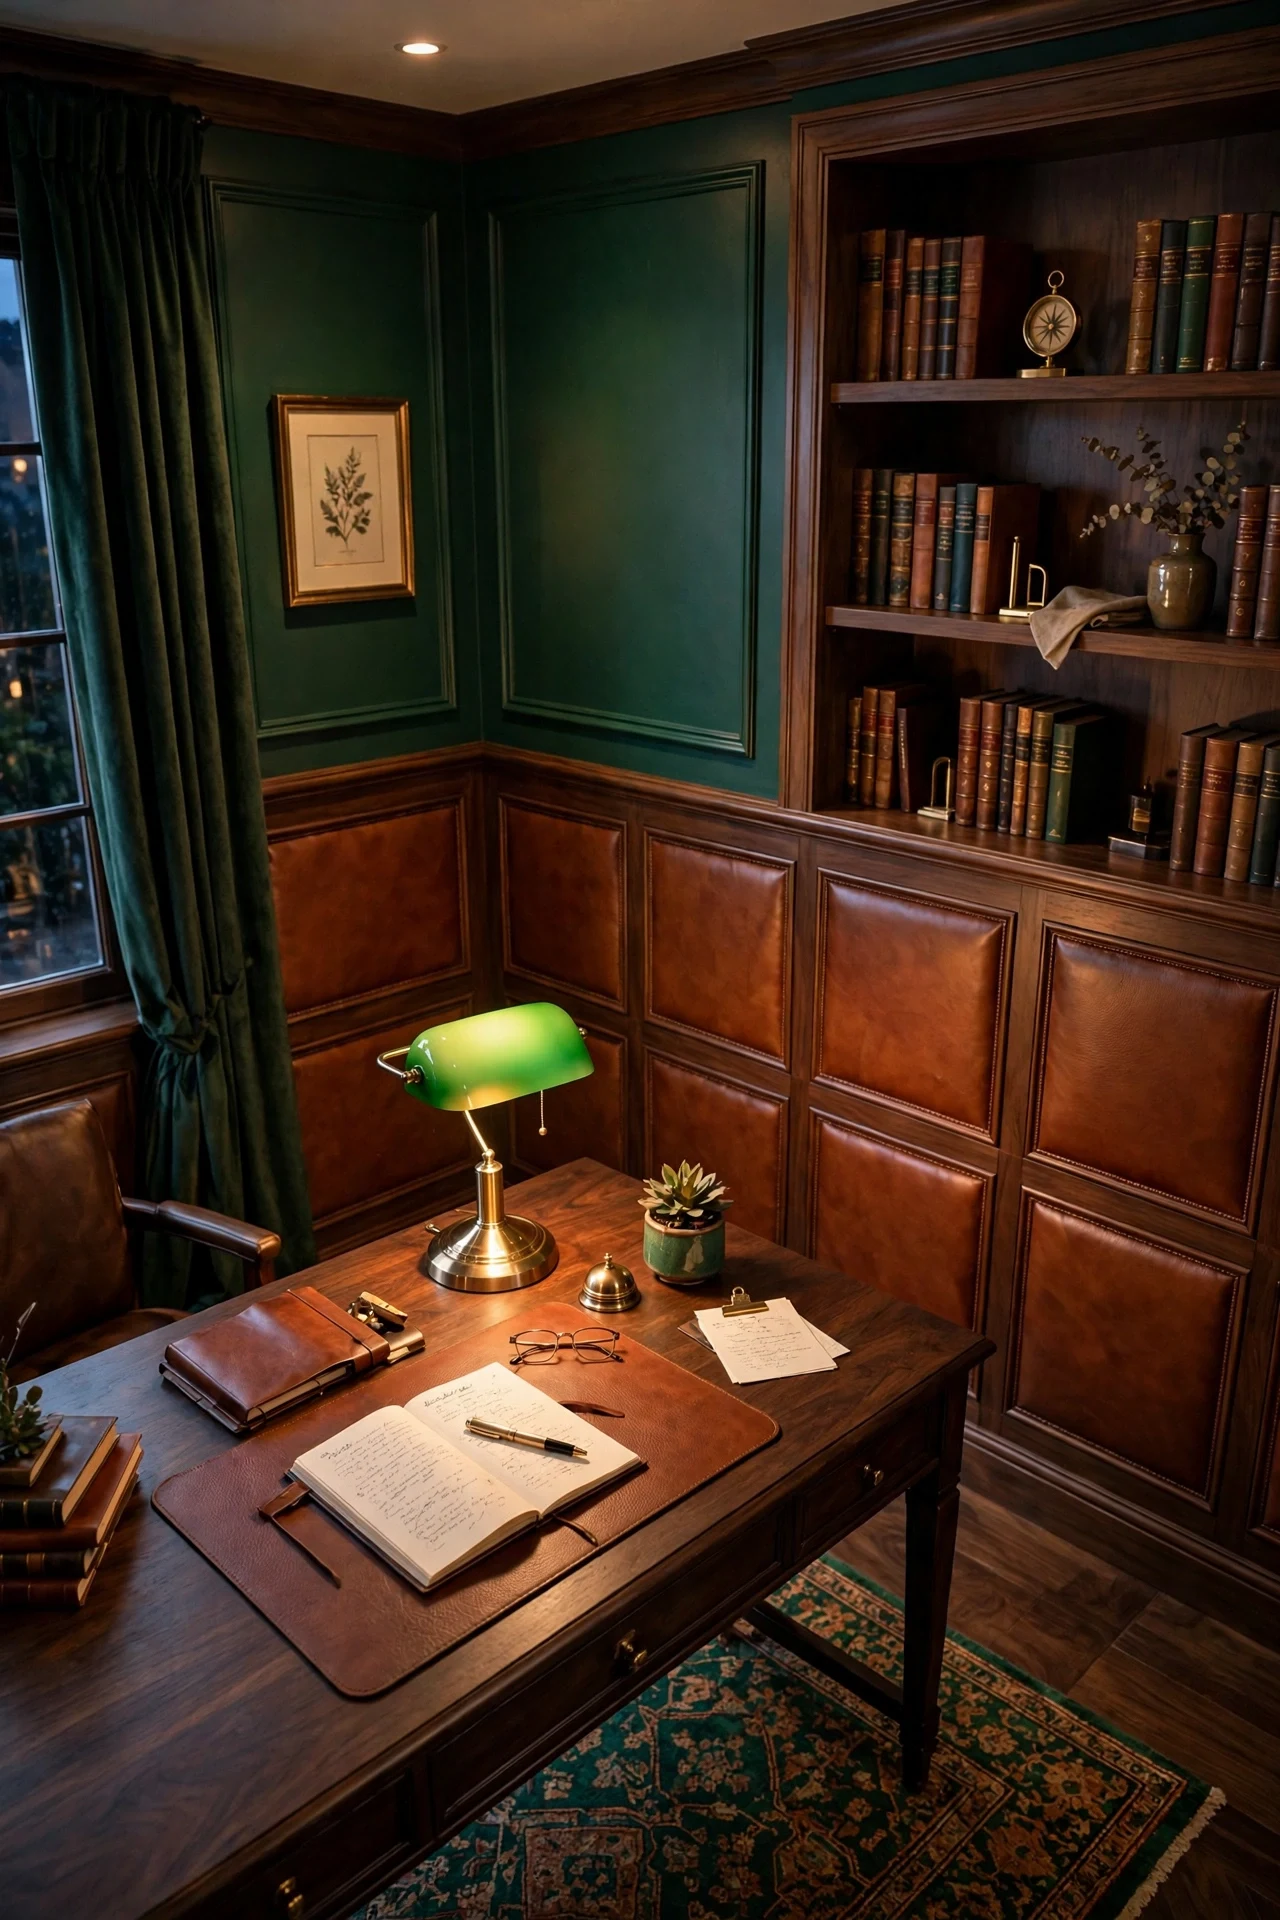
The study feels rich and focused, the leather panels giving off a faint, warm scent of the tannery.
Tactile luxury through padding is the principle: leather over thin foam yields slightly at touch, a sensation no paint can fake. The panels also deaden echo, which matters in a room built for calls and concentration. Vegetable-tanned cognac leather darkens with handling, recording use as patina.
Stretch leather over 1/4-inch foam on plywood inserts and staple from behind, mitering corners like upholstery. Condition once a year with a neutral leather balm. Keep leather panels out of direct sun — they fade faster than paint.
24. Under-Panel LED Strips in a Media Room
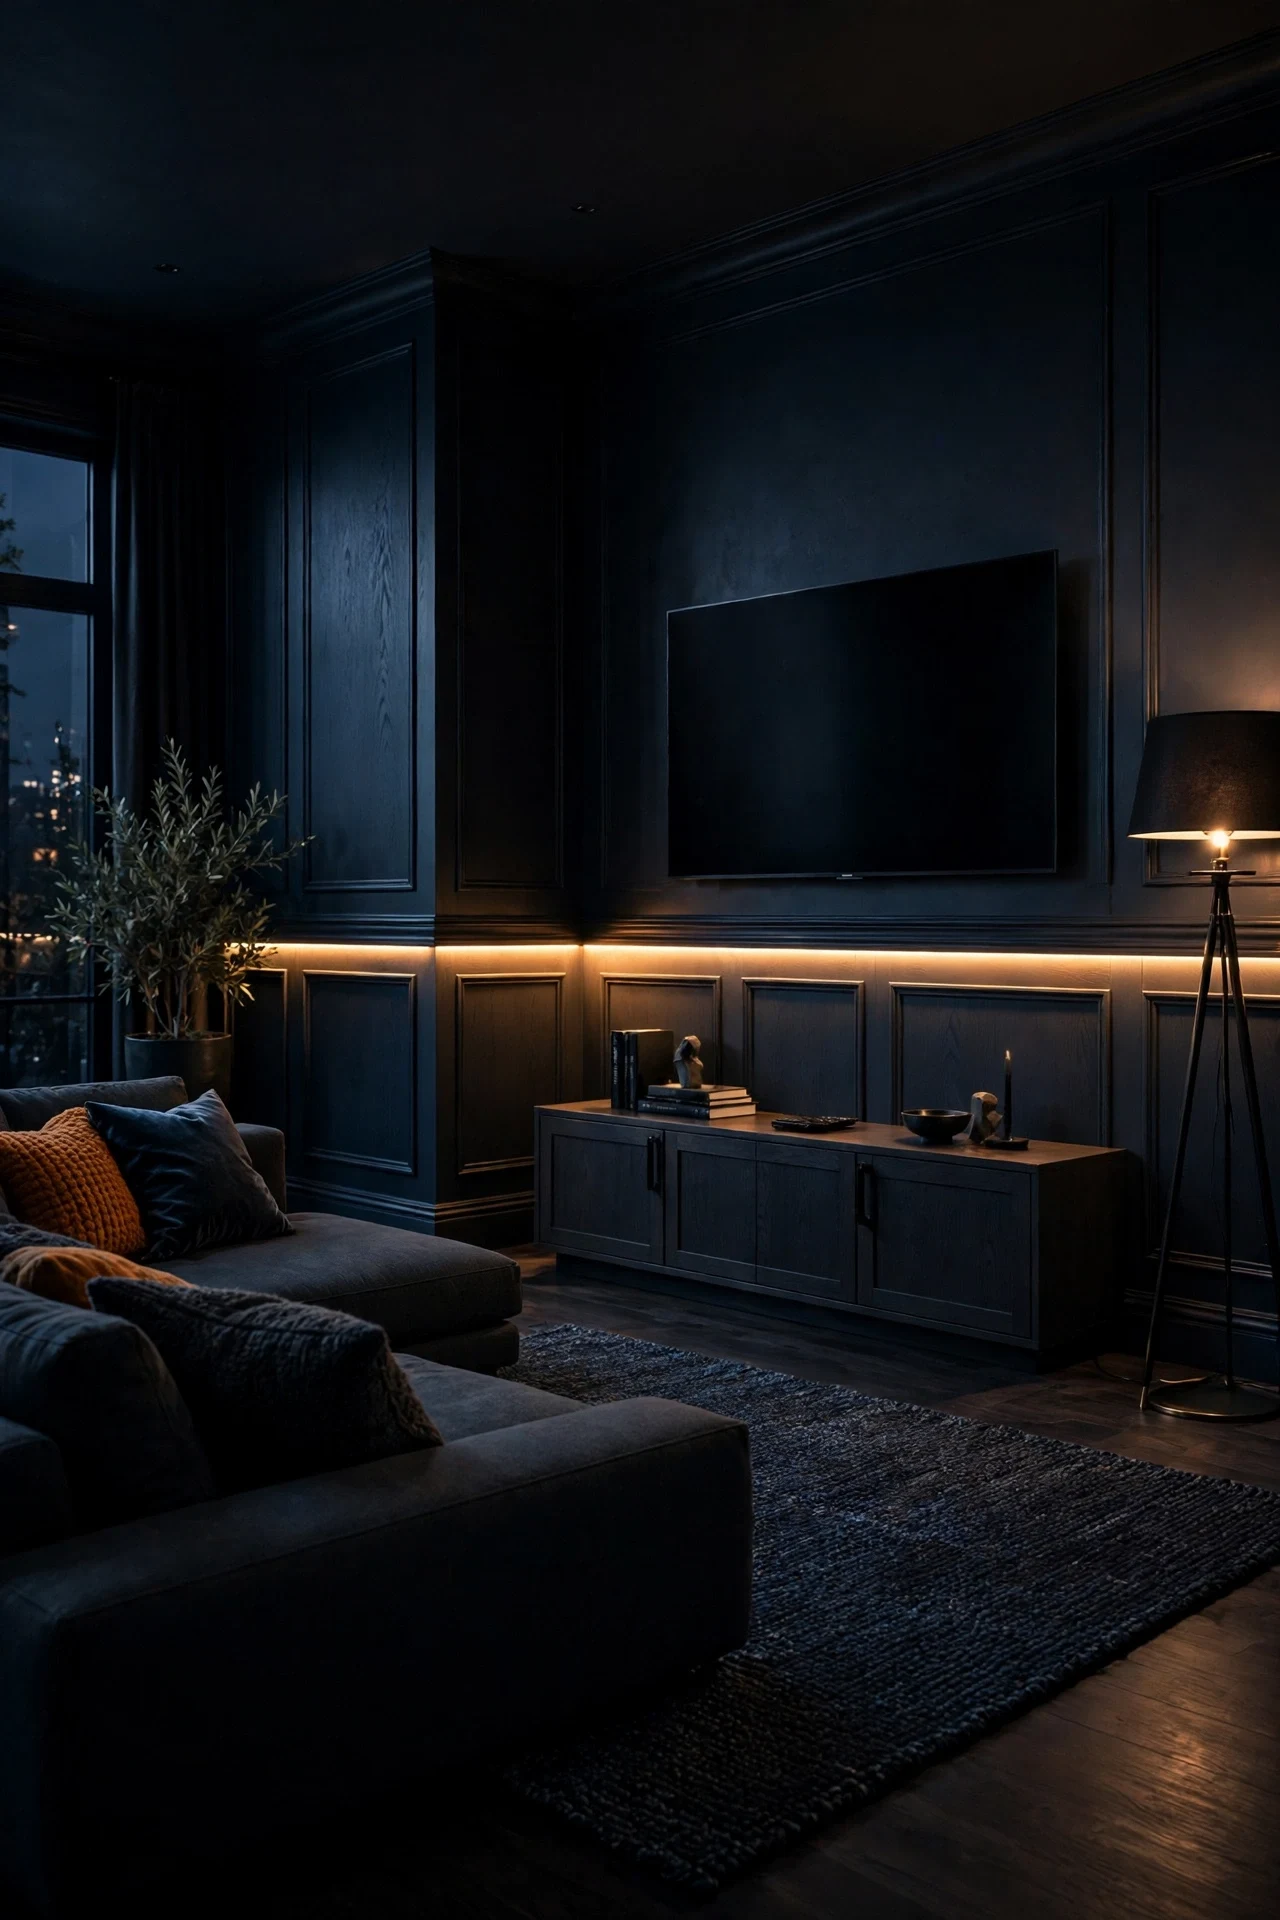
The media room feels cinematic and calm, a ribbon of light floating under the chair rail.
Indirect light at low height is the principle: the LED strip lights the floor path and panel faces without hitting the screen. Eyes relax, and glowing edges make the room read bigger. A routed channel hides the strip — you see light, never hardware.
Route a 3/8-inch channel into the chair rail underside and fit aluminum LED channel. Aluminum acts as a heat sink and doubles diode life. Choose 2700K, CRI-90+ tape so skin tones stay natural.
💡 Quick Win: A plug-in LED strip with remote dimmer tests the look tonight for $18.
25. A Window Seat Framed by Panels in a Child's Bedroom
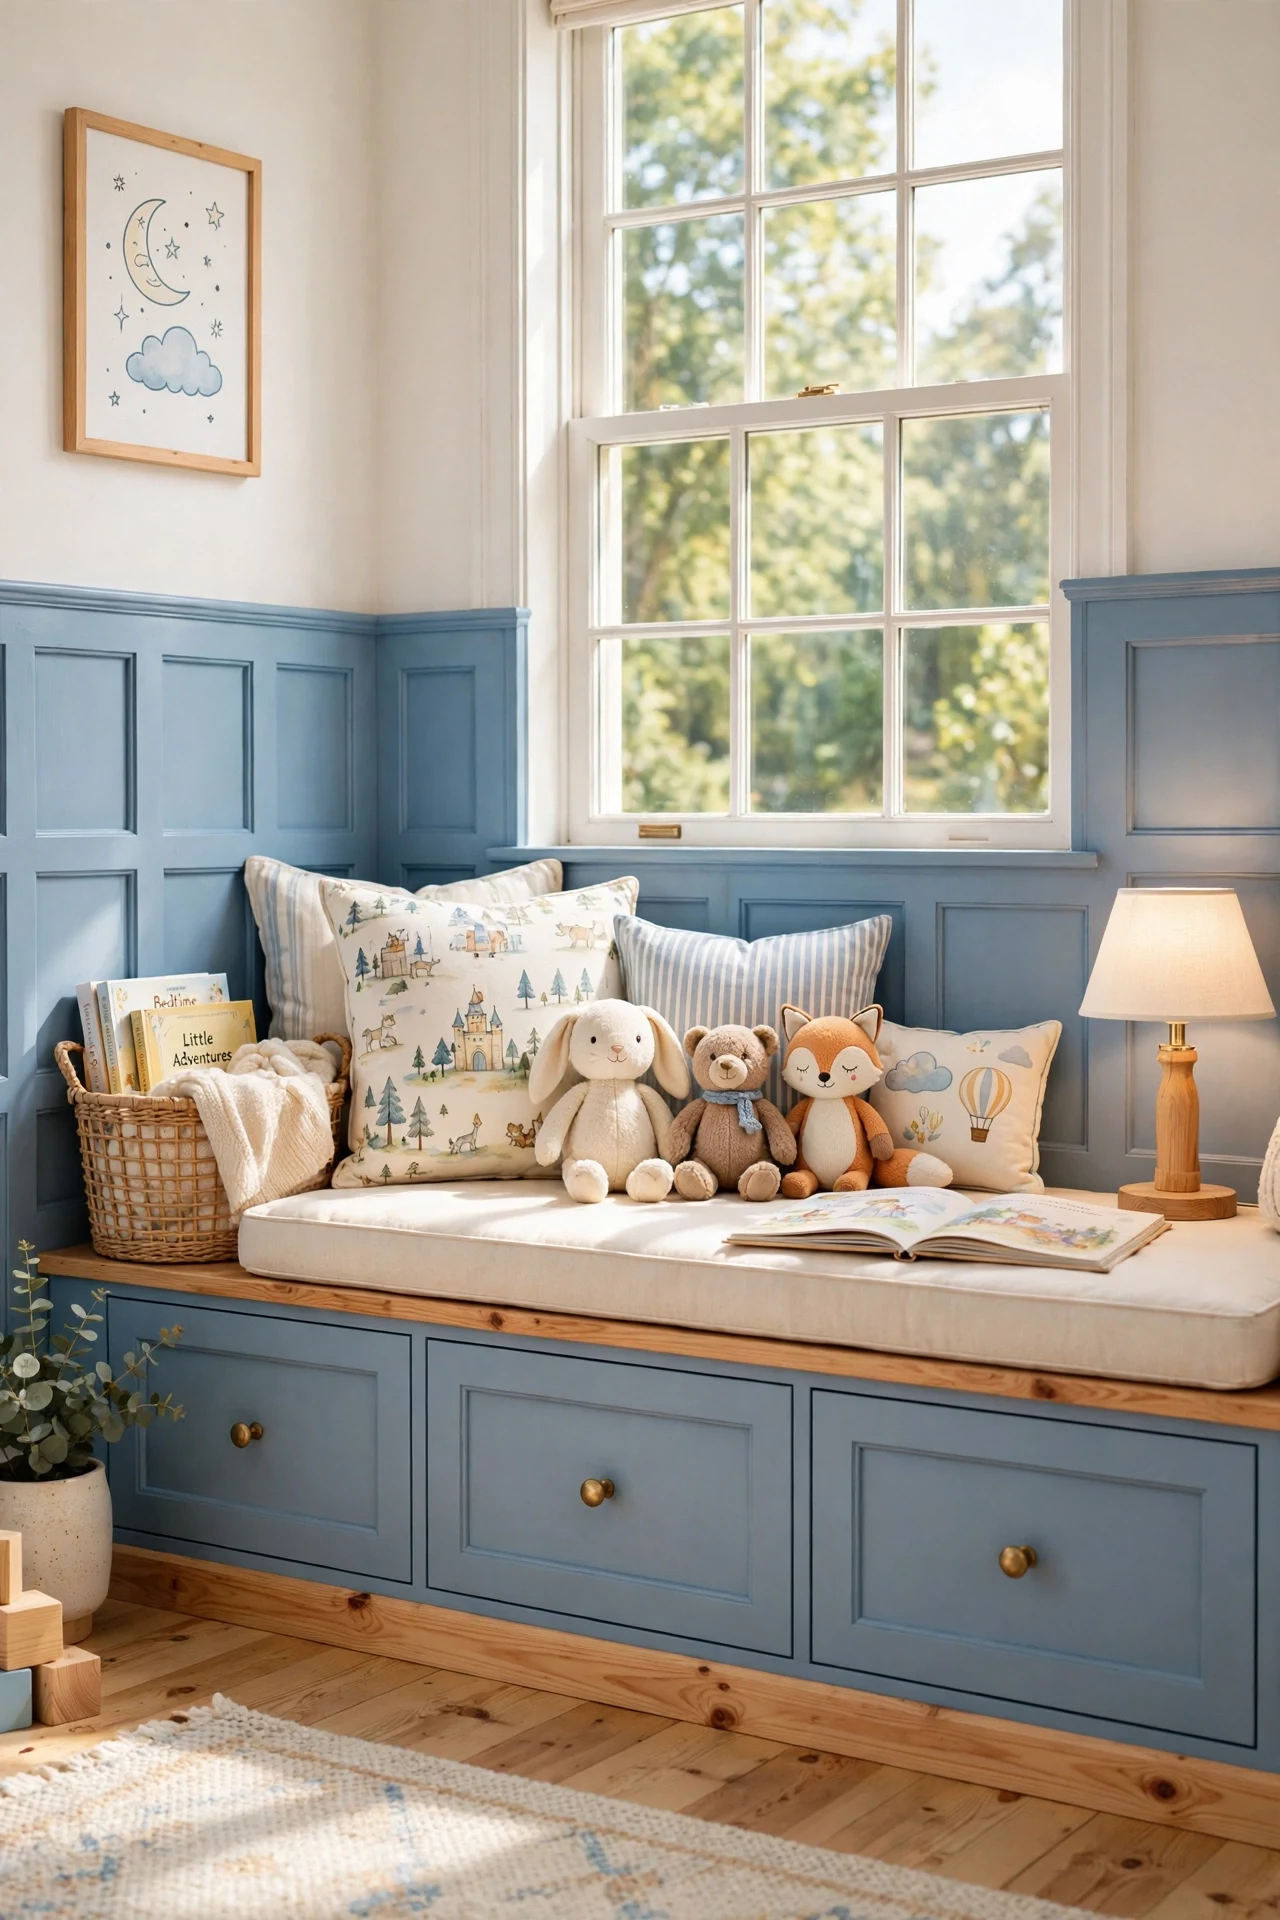
The child's room feels gentle and playful, the window seat waiting like the first page of a storybook.
Scale repetition is the principle: when drawer fronts repeat the wall panel sizes exactly, built-ins and wall become one friendly system a child can read. Soft blue painted MDF — Benjamin Moore 'Palladian Blue' HC-144 — stays calm behind busy toys and books. Pine seat tops warm the palette.
Use soft-close drawer slides rated for 75 pounds; window seats become climbing frames. Round the seat front edge with a 1/4-inch router bit for safety. Anchor the whole unit to studs, never just drywall.
26. Botanical Wallpaper Above the Rail in a Powder Room
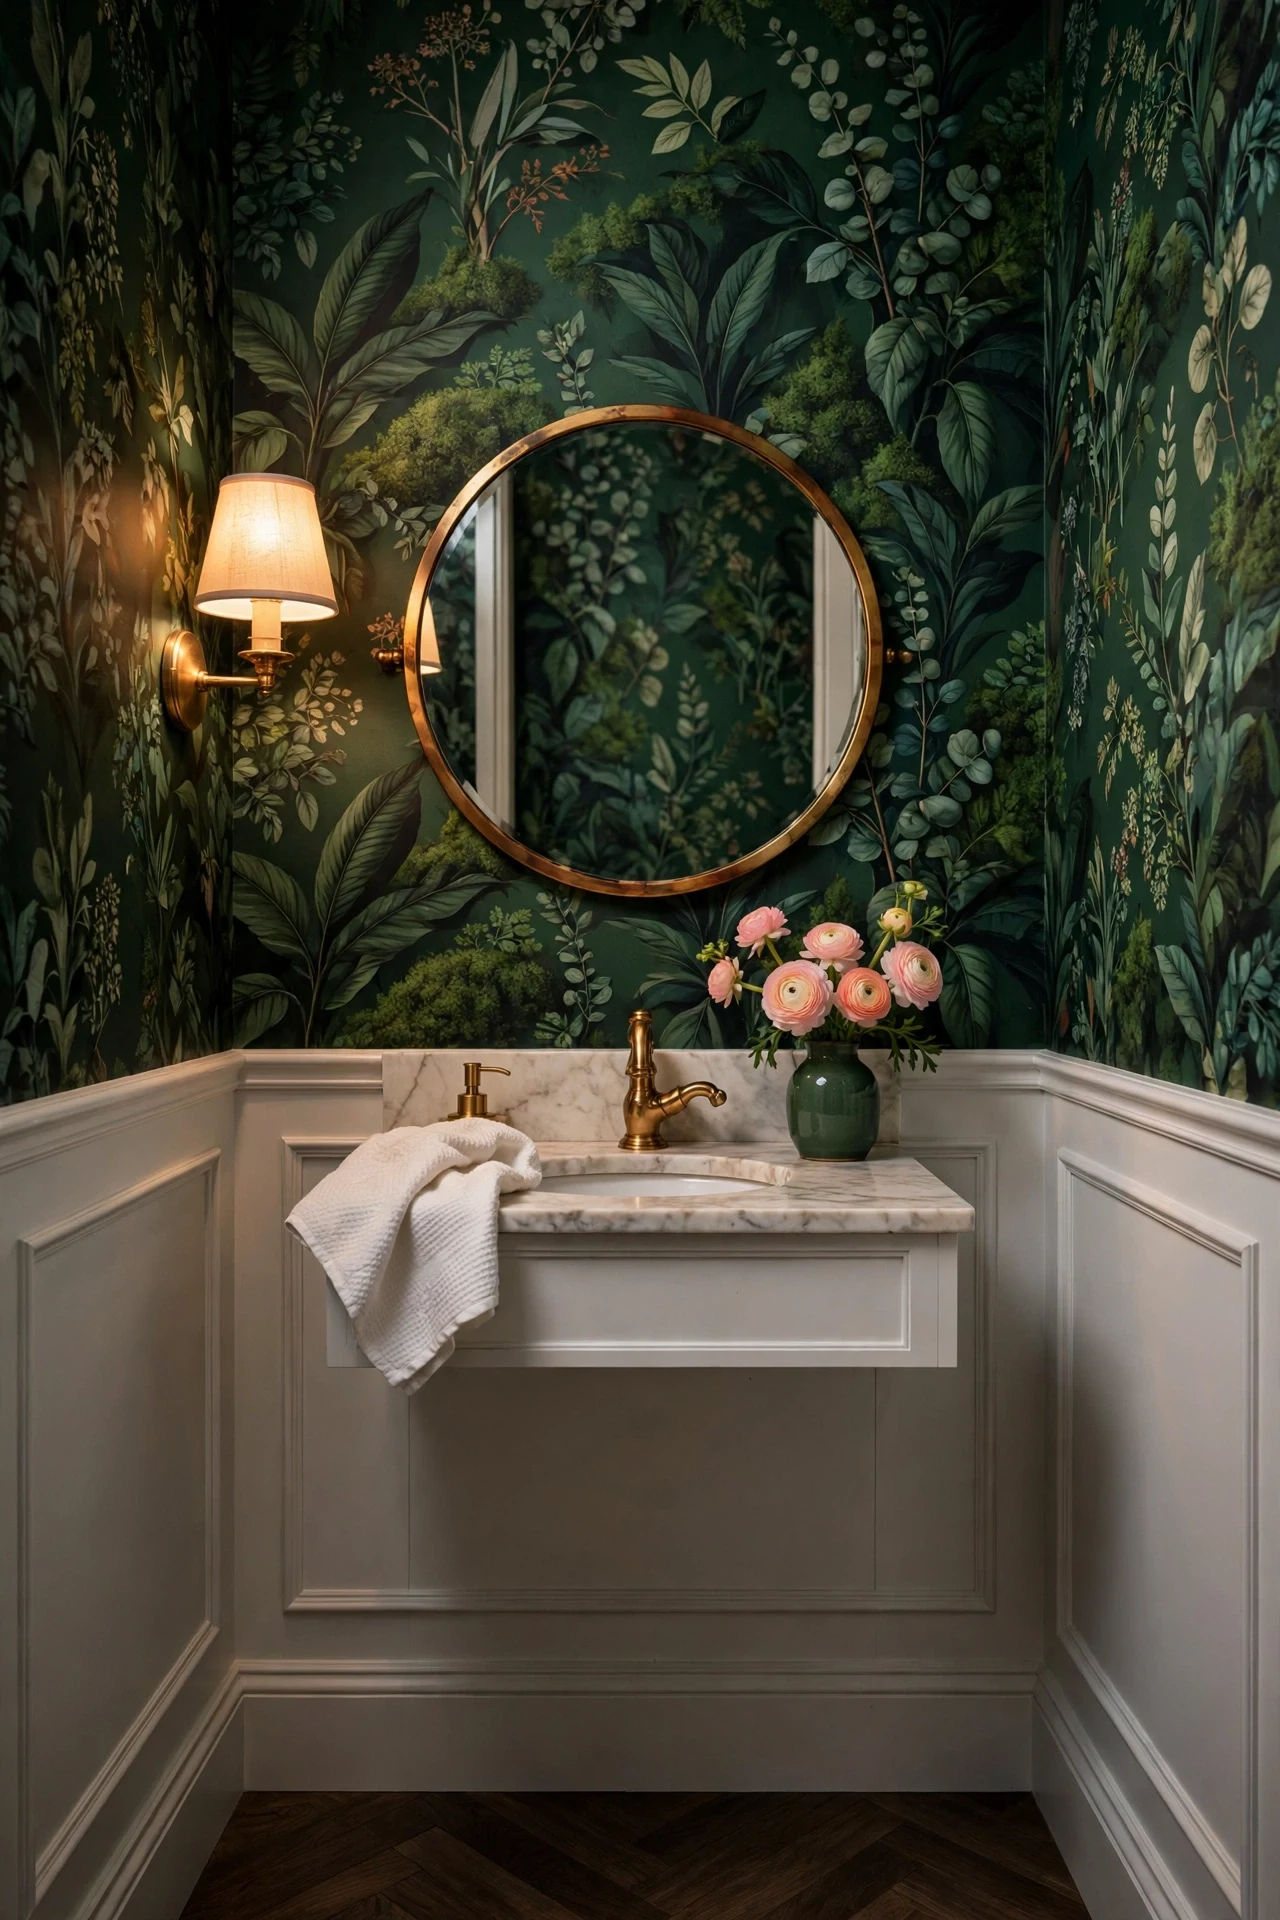
The powder room feels lush and jewel-like, botanical leaves climbing above the painted panels.
Pattern containment is the principle: flat panels give wallpaper a disciplined base, so the print reads as art rather than noise. Stopping pattern at the chair rail keeps a tiny room from closing in. Matte panels in warm white pulled from the paper tie both halves.
Pull your panel paint color from the wallpaper's lightest leaf vein, not its background. Order a sample and paint one panel first. In powder rooms, a deeper shade than the match reads richer under lamplight.
💡 Quick Win: A $15 peel-and-stick sample tests the pairing for a week first.
27. Panels Following the Stair Rake With Angled Tops
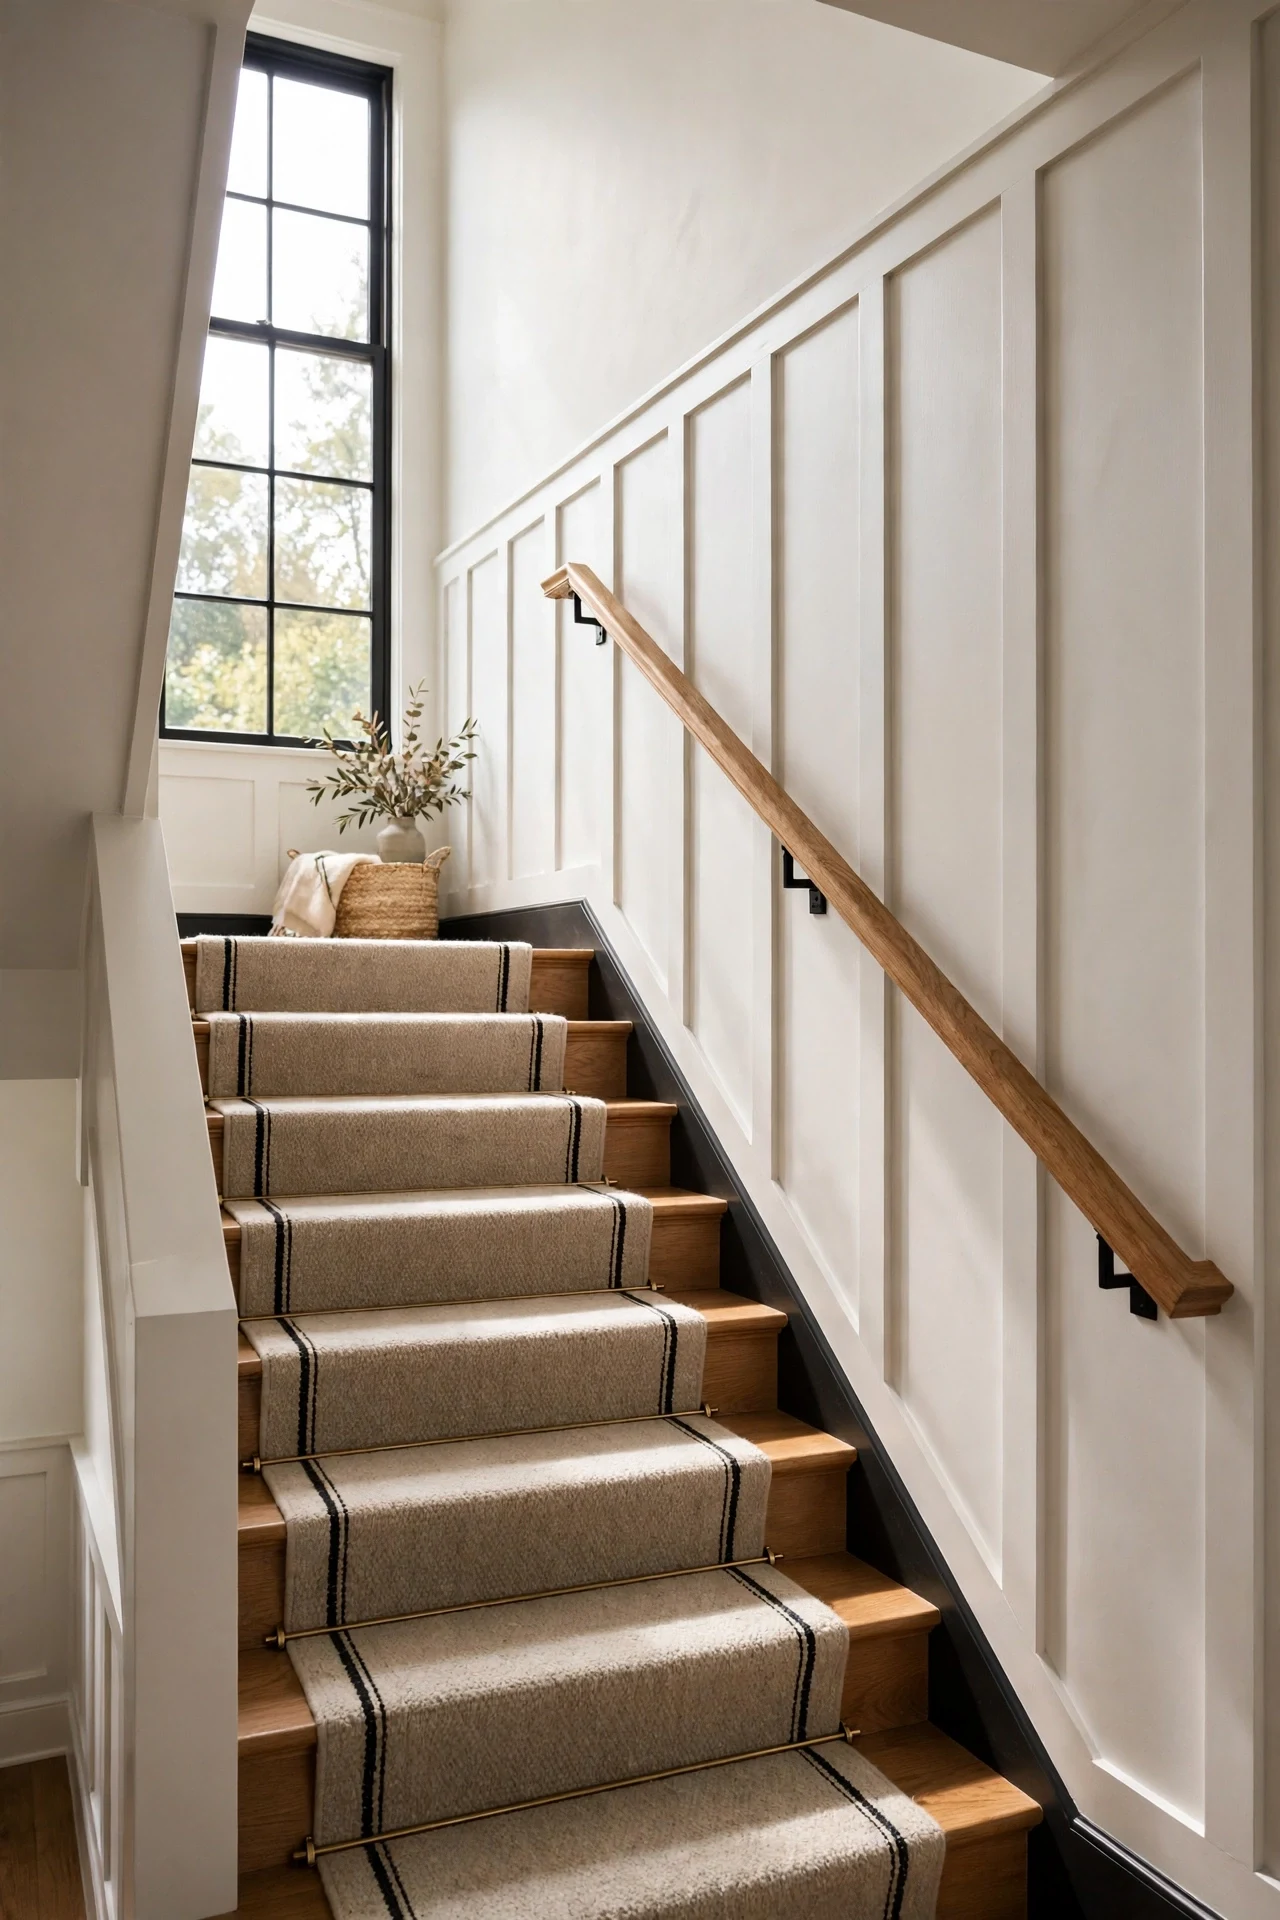
The stairway feels rhythmic and crafted, each angled panel stepping up the wall in time with your climb.
Following the rake is the principle: panel tops cut parallel to the stair slope create a second, quieter staircase in shadow and paint. The rhythm makes a plain stairwell feel deliberately designed. Warm white MDF panels keep the geometry, not the color, doing the work.
Build a cardboard template for one angled panel and test it on three consecutive treads before cutting wood. Stair angles drift — most runs are not a perfect 38 degrees. Scribe the template, never trust the math alone.
28. Flat Panel Wainscoting in a Galley Kitchen With Open Shelves
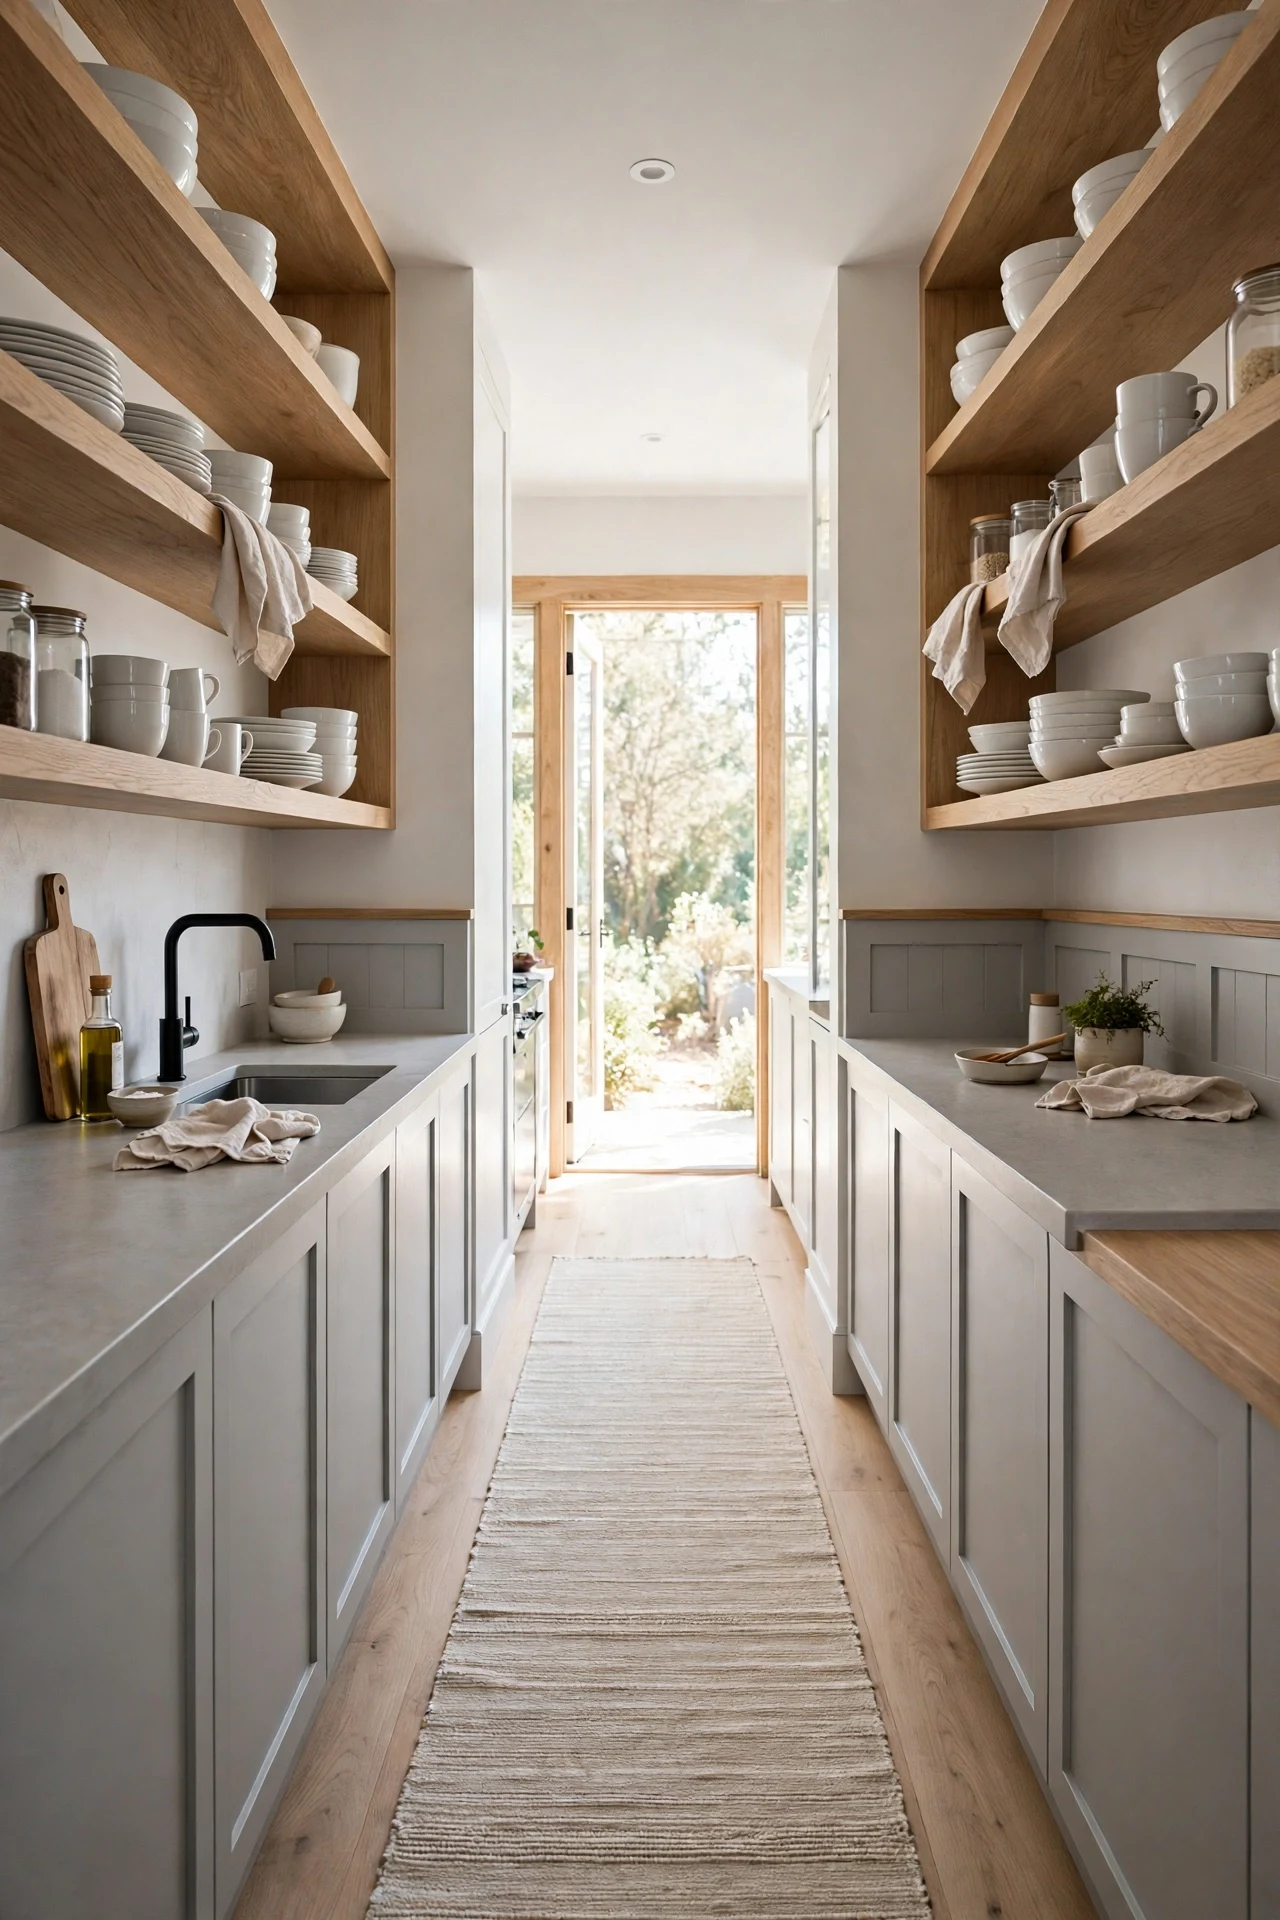
The galley feels efficient and bright, panels running its length like the calm inside of a ship.
A low cap is the principle: panels ending at counter height keep the galley's walls unified, while open shelves above preserve air. In a 7-foot-wide kitchen, upper cabinets would crowd the corridor; panels plus shelves do not. Warm white bounces end-window light down the run.
Seal the panel cap with three coats of water-based polyurethane — galley caps collect splashes and utensils. Use a slim 2-inch cap so hips clear it. Paint panels in scrubbable satin, never flat.
💡 Quick Win: One flatweave cotton runner lengthens a galley more than any paint trick.
29. Blackened Steel Panels in an Industrial Loft Entry

The loft entry feels urban and weighty, the blackened steel panels cool under your palm.
Material honesty is the principle: steel panels make no pretense of wood, and the visible welds and mill scale become the ornament flat design usually omits. The panels also take magnetic hooks anywhere, turning the entry into flexible storage. A wax finish keeps fingerprints visible but dignified — this is a working surface.
Order panels pre-cut from a local metal shop with the blackening done there; home blackening kits streak at this scale. Seal with Renaissance wax twice a year. Rare-earth magnets grip straight through the wax for hooks and notes.
30. Recessed Niches Between Panels in a Primary Bathroom
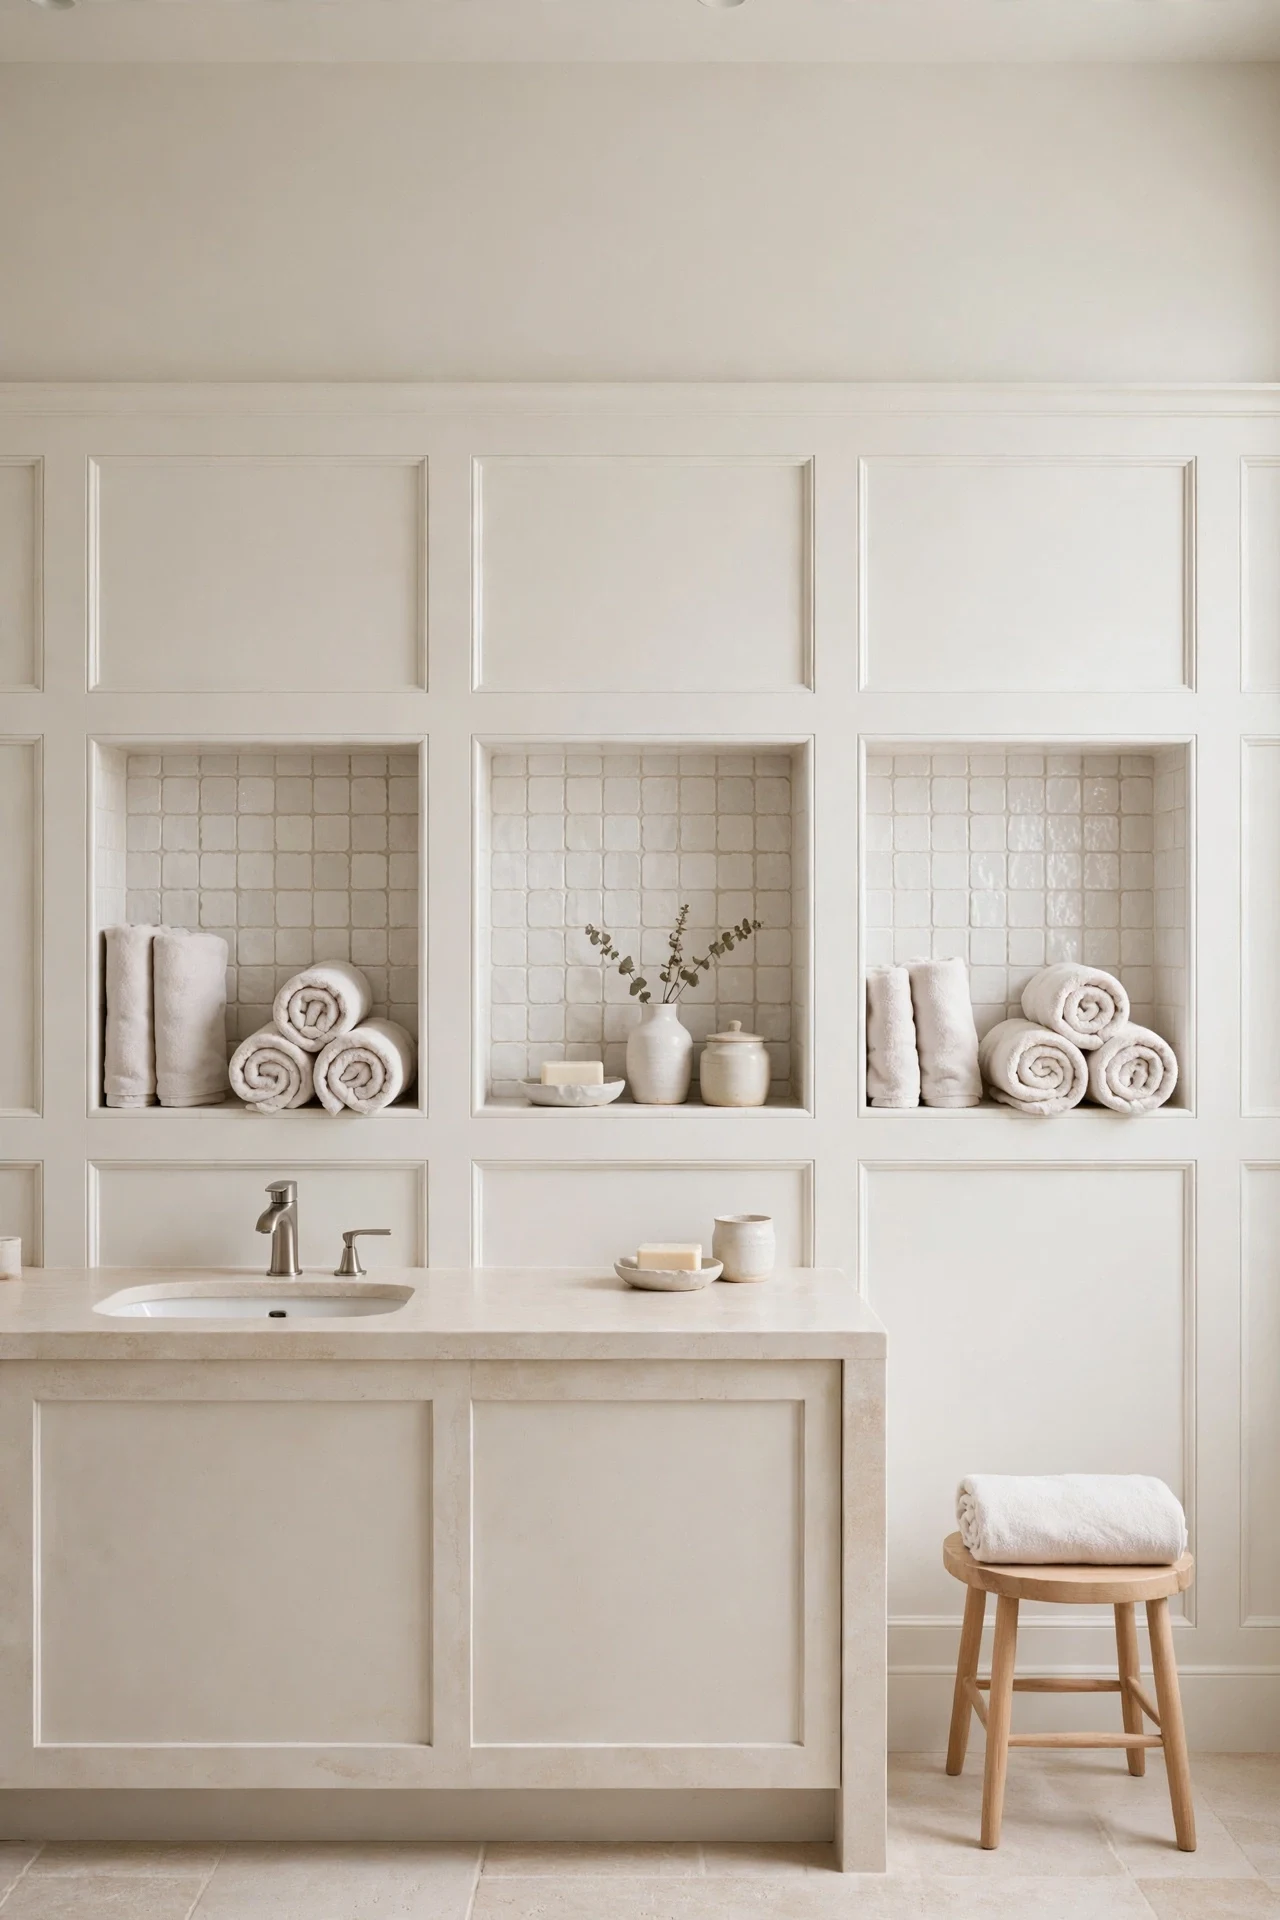
The bathroom feels ordered and serene, every towel and jar resting in its own framed niche.
Rhythm with interruption is the principle: one niche every third panel breaks the grid just enough to feel designed. The niches move storage into the wall. Handmade white tile inside each niche catches light differently from the painted panels.
Frame niches between studs to avoid structural work, and slope the niche sill 1/8 inch so water runs out. Tile before painting the panels — grout haze ruins paint. Keep niches 14 inches wide to fit stud bays.
💡 Quick Win: Even one niche transforms towel storage — start with a single bay.
31. Charcoal Panels Grounding a White Living Room

The living room feels balanced and crisp, the charcoal base anchoring all that white like a drawn horizon.
A dark datum line is the principle: charcoal panels below the rail give white walls a floor of their own, so pale furniture stops floating. Benjamin Moore 'Wrought Iron' 2124-10 is soft enough to live with large. The white cap rail draws the boundary line that makes the contrast look tailored.
Paint the baseboards the same charcoal — a white baseboard under dark panels chops the line. Carry charcoal onto the backs of open bookcases for depth. Keep textiles cream, not bright white, against the dark base.
32. Pine Plank Panels in a Rustic Mudroom

The mudroom feels hardworking and warm, pine panels taking boot scuffs and dog shakes in stride.
Sacrificial surface is the principle: knotty pine panels invite dents, and every mark reads as patina rather than damage. A clear matte finish lets the knots and grain carry the character. Black iron hooks repeat at panel centers, turning storage into part of the grid.
Pre-finish pine boards on all six sides — mudrooms drip, and unfinished backs cup. Use exterior-grade matte polyurethane on the lowest 12 inches. Add one spare board in the garage for repairs.
💡 Quick Win: A galvanized boot tray under the hooks catches meltwater for under $25.
33. Flat Panel Wainscoting Framing a Daybed in a Bay Window
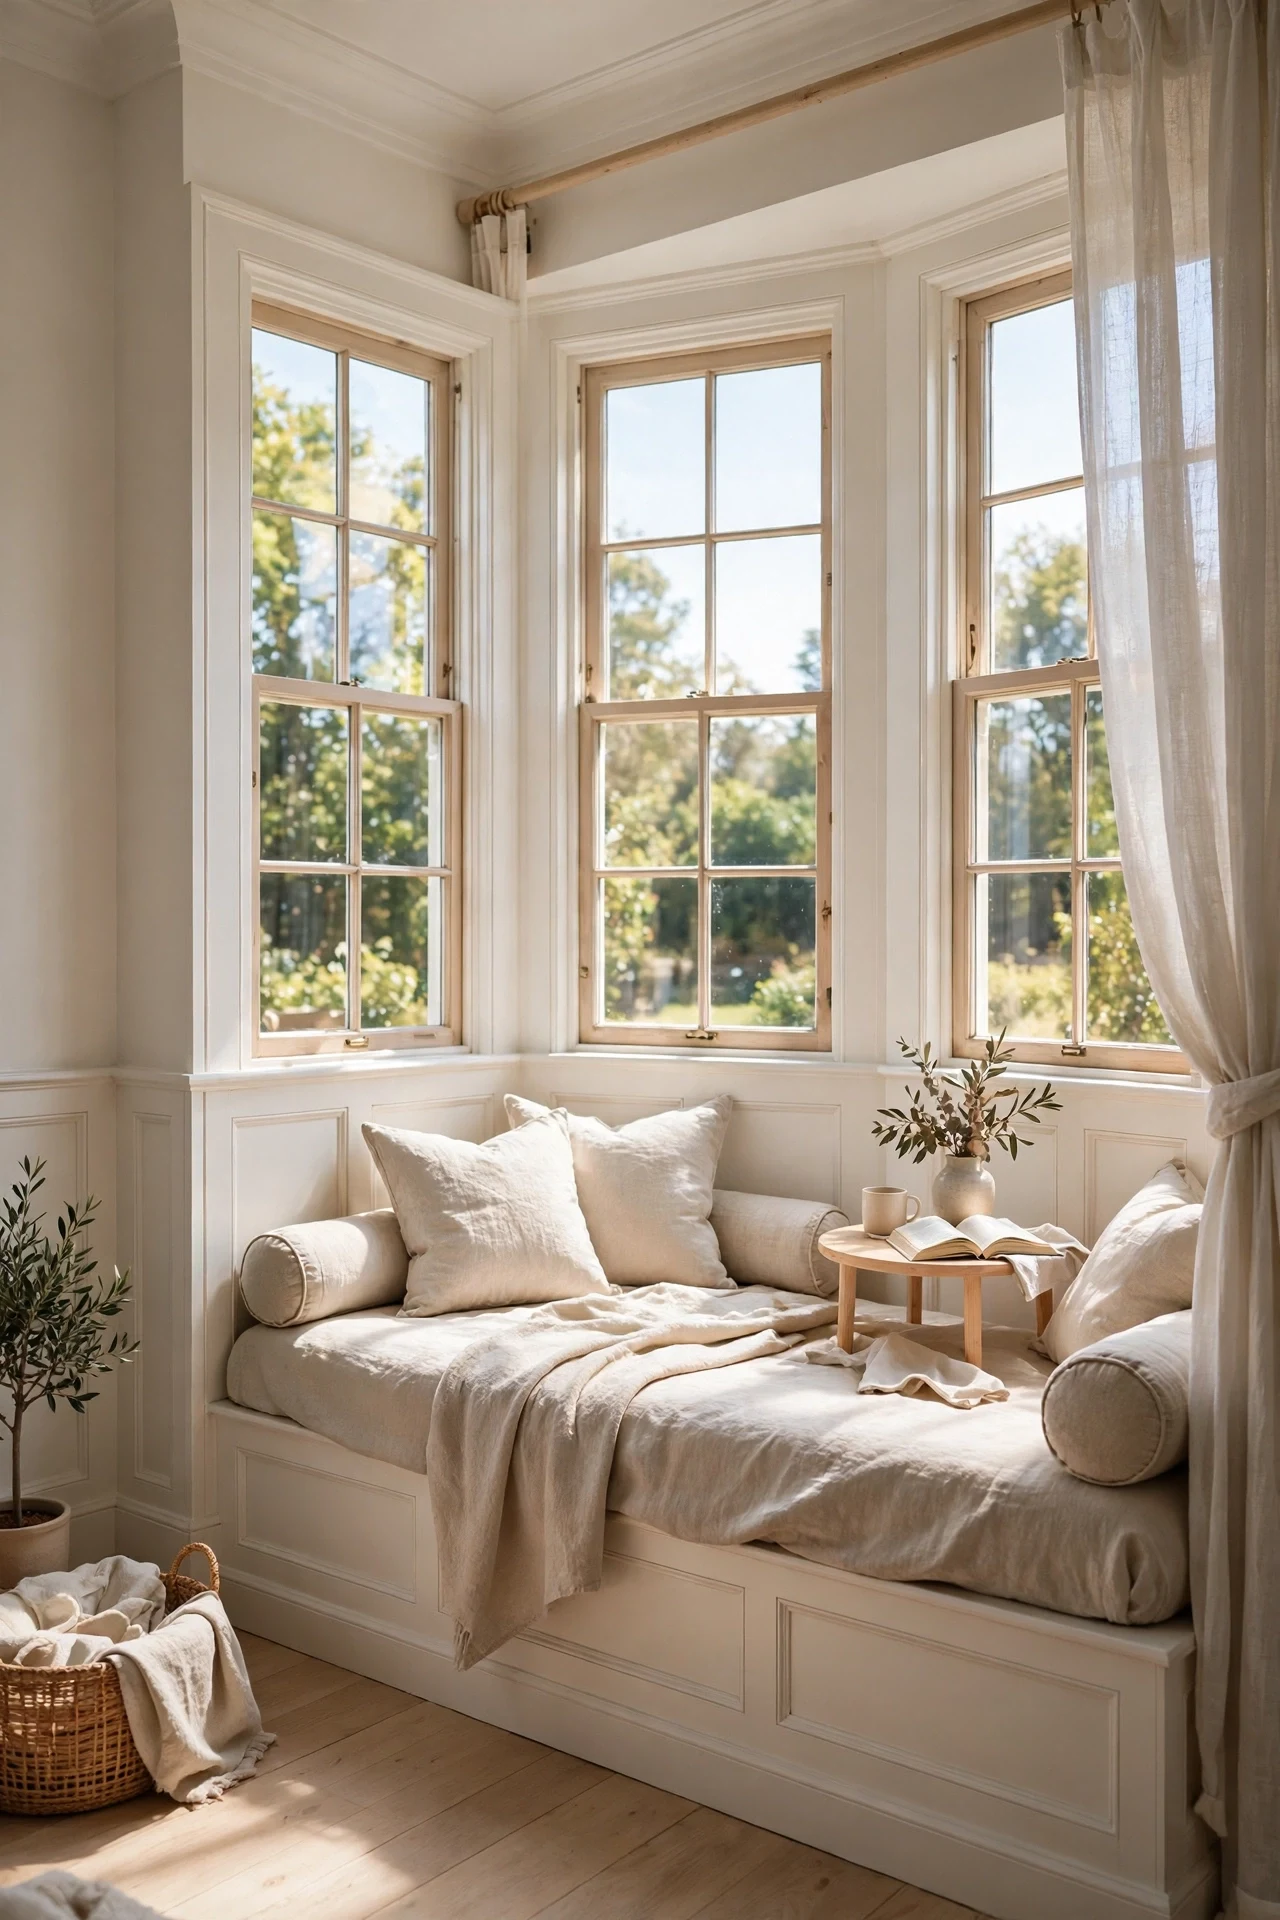
The bay feels sheltered and sunlit, the daybed nested inside its paneled curve of wall.
Wrapping the bay in panels is the principle: mitered flat panels unify the angles, so the daybed reads as built into architecture rather than parked by windows. Matching panel height to the daybed back hides the seam. Natural linen keeps the light soft.
Template the bay angles with a digital angle finder — old bays are rarely true 45s. Build the center panel first and scribe the sides to it. Leave a finger gap behind the daybed for curtain clearance.
💡 Quick Win: Two long bolsters along the panel line make any daybed feel built-in.
34. Flat Panel Wainscoting Ideas With Limewash Texture in a Dining Room

The dining room feels earthy and quiet, the limewashed panels shifting like plaster as clouds pass.
Surface movement is the principle: limewash gives flat panels the cloudy depth of old plaster, so a simple grid gains centuries of character. Portola-style limewash in a warm gray — the 'Tranquility' family of tones — pairs with dark oak without going cold. The matte finish swallows glare from windows and candles alike.
Prime panels with a dedicated limewash primer; standard primer makes limewash slide and patch. Apply with a large block brush in random X strokes, working wet edge to wet edge. Two thin coats beat one thick one every time.
How to Start Your Flat Panel Wainscoting Transformation
Start with paint. Order a quart of Benjamin Moore 'White Dove' OC-17 in satin and paint one full panel section on your worst-lit wall. That single finished section becomes your reference for color, sheen, and panel scale, and every later decision — rail height, furniture, art — keys off it instead of a guess.
The most common mistake is choosing panel spacing from a photo instead of from the wall itself, which leaves awkward slivers at corners. Sliver panels break the rhythm and announce DIY instantly. Fix it by laying out the whole wall on painter's tape first, adjusting spacing until every panel lands between 18 and 30 inches wide.
Three items under $50 create instant impact: a 25-foot roll of 3M blue painter's tape for full-scale layout trials ($12), a quart of Benjamin Moore 'White Dove' for your test section ($28), and a digital angle finder for stair and bay work ($19). Add a laser level when budget allows. None of these is glamorous; all of them prevent the expensive errors.
A single accent wall takes one weekend and $150–$300 in MDF, paint, and trim. A full room runs two to three weekends and $600–$1,200 DIY, or $2,500+ hired out. Panel one wall, live with it for a month, then decide how far the grid travels.
Frequently Asked Questions About Flat Panel Wainscoting
What is the difference between flat panel and raised panel wainscoting?
Flat panel wainscoting uses smooth, recessed fields framed by flat rails and stiles, so nothing projects from the wall. Raised panel wainscoting has beveled panels that sit proud of the frame, a more traditional, furniture-like look. Flat panel suits Shaker, Craftsman, and modern rooms; raised panel suits Colonial and formal traditional spaces. Flat panel is also far easier to build with basic tools.
What colors work best for flat panel wainscoting ideas?
Warm whites like Benjamin Moore 'White Dove' OC-17 are the most forgiving starting point. Sage greens such as Sherwin-Williams 'Evergreen Fog' SW 9130 suit bedrooms, while inky navy and charcoal ground living rooms and libraries. The rule is sheen contrast: satin on the panels, eggshell on the wall above. Dark colors need eggshell or matte finishes to hide roller marks.
How much does flat panel wainscoting cost?
DIY materials run roughly $3–$6 per linear foot using MDF and paint, so a 12-foot wall costs $150–$300 all-in. Professional installation typically runs $25–$45 per linear foot depending on region and complexity. Real wood veneer panels push materials to $10–$18 per linear foot. Staircase runs cost more because every angled panel is a custom cut.
Can I mix flat panel wainscoting with other styles?
Yes — flat panel is one of the easiest millwork styles to mix because its geometry is neutral. It pairs with shiplap on ceilings, board and batten in secondary rooms, and traditional crown molding above. Keep one element constant, usually paint color or rail height, so the mix reads intentional. Avoid placing two different wainscot styles on the same wall.
What lighting works best with flat panel wainscoting?
Grazing light shows flat panels at their best, so sconces or picture lights mounted just above the chair rail are ideal. Warm 2700K bulbs keep painted panels from reading blue or clinical. In hallways, one sconce per panel bay creates the rhythm the style is known for. Avoid harsh overhead cans aimed straight down — they flatten the recesses into invisibility.
Ready to Create Your Dream Flat Panel Wainscoting?
From inky navy libraries to limewashed dining rooms, cane-webbed bathrooms to steel loft entries, these flat panel wainscoting ideas covered color, material, light, furniture, and clever small-space layouts. Starting with a single wall — or even a single painted panel section — is not a compromise; it is exactly how good rooms get built. Today, tape one panel layout onto your emptiest wall with blue painter's tape and live with the outline until morning. When you step back and see bare drywall turned into architecture by nothing but proportion and paint, the room starts to feel calmer, more finished, and unmistakably yours. Save the flat panel wainscoting ideas that made you pause — especially the ones with the shadow lines and recessed fields you can already picture on your own walls — and pin them where your next free weekend can find them.